Chapter 2- drive system: cvt and transfer case – Cub Cadet 4 x 4 Volunteer User Manual
Page 19
Chapter 2- Drive System: CVT and Transfer Case
15
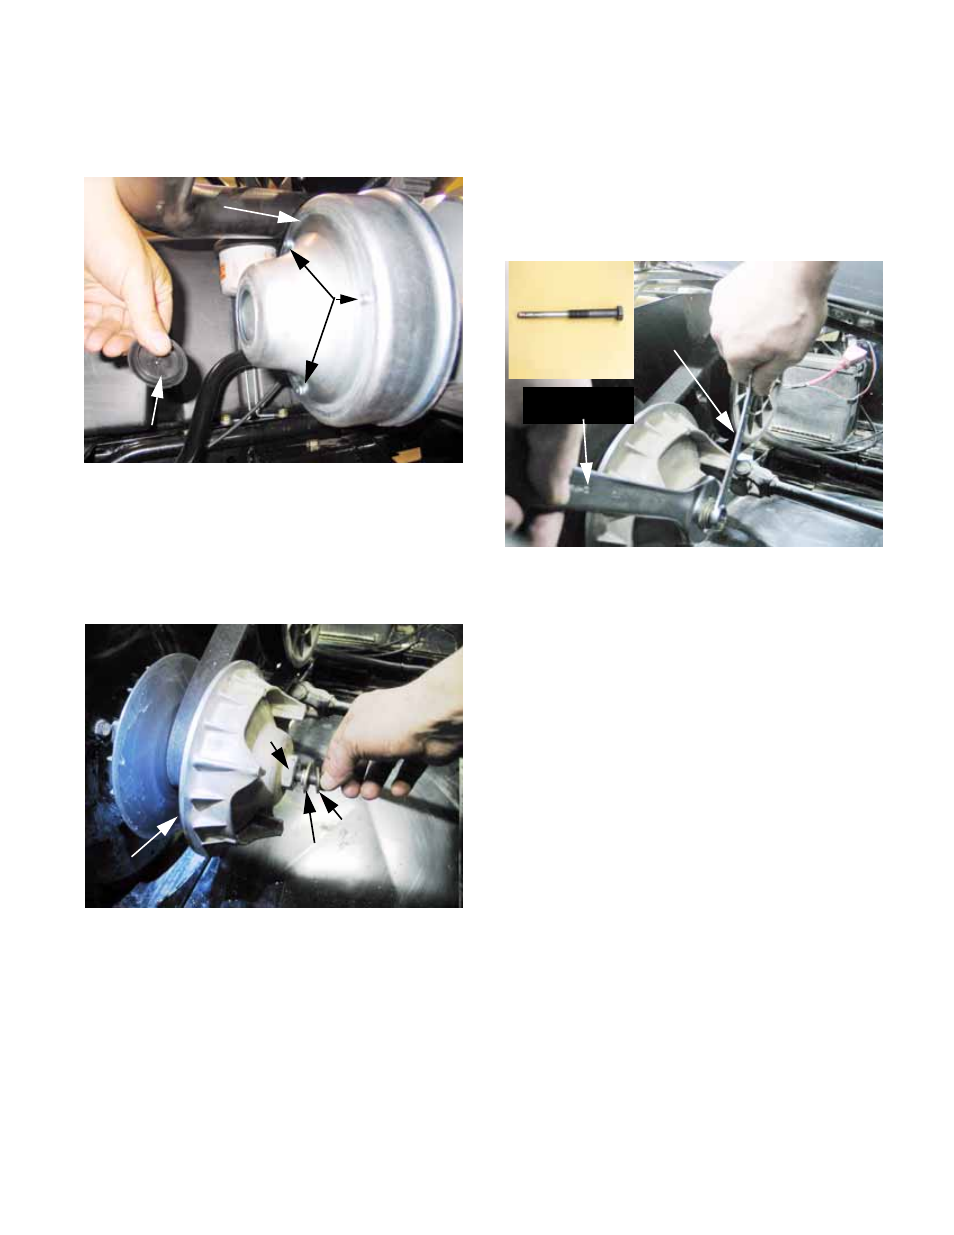
2b. Remove the three screws holding the
cover in place, then remove the cover.
See Figure 2.15.
2c. Hold the large nut with a 30mm wrench
while loosening the crankshaft bolt with a
5/8” wrench.
2d. Withdraw the bolt, washers, and shoulder
spacer. See Figure 2.16.
Figure 2.15
Screws
Driving element cover
Plastic cap
Figure 2.16
Driving
element
Shoulder washer
Flat washer(s)
Nut
3.
Install the clutch removal tool (M14 - 2.O) by
threading it into the clutch, pressing against the
crankshaft.
3a. Hold the pulley with a 30mm wrench, and
turn the tool using a 22mm wrench. This
will force the driving element off of the
crankshaft. See Figure 2.17.
CAUTION: There is a tapered fit between the
driving element and the crankshaft. Applying
force to the perimeter of the driving element will
break it.
3b. If the belt was not previously removed, it
can be taken-off as the driving element is
removed.
4.
Removal of the driven element
4a. Remove the belt.
NOTE: The driving element fits on a tapered
shaft. It can be removed with the belt in-place
because the tapered shaft provides freedom of
movement as soon as the driving element
comes loose.
The driven element fits on a splined shaft. As the
driven element is drawn off the shaft, the belt will
tighten, making removal difficult even with the
sheaves spread. The belt should be removed
before taking-off the driven element.
Figure 2.17
Inset:
clutch tool
One wrench to
hold the clutch
One wren
ch
to turn the
tool