Component replacement, Chapter 5 - rear suspension – Cub Cadet 4 x 4 Volunteer User Manual
Page 168
Chapter 5 - Rear Suspension
164
COMPONENT REPLACEMENT
Spring and Damper Unit
Refer to the INSPECTION section of this chapter
for information on when to replace spring and
damper units.
1.
Lift and safely support the vehicle as described
in the INTRODUCTION section of this manual.
The vehicle should be supported by the frame.
2.
Remove the rear wheel using a 3/4” wrench.
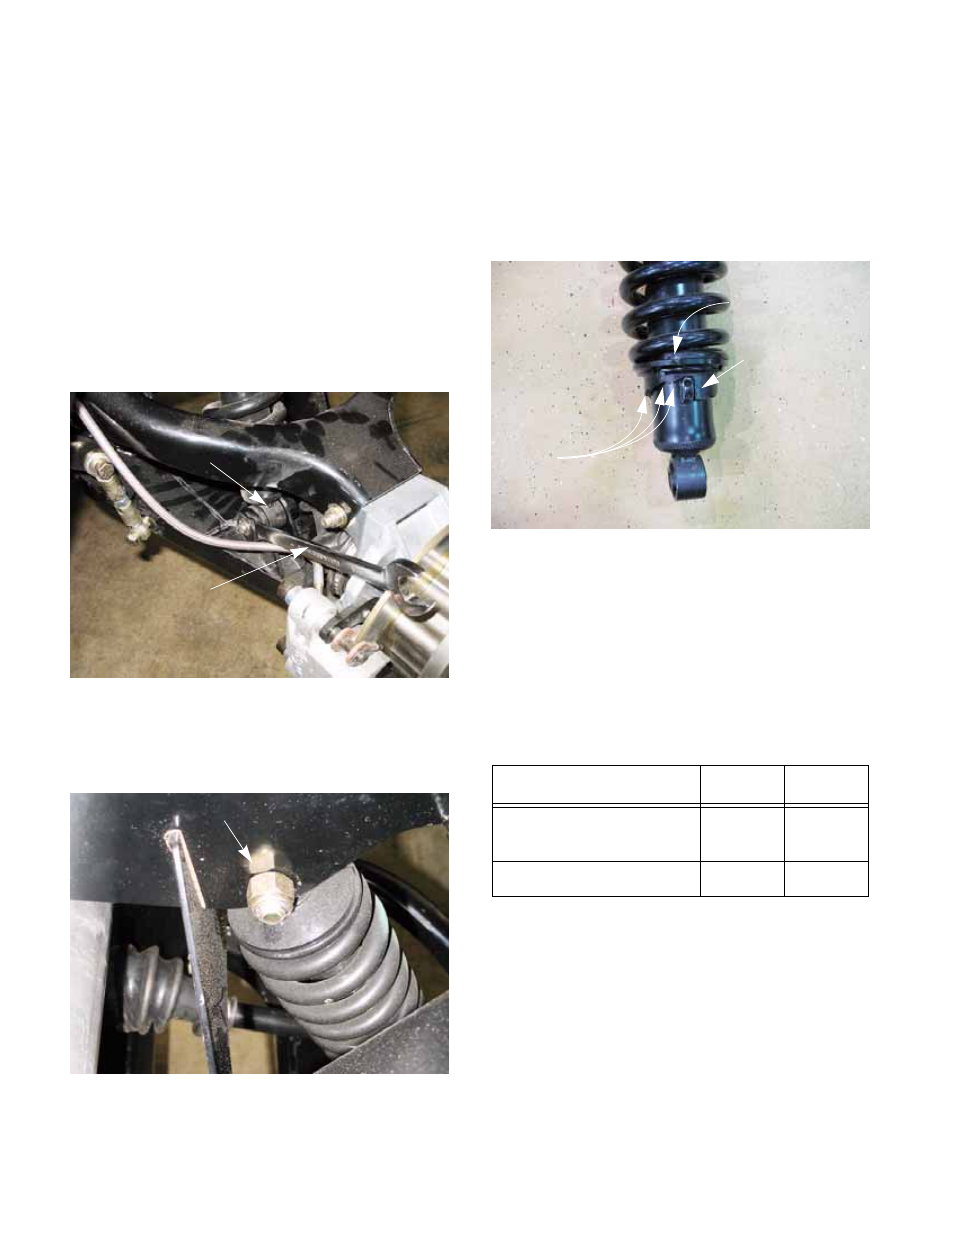
3.
Disconnect the bottom of the spring and damper
unit from the lower control arm using a pair of 3/
4” wrenches. See Figure 5.11.
4.
Disconnect the top of the spring and damper unit
from the frame using a pair of 3/4” wrenches.
See Figure 5.12.
5.
Install the replacement spring and damper unit.
Tighten the nuts to a torque of 42-64 ft-lbs (60-
88 N-m).
6.
If the spring and damper that was removed was
adjusted to meet the operating conditions of the
vehicle, adjust the new one to the same spring
rate. See Figure 5.13.
7.
Install the rear wheel, tightening the lug nuts to a
torque of 75 ft-lbs. (102 Nm).
8.
Repeat the process on the second front wheel, if
necessary.
9.
Test the operation of the new spring and damper
units in a safe area before returning the vehicle
to service.
Figure 5.11
Spring and damper
9/16” wrench
Figure 5.12
Remove this nut and bolt
Item
ft-lbs
N-m
Spring and damper
unit mounting bolts
42-64
60-88
Lug nuts
65-75
88-102
Figure 5.13
Notch for spanner
Steps in
spring perch
Welded seat
for steps