Lcl filter fan assembly removal and installation, E lcl filter fan assembly removal and installation – Rockwell Automation 20Y PowerFlex 700H, 700S, and 700AFE Drive Fan Systems, Frames 9...14 User Manual
Page 252
252
Rockwell Automation Publication PFLEX-IN029B-EN-P - August 2014
Chapter 8
PowerFlex 700AFE Drive - Frame 13 Procedures
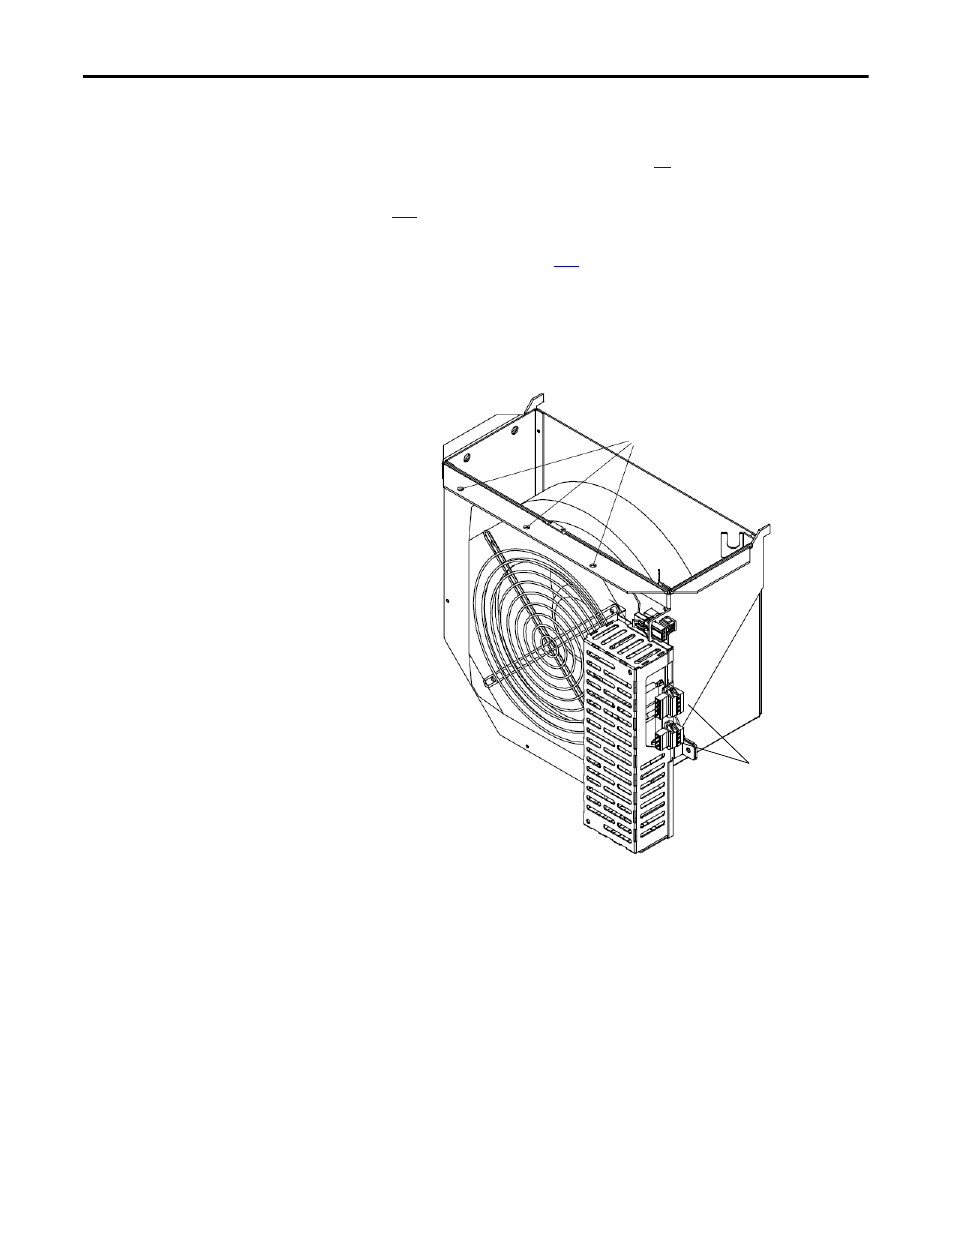
LCL Filter Fan Assembly Removal and Installation
1.
Review the General Precautions on page
2.
Remove power from the AFE. See Remove Power from the AFE on page
3.
Remove the LCL filter protective covers. See Removing the LCL Filter
Protective Cover in page
4.
Disconnect terminal blocks X51 and X53.
5.
Remove the three M4 x 8 mm hexalobular screws that secure the fan
housing to the chassis. Note: Support the front of the fan housing as you
remove the screws.
6.
Lower the front of the fan assembly, slide it forward to remove the
alignment tabs on the sheet metal housing from the slots on the back wall
and pull the fan assembly out of the chassis.
7.
Install the LCL filter fan assembly in reverse order of removal. Be sure that
the alignment tabs are seated in the slots on the back wall as you slide the
fan assembly back into place.
5
4