SkyTrak 8042 Service Manual User Manual
Page 96
3.35
Model 8042, 10042, 10054 Legacy
Rev. 03/04
Boom
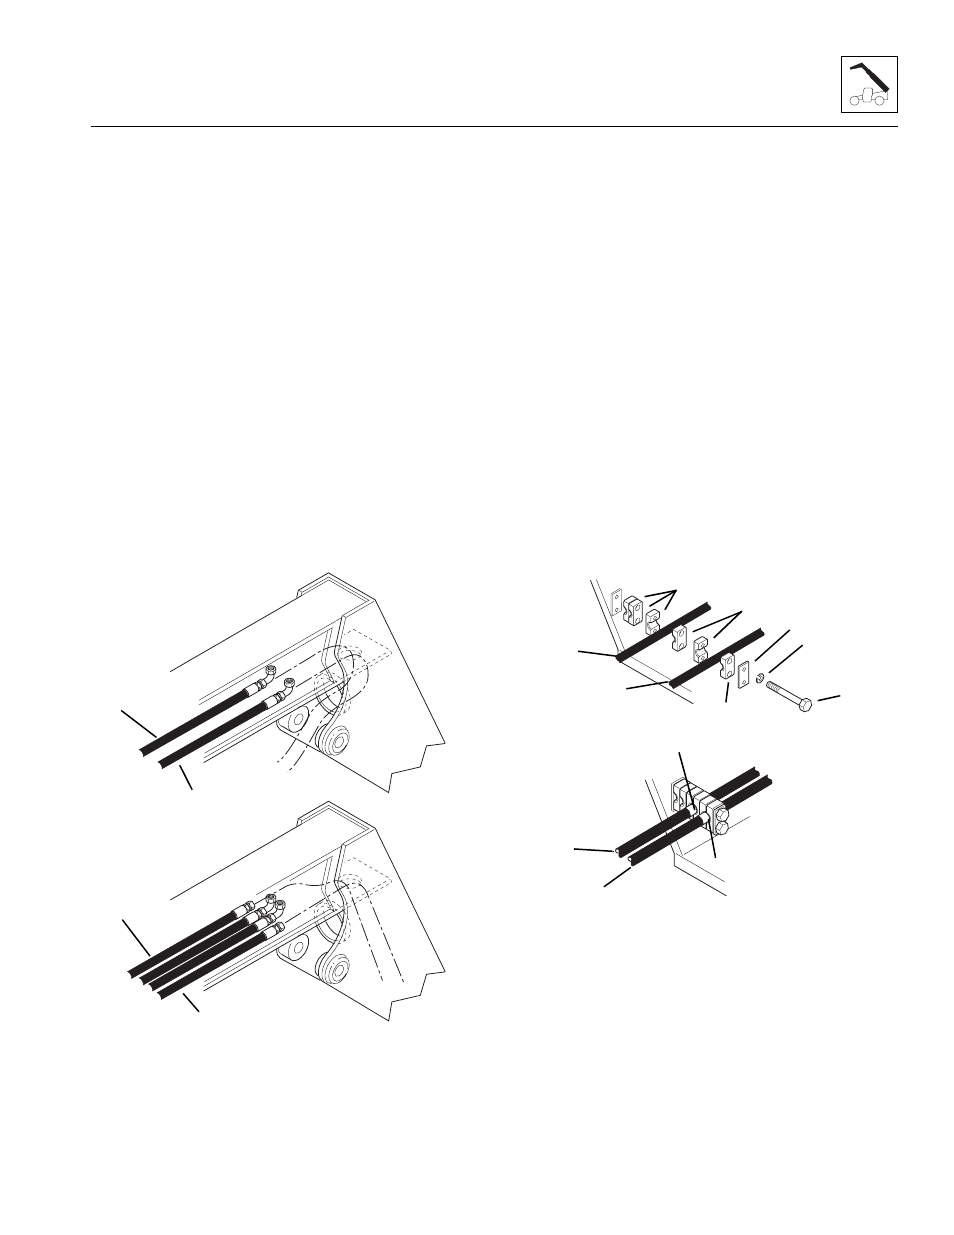
3. With auxiliary hydraulics: Slide the elbow ends of
the two Attachment Tilt hoses (10 and 11) down the
inner boom and out to the gooseneck. Keep the
hoses next to each other as they are being pushed
down the inner boom.
At the opening in the gooseneck, pull both hoses
out. Be careful not to cross the hoses as you pull
them out. Label the left side hose (10 ) as “Retract”
and the right side hose (11) as “Extend.” Label the
hoses the same on the male end of each hose.
4. Slide the female end of the two auxiliary hydraulics
hoses (12 and 13) down the inner boom and out the
gooseneck. Keep the auxiliary hoses to the left and
right sides of the Attachment Tilt hoses (10 and 11).
At the opening in the gooseneck, pull both hoses out
and down toward the bulkhead plate for the couplers.
Keep the left side hose (12) on the left side and label
that hose as “Female Coupler.” Label both ends of
the hose. Keep the right side hose (13) on the right
side and label that hose as “Male Nipple.” Label both
ends of the hose.
5. Without auxiliary hydraulics: Keep the two hoses
on the left and right sides as they come out of the
rear of the inner boom. Place a lockwasher (14),
saved, onto each capscrew (15), saved, and insert
the capscrews through the clamp cover plate (16),
saved.
6. Place a hose clamp half (17), saved, onto the
capscrews. Place the right Attachment Tilt hose (18)
and a hose clamp half (17) onto the capscrews.
7. Place another hose clamp half (17), saved, the left
Attachment Tilt hose (19) and a hose clamp half (17)
onto the capscrews.
8. Place two more hose clamp halves (17) onto the
capscrews positioned as shown. Assemble the
capscrews to the left side of the inner boom. Tighten
the capscrews only enough to hold the hoses in
place.
9. Position the Attachment Tilt hoses (18 and 19) with
the edge of the tape (20) at the hose clamps. Hold
the Attachment Tilt hoses in this position and tighten
the two capscrews securely to hold the hoses.
MH1610
10
11
12
13
MH1620
14
15
16
17
18
19
20