SkyTrak 8042 Service Manual User Manual
Page 220
3.159
Model 8042, 10042, 10054 Legacy
Rev. 03/04
Boom
Note: ALWAYS replace elastic locknuts with new elastic
locknuts to help ensure proper fastening.
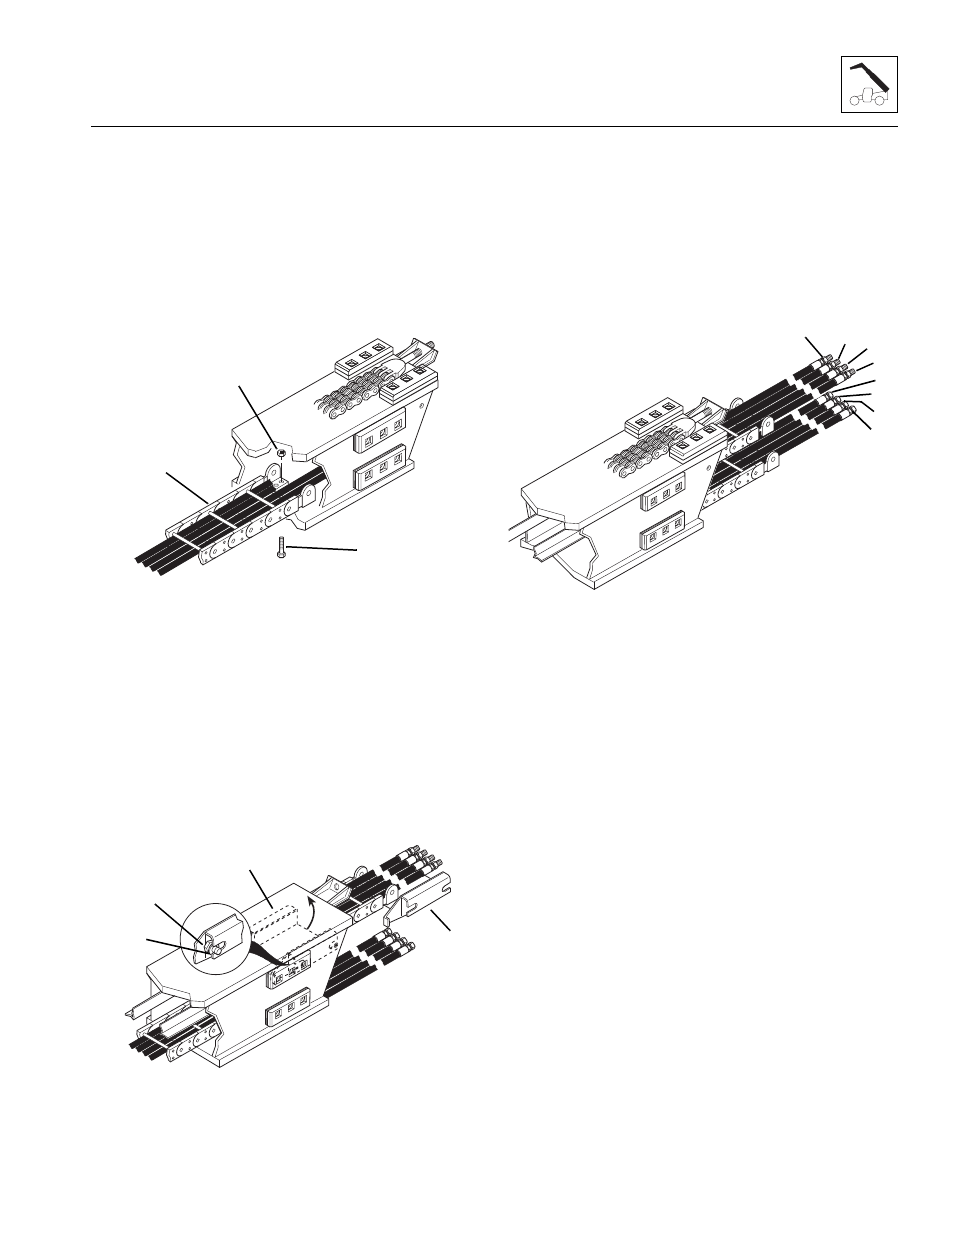
7. Line up the lower mounting holes in the hose carrier
assembly (12) with the holes in the bottom of the
inner boom. Insert the four capscrews (13), saved,
through the bottom boom plate and up through the
hose carrier mounts. Secure the capscrews in place
with new elastic locknuts (14). Tighten all four
locknuts securely.
8. Lift up the upper part of the hose carrier assembly
and place the hose carrier guide (15) under the hose
carrier with the angled guides toward the front. Slide
the hose guide into the inner boom and place the
front notches onto the rear wear pad mounting
capscrew (16). Be sure the notch in the side of the
hose guide is under the flat washer (17) on each
side of the boom.
9. Rotate the back of the hose guide up toward the top
of the inner boom as far as it will go. Tighten the rear
wear pad mounting capscrews (16) only enough to
hold the hose guide in this position.
10. Label each end of the hoses of the new hose carrier
assembly for proper identification during reassembly:
Right side outer hose (18) goes to “Auxiliary Female
Coupler” and the right side inner hose (19) goes to
“Attachment Tilt Extend.”
Left side outer hose (20) goes to “Auxiliary Male
Nipple” and the left side inner hose (21) goes to
“Attachment Tilt Retract.”
11. With the hose guide (1) tilted up in the back, insert
the female ends of the two left side hoses (2) (from
the hose carrier) one at a time over the top of the
angled guide (3) on the front side of the hose guide.
Push the hoses into the hose channel (4) on the left
side of the inner boom and down to the front of the
inner boom. Repeat this procedure to insert the two
right side hoses (5) into the hose channel on the
right side of the inner boom.
MH2450
12
13
14
MH2460
15
16
17
MH2750
18
19
20
21