7b.8.2 fuel/hydraulic oil tank, 7b.8.2, Fuel/hydraulic oil tank b.24 – SkyTrak 8042 Service Manual User Manual
Page 391: Warning
Engine: Cummins QSB4.5T
7B.24
Model 8042, 10042, 10054 Legacy
Rev. 10/03
7B.8.2
Fuel/Hydraulic Oil Tank
Note: The fuel/hydraulic oil tank is part of a one piece unit
divided into a two compartment (tank) unit. It is located on
the right side of the vehicle, across from the operator’s
cab. If it is determined that either the fuel or hydraulic oil tank
must be removed, both the fuel and hydraulic oil must be
drained before tank removal. Always dispose of hydraulic
oil or fuel properly.
a. Fuel/Hydraulic Oil Tank Removal
1. Unlock, unlatch and open the side and rear engine
doors. Allow the engine to cool before proceeding.
Draining the cooling system while the engine is hot
can cause cracks in the engine block.
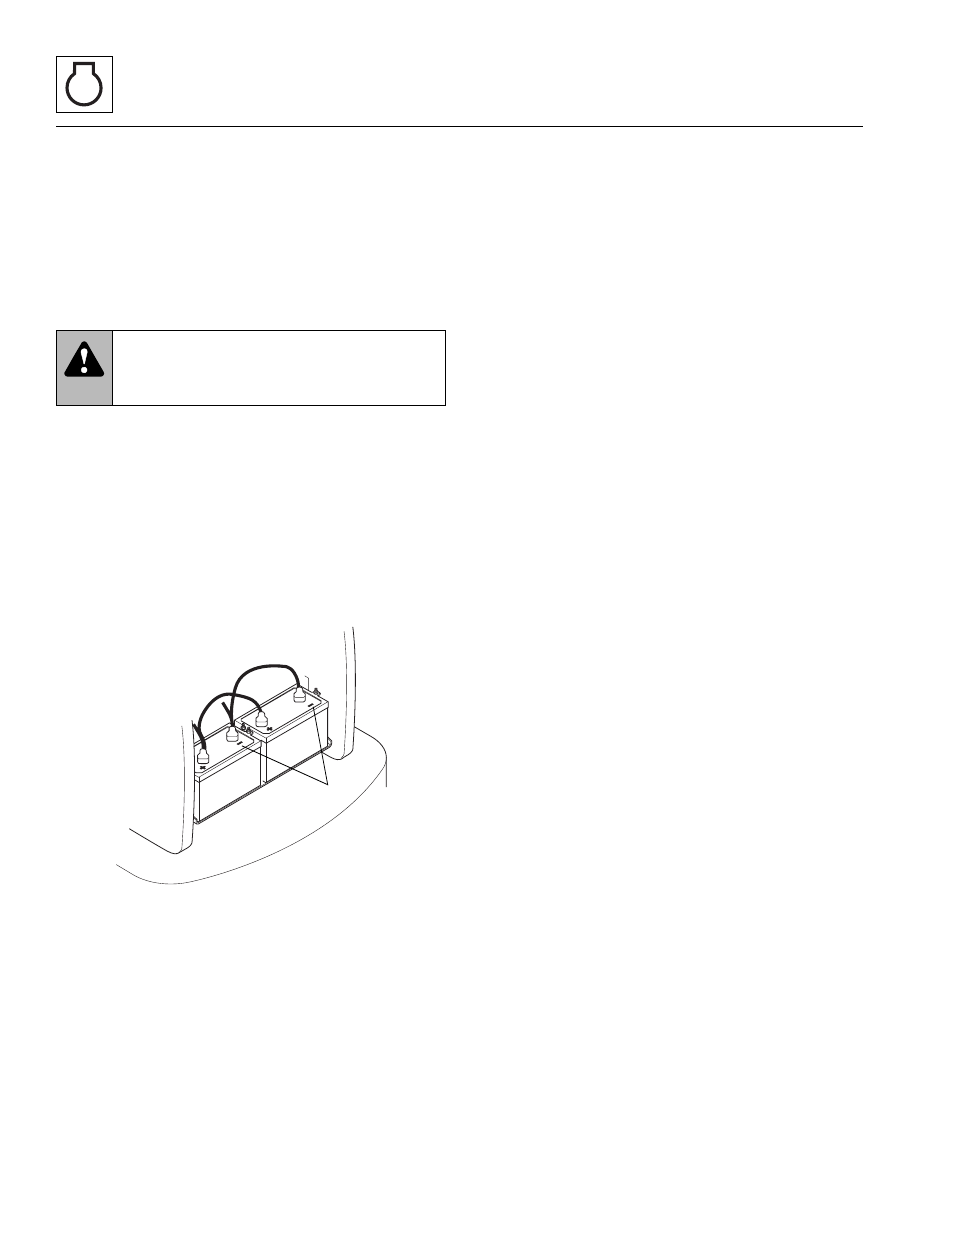
2. Disconnect the negative (-) battery cables (1) from the
batteries.
3. Remove the fuel/hydraulic oil tank top cover from tank.
Refer to Section 4.7, “Access Panels and Covers.”
4. Remove the two frame top covers from above the frame.
Refer to Section 4.7, “Access Panels and Covers.”
Note: If replacing the tank, remove all internal and
external components from the old tank, and retain for
use on the replacement tank.
Note: Have a dry chemical (Class B) fire extinguisher
near the work area.
5. Remove fuel drain plug (2), and drain fuel into an
approved and suitable container. Dispose of fuel
properly.
6. Remove hydraulic oil drain plug (3), and drain
hydraulic oil into an approved and suitable container.
Dispose of oil properly.
7. Disconnect the hydraulic oil temperature sensor
connector (4), from the engine harness connector,
and remove from tank (5).
8. Loosen the clamps (6) and disconnect the fuel
supply hose (7) and return line hose (8) from tank.
9. Remove the fuel line fittings (9) from tank.
10. Loosen clamp (10) and disconnect the lower
hydraulic oil strainer hose (11) from hydraulic fuel
strainer (12). Cap hose.
11. Remove the hydraulic fuel strainer (12) from tank (5).
12. Disconnect and cap the hydraulic return hose (13)
and remove lower tank fitting (14).
13. Remove capscrews securing the hydraulic fluid level
sight-glass (15) from tank.
14. Disconnect upper hydraulic hoses (16 and 17) from
the t-fittng (18) and cap hoses.
15. Remove the t-fittng (18) from tank.
16. Disconnect fuel level sender electrical connectors
(19) from the engine harness.
17. Remove screws (20) securing fuel sender (21) to the
tank. Remove fuel sender from tank.
Note: ALWAYS replace elastic locknuts with new elastic
locknuts to help ensure proper fastening.
18. Remove elastic nuts (22) securing the hydraulic oil
filter (23) to the tank. Remove filter and gasket (24)
from tank.
19. Remove plug (25) from top of tank.
20. Remove elastic nuts (26) securing hydraulic oiler
filler neck components (27) and remove
components.
21. Remove elastic nuts (28) securing fuel filler neck
components (29) and remove components.
22. Position and connect a suitable chain support to tank
lifting point (30) and take up slack in the chain.
23. While supporting the tank, remove hex nuts (31) and
lockwashers (32) securing the tank to vehicle frame.
Pull tank away from the tank carriage bolts (33), and
remove tank. Retain hardware for reuse.
WARNING:
Explosion and fire hazard.
Cap or safely cover the fuel/hydraulic oil tank
fittings before removing tank.
MH4440
1