7b.6.3 drain and flush radiator, Section 7b.6.2, b. “thermostat installation, 7b.6.3 – SkyTrak 8042 Service Manual User Manual
Page 378: Drain and flush radiator b.11, S ( 9 ), Warning
7B.11
Model 8042, 10042, 10054 Legacy
Rev. 10/03
Engine: Cummins QSB4.5T
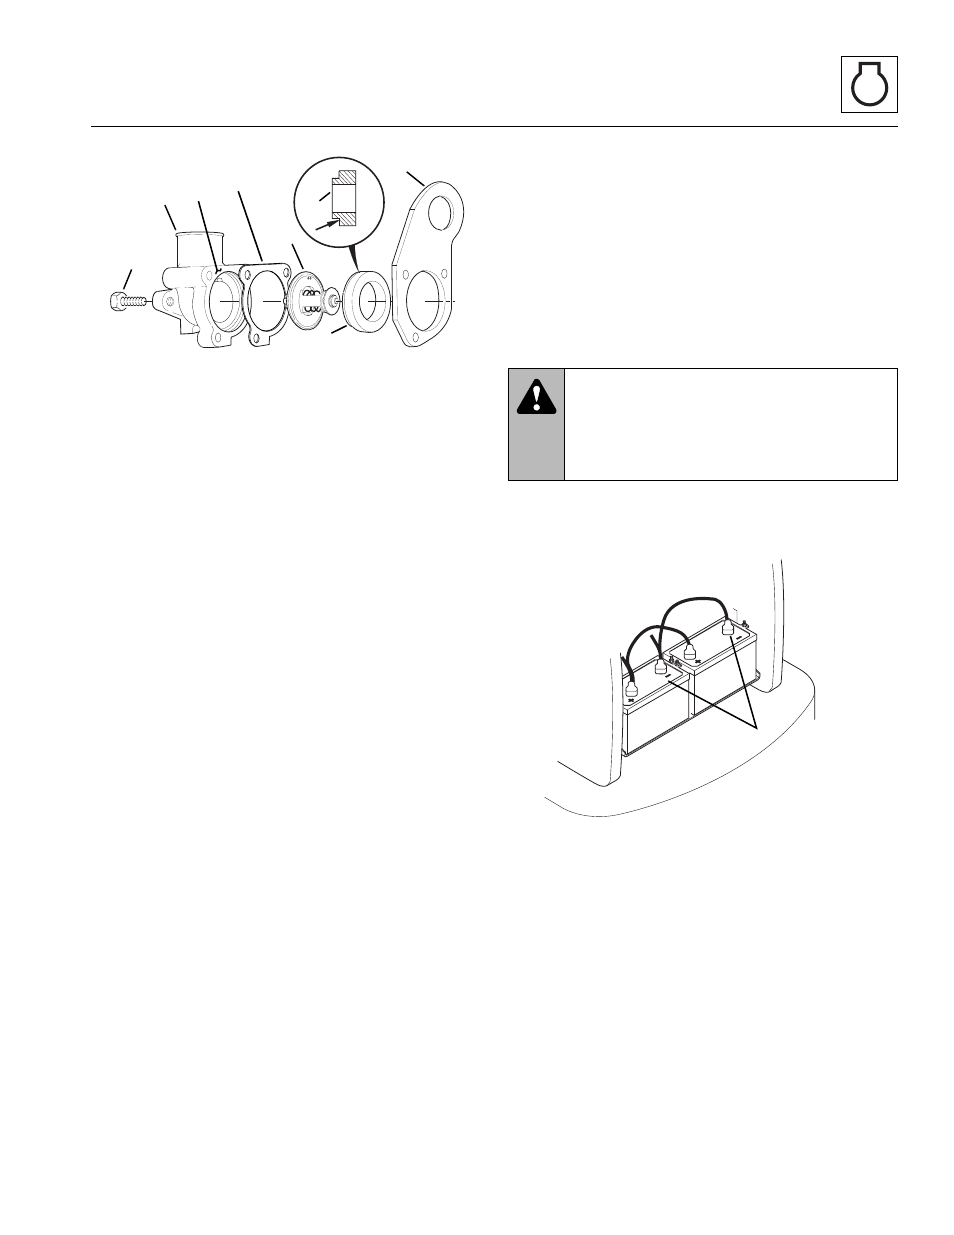
10. Remove the thermostat housing (10), old gasket
(11), thermostat (12), thermostat seal (13) and
engine lift bracket (14). Clean all gasket surfaces
(15). DO NOT let any debris into the thermostat
opening.
IMPORTANT: ALWAYS use the correct thermostat and
install a new gasket. NEVER operate the engine without
a thermostat, or engine damage will result.
b. Thermostat Installation
Note: Ensure that notched edge (arrow) of thermostat
seal (13) is facing thermostat.
1. Install the engine lift bracket (14), thermostat seal
(13), thermostat (12) gasket (11) and thermostat
housing (10). Secure with the capscrews (9)
removed earlier. Torque to 18 lb-ft (24 Nm).
2. Raise the alternator (7), and install the upper
alternator mounting capscrew (8) and alternator
lower capscrew (6). Torque to 32 lb-ft (43 Nm).
3. Insert a 1/2" drive ratchet or breaker bar into the into
the square hole (4) in the automatic belt tensioner
housing and lift the automatic tensioner pulley (3).
With the automatic tensioner pulley lifted out of the
way, install the fan drive belt (5).
4. Connect the negative (-) battery cables (16) to the
batteries.
5. Refer to Section 7B.6.3, “Drain and Flush Radiator.”
7B.6.3
Drain and Flush Radiator
1. Park the vehicle on a firm, level surface. Level the
vehicle, ground the attachment, place the travel
select lever in the (N) NEUTRAL position, place the
neutral lock lever in the (N) NEUTRAL LOCK
position, engage the parking brake switch and shut
the engine OFF.
2. Place an Accident Prevention Tag on both the
ignition key switch and steering wheel, stating that
the vehicle should not be operated. (Refer to Section
1.5, “Accident Prevention Tags.”)
3. Disconnect the battery negative (-) ground cables
(16) at the battery negative (-) terminal.
MS1160
9
10
11
12
13
14
15
WARNING:
DO NOT attempt this
procedure when the engine is hot. Wait for the
engine, muffler, and tailpipes to cool down
before proceeding. Failure to do so could result
in severe burns.
MH4440
16