SkyTrak 8042 Service Manual User Manual
Page 104
3.43
Model 8042, 10042, 10054 Legacy
Rev. 03/04
Boom
35. Assemble the two extend chains to the outer boom
mount if the yoke plates were removed from the
extend chains. If the yoke plates were not replaced,
proceed to Step 38.
Note: ALWAYS replace elastic locknuts with new elastic
locknuts to help ensure proper fastening.
36. Assemble the yoke plates (17) to the mount on the
front of the outer boom. Coat the shoulder bolt (18),
saved, with anti-seize compound and insert the
shoulder bolt through a yoke plate (17), the mount
on the boom and through a second yoke plate (17)
on the bottom. Secure in place with a new elastic
locknut (19). Tighten the locknut securely; but the
yoke plates must pivot freely.
37. Assemble the clevis’ on the two extend chains (20)
between the yoke plates. Align the holes in each
clevis with the holes in the yoke plates. Coat the
capscrews (21), saved, with anti-seize compound
and insert the capscrews through the yoke plates
and the clevis. Secure in place with new elastic
locknuts (22). Tighten the locknuts securely; but the
extend chain clevis’ must pivot freely.
38. Align the holes in the yoke plates (23) with the hole
in the mount on the outer boom. Coat the shoulder
bolt (24), saved, with anti-seize compound and
insert the shoulder bolt through the yoke plates and
the mount on the boom. Secure in place with a new
elastic locknut (25). Tighten the locknut securely; but
the yoke plates must pivot freely.
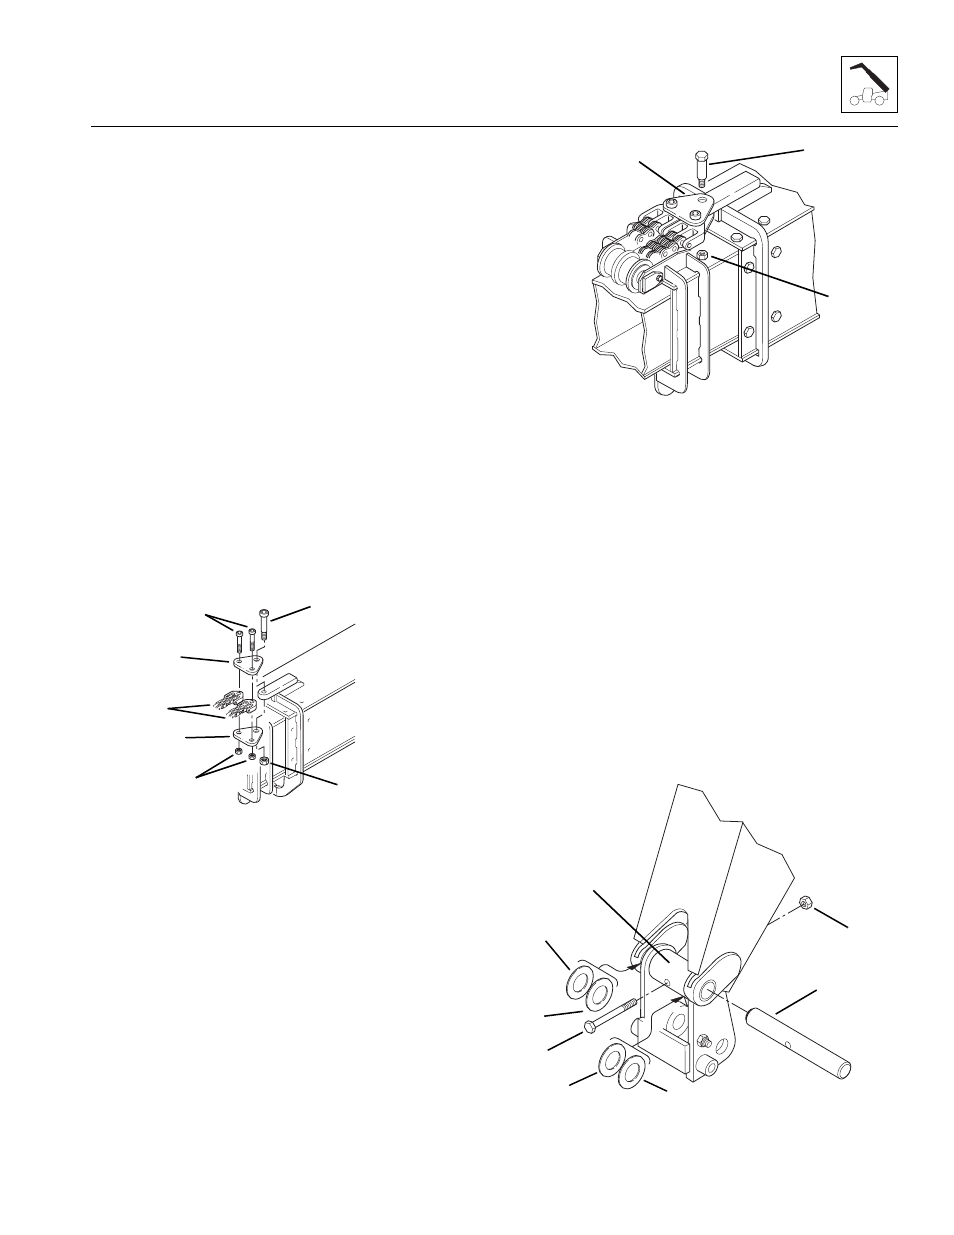
39. Assemble the quick attach to the gooseneck. Align
the quick attach (26) between the mounts on the
gooseneck. Assemble a washer (27), saved, on
each side of the quick attach. Reassemble the
shims (28), saved, between the quick attach and the
gooseneck. DO NOT put all the shims on one side.
The quick attach should be centered in the gooseneck.
Note: ALWAYS replace elastic locknuts with new elastic
locknuts to help ensure proper fastening.
40. Coat the quick attach pivot pin (29) with anti-seize
compound. Insert the quick attach pivot pin through
the gooseneck, washers, shims and quick attach.
Use a tapered punch to align the hole in the pivot pin
with the hole in the quick attach. Insert the
capscrew (30), saved, through the quick attach and
pin. Secure the capscrew in place with a new elastic
locknut (31). Tighten securely.
SH1870
17
18
19
20
21
22
MH1710
23
24
25
MH1720
~
26
27
28
29
30
31