SkyTrak 8042 Service Manual User Manual
Page 519
Hydraulic System
8.104
Model 8042, 10042, 10054 Legacy
Rev. 10/03
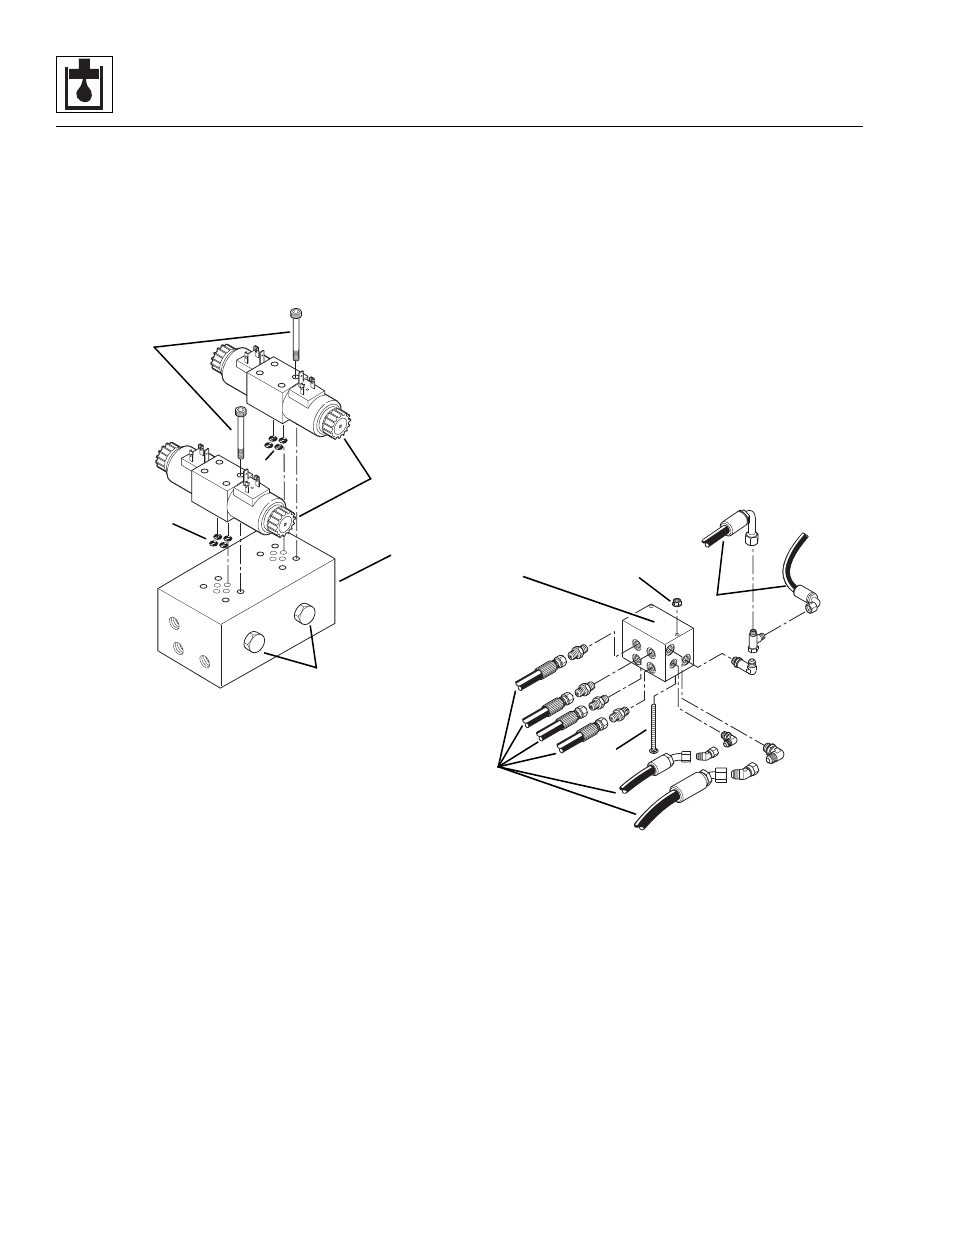
b. Outrigger Valve Disassembly, Cleaning,
Inspection and Assembly
1. Place the outrigger valve assembly on a suitable
work surface.
2. Remove the solenoid valve assemblies (1) from the
outrigger valve (2) by removing the four socket head
capscrews (3). Discard the four o-rings (4).
3. Remove the shuttle cartridges (5) from the outrigger
valve (2).
4. Clean all components with a suitable cleaner before
inspection.
5. Inspect the solenoid cartridges for proper operation.
Check by shifting the spool to ensure that it is
functioning properly. Check that the spring is intact.
Inspect the cartridge interior for contamination.
6. Inspect internal passageways of the outrigger valve
for wear, damage, etc. If inner surfaces of the valve
DO NOT display an ultra-smooth, polished finish, or
components are damaged in any way, replace the
valve or appropriate part. Often, dirty hydraulic fluid
causes failure of internal seals and damage to the
polished surfaces within the secondary function
manifold.
Note: ALWAYS replace seals, o-rings, gaskets, etc.,
with new parts to help ensure proper sealing and
operation. Lubricate seals and o-rings with clean
hydraulic oil.
7. Install the shuttle cartridges (5) into the outrigger
valve (2). Torque to 35 lb-ft (48 Nm).
8. Attach the solenoid assemblies (1) to the outrigger
valve (2) using four new, oiled o-rings (4) and the
four socket head capscrews (3).
c. Outrigger Valve Installation
1. Insert the two carriage bolts (9) through the bottom
of the outrigger valve (7) and loosely attach the hex
flange nuts (8) to the carriage bolts.
2. Position the outrigger valve (7) so that the heads of
the carriage bolts go through the slots in the frame.
Tighten the hex flange nuts.
3. Connect the hydraulic hoses (6), fittings, solenoid
wire terminal leads, etc., to the outrigger valve.
4. Check the routing of all hoses and wiring for sharp
bends or interference with any rotating members,
and install tie wraps and/or protective conduit as
required. Tighten all hose clamps.
P
S
T
MH3880
1
2
3
4
5
MH3760
~
6
7
8
9