SkyTrak 8042 Service Manual User Manual
Page 211
Boom
3.150
Model 8042, 10042, 10054 Legacy
Rev. 03/04
25. Remove the wire, and the threaded eye or capscrew
with flat washer, from the end of the clevis.
Note: ALWAYS replace elastic locknuts with new elastic
locknuts to help ensure proper fastening.
26. Place the flat washer (1), saved, onto the threaded
clevis (2). Assemble a new elastic locknut (3) onto
the threaded clevis. Turn the elastic locknut only 2 or
3 turns onto the clevis to allow assembly of the other
end of the retract chain.
27. At the front of the boom, disconnect the inner boom
extend chain clevis (13) from the anchor plates on
the primary intermediate boom. Remove the elastic
locknut (14) holding the shoulder bolt (15) to the
anchor plates. Pull the extend chain clevis from
between the plates and lay over the front of the inner
boom (16). Save the shoulder bolt and discard the
elastic locknut.
28. Return to the operator’s compartment and start the
engine and slowly retract the boom. To avoid having
the inner boom retract chain becoming entangled,
keep tension on the chain coming out the back of the
boom. Retract the boom as far as possible with the
extend/retract cylinder. Turn the engine OFF.
29. The inner boom will not retract completely and must
be manually pushed in. To avoid having the inner
boom retract chain becoming entangled, keep
tension on the chain coming out the back of the
boom while the inner boom is pushed in.
IMPORTANT: Care should be taken not to push the
inner boom in too far. If the inner boom is pushed in too
far it could damage the hose reel at the back of the
boom.
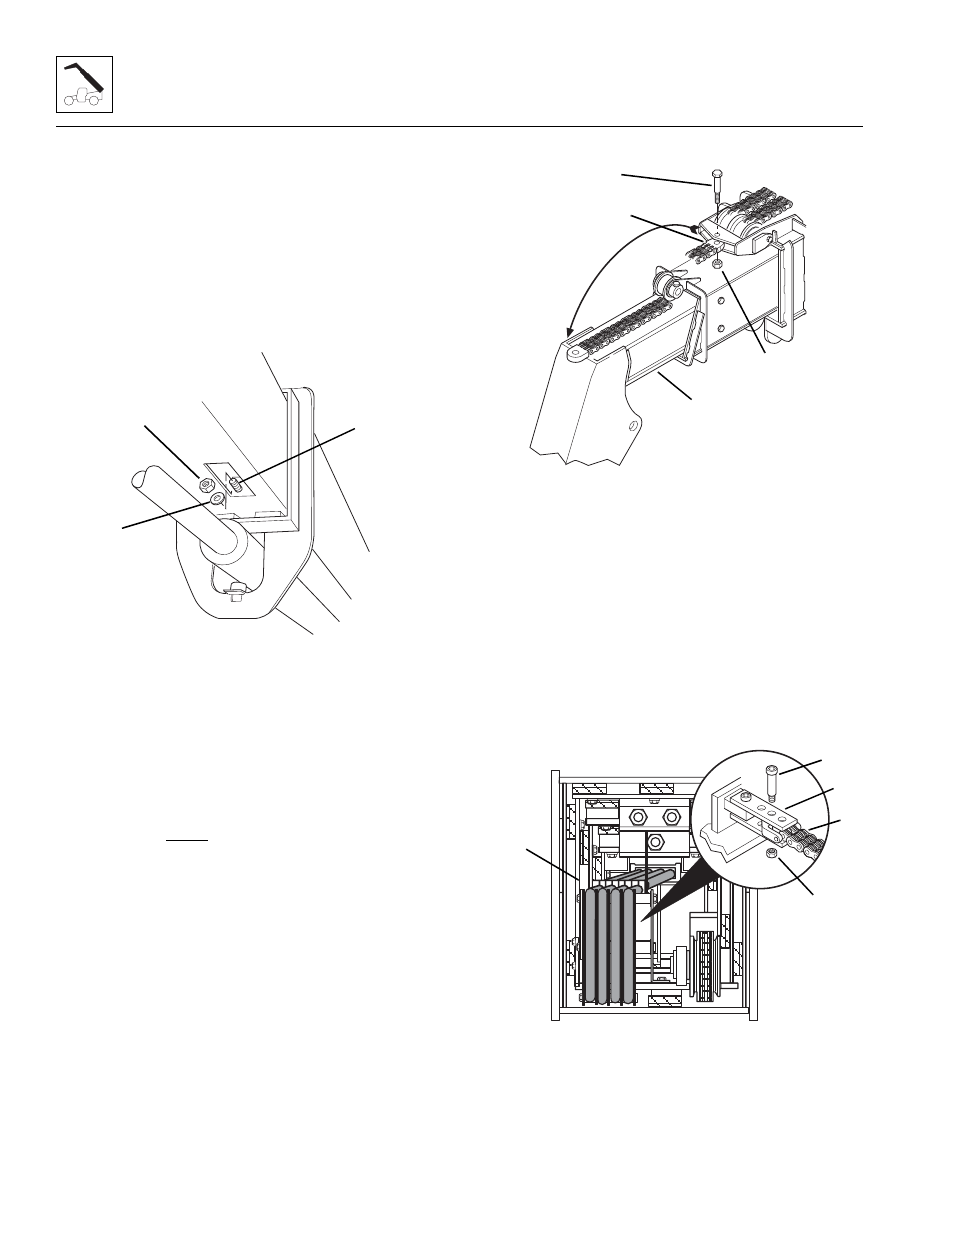
30. Remove the wire from the anchor clevis at the rear of
the boom. At the rear of the boom, place the retract
chain (8) up and over the chain sheave in front of the
hose reel assembly (9). Place the clevis between the
two anchor plates (10). Line up the hole in the clevis
with the anchor plate hole position recorded during
removal.
Note: ALWAYS replace elastic locknuts with new elastic
locknuts to help ensure proper fastening.
31. Insert the shoulder bolt (11), saved, through the
plates and clevis and secure in place with a new
elastic locknut (12). Tighten the locknut securely.
MH2660
3
1
2
MH1790
4
5
6
7
MH2670
8
9
10
11
12