7a.10.2 air cleaner assembly installation, 7a.11 engine replacement, 7a.11.1 engine removal – SkyTrak 8042 Service Manual User Manual
Page 352: 7a.11, Engine replacement a.29, 7a.10.2, Air cleaner assembly installation a.29, Engine replacement a.29 7a.11.1, Engine removal a.29, Warning
7A.29
Model 8042, 10042, 10054 Legacy
Rev. 10/03
Engine: Cummins 4BT3.9 and 4BTA3.9
2. Remove the engine harness clamp (20), and move
harness away from air cleaner assembly (16).
3. Remove the two capscrews (17) and lockwashers
(18) securing the air cleaner mounting bracket (19)
to the engine. Remove the air cleaner assembly.
7A.10.2
Air Cleaner Assembly Installation
Note: Apply Loctite
®
242 threadlock to the capscrew
threads before installation.
1. With the air cleaner assembly attached, install the air
cleaner mounting bracket (19) using capscrews (17)
and lockwashers (18).
2. Place the loosened T-bolt clamps (13 and 14) over
the air intake hose (15), and install hose on the air
cleaner assembly (16) and engine intake. Tighten
T-bolt clamps.
3. Install the engine harness clamp (20) and harness to
the air cleaner mounting bracket (19).
7A.11 ENGINE REPLACEMENT
7A.11.1
Engine Removal
Note: The radiator and oil cooler must be removed from
the vehicle before engine removal. Refer to
7A.6.3, a. “Oil Cooler and Radiator Removal.” Several
additional components must be removed before engine
removal. They will be addressed in the following procedures.
1. Level the vehicle, ground the attachment, place the
travel select lever in NEUTRAL (N), engage the
neutral lock lever, engage the parking brake switch
and shut off the engine.
2. Secure accident prevention tags to the steering
wheel and ignition key switch. Refer to Section 1.5,
“Accident Prevention Tags.”
3. Open the side and rear access doors, and allow the
engine, cooling system and hydraulic system to cool.
4. Remove the engine exhaust. Refer to Section
7A.9.1, “Exhaust System Removal.”
Note: ALWAYS replace elastic locknuts with new elastic
locknuts to help ensure proper fastening.
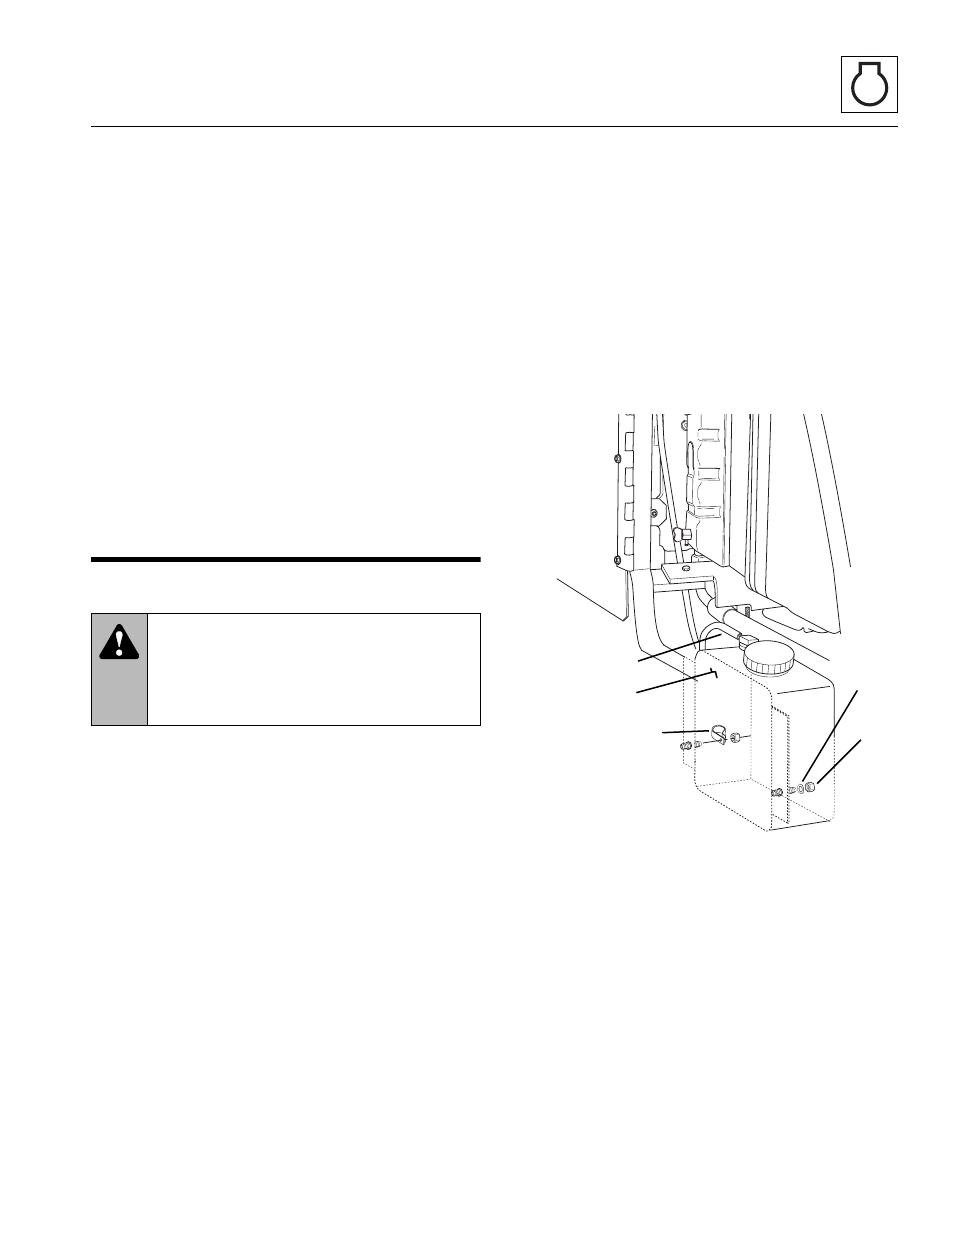
5. Remove the radiator overflow tube (21), overflow
tank (22), hose support (23), flat washer (24) and
elastic locknuts (25).
WARNING:
To avoid severe burns, DO
NOT attempt to remove the engine when the
engine, cooling system and hydraulic system
are hot. Wait until all parts and systems are
cool before proceeding.
MH4200
21
22
23
24
25