SkyTrak 8042 Service Manual User Manual
Page 523
Hydraulic System
8.108
Model 8042, 10042, 10054 Legacy
Rev. 10/03
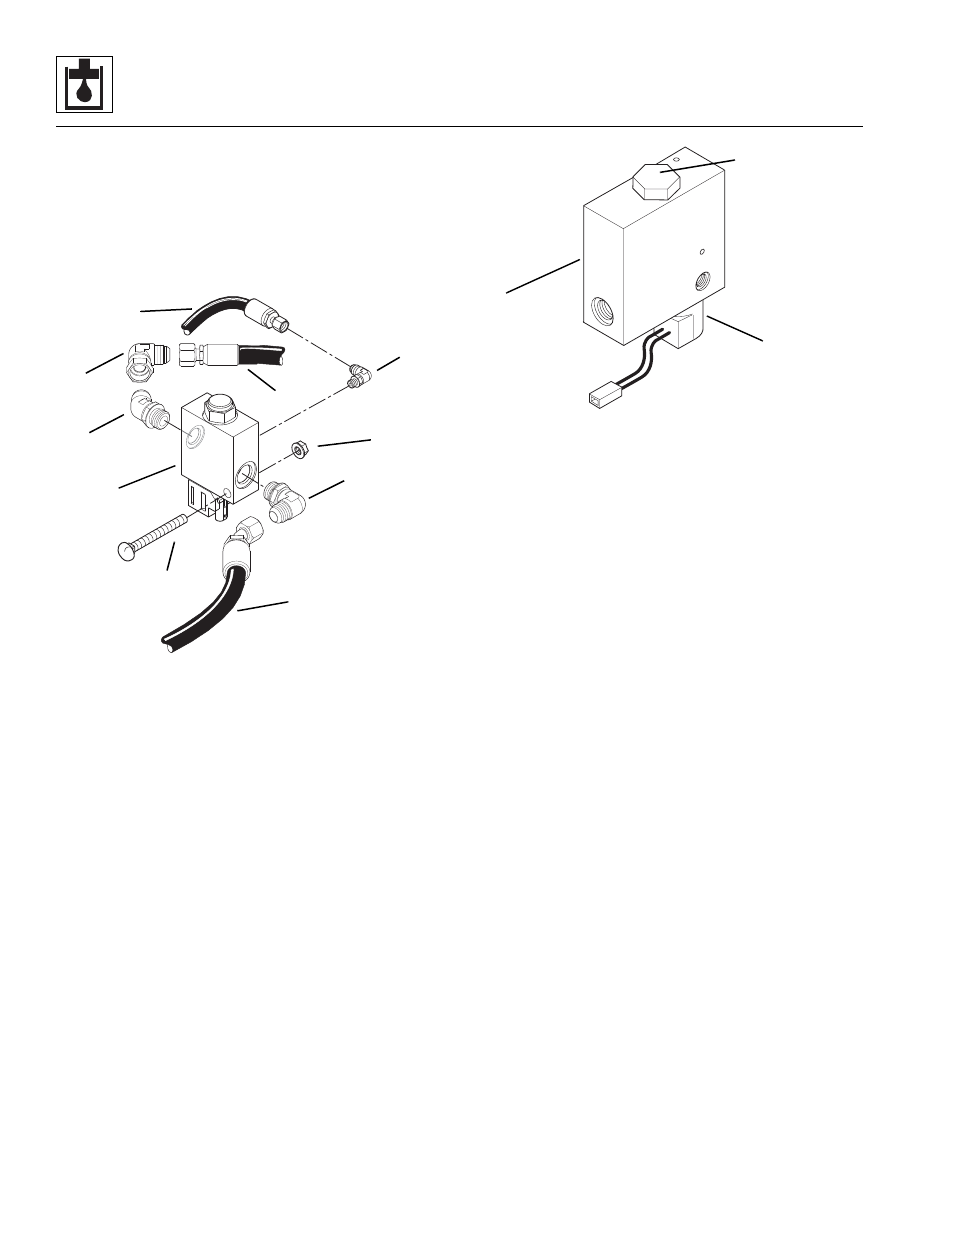
6. Disconnect the wiring connection to the solenoid
valve on the extend lockout valve (1).
7. Disconnect, label and cap all hydraulic fittings and
hoses during removal from the extend lockout valve
(1). Disconnect the tank line (2). Disconnect the
main control line (3) and the extend/retract cylinder
line (4). Remove the fittings (5, 6, 7 and 8).
8. Remove the hex flange nut (9) and the carriage bolt
(10) securing the extend lockout valve (1) to the
frame.
9. Remove the extend lockout valve (1) from the
vehicle. Wipe up any hydraulic fluid spillage.
b. Extend Lockout Valve Disassembly, Cleaning,
Inspection and Reassembly
1. Secure the extend lockout valve (11) in a suitable
bench vise if possible. Remove the solenoid nut, coil
and cartridge (12) from the valve. Remove the
pressure sense valve (13) from the valve.
2. Clean all components with a suitable cleaner before
inspection.
3. Inspect the solenoid cartridge for proper operation.
Check by shifting the spool to ensure that it is
functioning properly. Check that the spring is intact.
Inspect the cartridge interior for contamination.
4. Inspect internal passageways and the extend lockout
valve overall for wear, damage, etc. If inner surfaces
of the component DO NOT display an ultra-smooth,
polished finish, or are damaged in any way, replace
the extend lockout valve. Often, dirty hydraulic fluid
causes failure of internal seals and damage to the
polished surfaces within the valve.
Note: ALWAYS replace seals, o-rings, gaskets, etc.,
with new parts to help ensure proper sealing and
operation. Lubricate seals and o-rings with clean
hydraulic oil.
5. Install the solenoid valve (12).
6. Install the pressure sensing valve (13). Torque to 65
lb-ft (88 Nm).
MH3780
1
2
3
4
5
6
7
8
9
10
V1
T
C1
MH3790
11
12
13