Customize your toolbar, Change the display of the toolbar, Add your own custom toolbar item – Nisus Writer Pro User Manual
Page 411: Ge 391, 391,and
Customizing & Automating Solutions
391
Customize Your Toolbar
In addition to the standard ability to move icons around on the Toolbar, Nisus Writer Pro comes
with a number of icons that you can use to customize your Toolbar. You can also associate almost
any Nisus Writer Pro command with an icon of your choosing and add that to the Toolbar.
Change the Display of the Toolbar
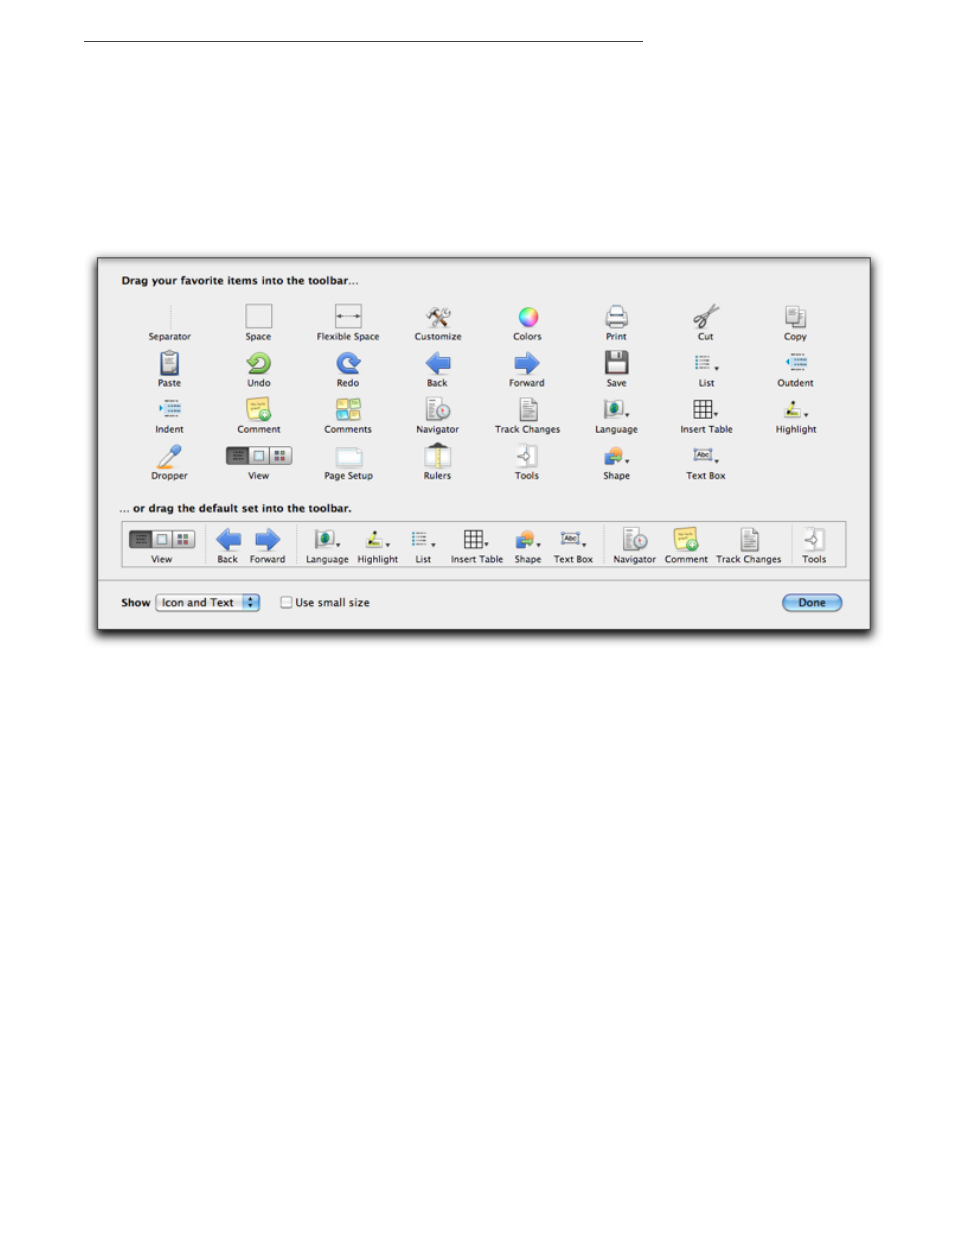
1. Choose the menu View > Toolbar > Customize Toolbar….
2. Choose Icon & Text, Icon Only or Text Only from the Show pop-up menu and/or click Use
Small Icons.
Figure 417
The Customize Toolbar sheet
3. Drag the icon of the tool you desire from or into the Toolbar to the location you want (or click
and drag the "default set" into the Toolbar)
4. Click Done.
Nisus Writer Pro currently offers a wide variety of icons you can put on the Toolbar including Page
Setup, Save and Customize (the Toolbar), in addition to line and space separators, and others. In
order to save space, some commands’ names are changed (Back and Forward refer to Previous
Selection and Next Selection respectively).
Add your own custom Toolbar item
You can associate almost any Nisus Writer Pro command with an icon of your choosing and add it
to the Toolbar. This includes commands you create such as those on the Macro menu or the
Window menu. While you cannot add a command from the menu File > Open Recent, you can add
an icon or icons for commands in the Document Manager segment of the File menu. The Document
Manager is explained in detail beginning on page 55.
1. Choose the menu command command View > Tooldrawer > Add Custom Toolbar Item….
2. Choose a command from the Add Custom Toolbar Item browser.
3. Give the toolbar item a (shorter) name if you want by typing it into the field labeled The name
of the new toolbar item.
4. Scroll through the available icons (from Nisus Writer Pro and Mac OS X) and select one that
you want.
5. If you do not see an icon that suits your needs, you might have such an image on your hard
drive or on your Clipboard. Click the little Gear menu to the right of Choose an icon for the
toolbar item
▶
Choose Choose Image File… and locate the image you want.
▶
Choose Paste From Clipboard.
In either case the new image appears, selected, on the far right edge of the “list” of icons.
6. Click Add Item.