Using the shape metrics palette – Nisus Writer Pro User Manual
Page 200
180
Working with Shapes
Graphics: Images and Shapes
Using the Shape Metrics palette
You can determine the precise size and location of your shapes using the Shape Metrics palette
illustrated in Figure 207.
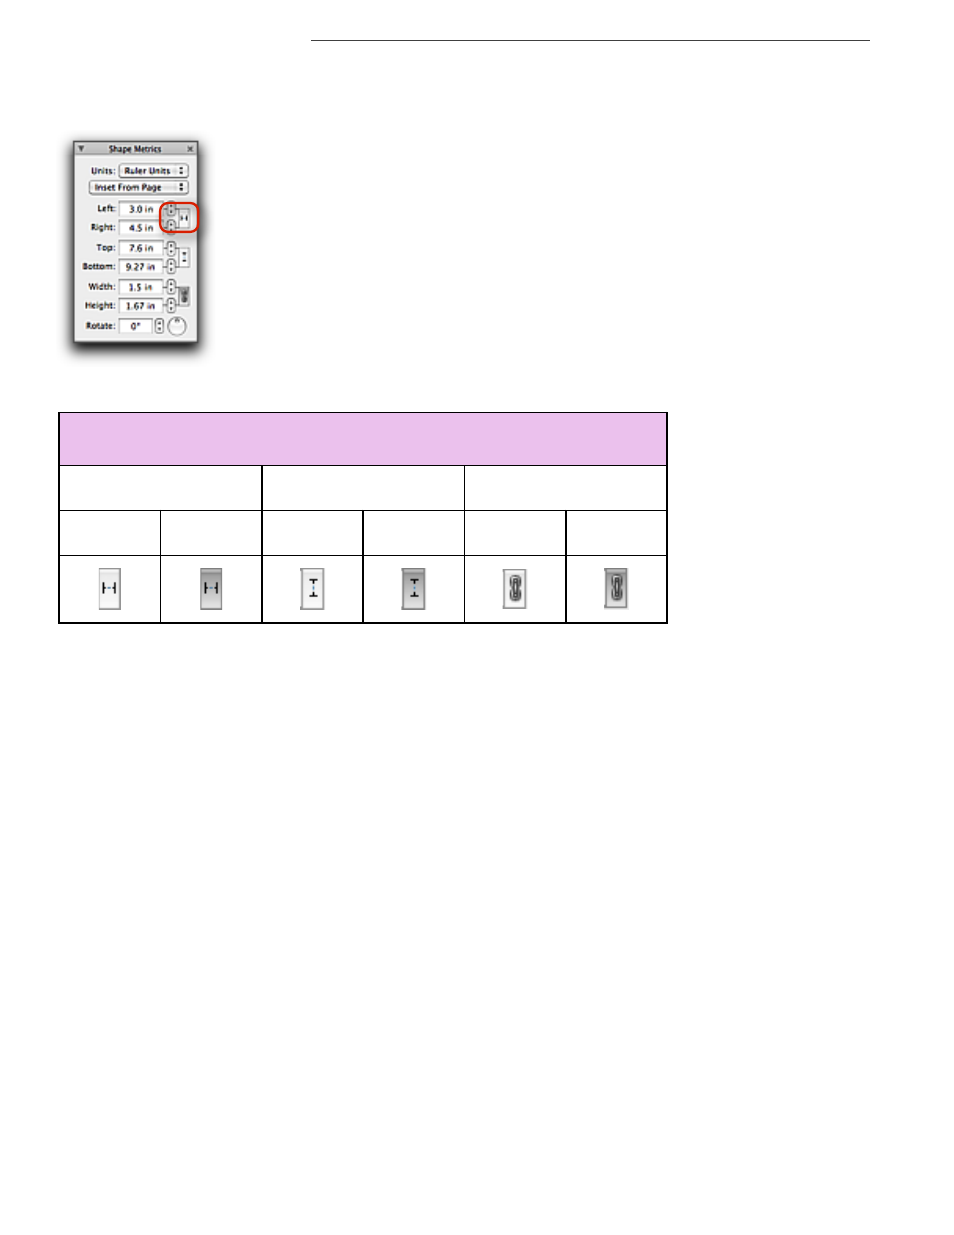
Figure 207
The Shape Metrics palette with the Left and Right dimensions linked and highlighted
Table 7
The Shape Metrics palette link buttons
1. Select the shape(s) you want to change.
2. Choose the measuring units you want to use from the Units pop-up menu in the Shape Metrics
palette.
You can display the units either as they are preset on the ruler (Ruler Units), or any of the
other units supported: Centimeters (cm), Inches (in), Millimeters (mm), Picas (pc) or Points
(pt).
3. Determine whether the horizontal and vertical alignment should be measured
•
from the edge of the paper: choose Inset From Page
•
or from the paragraph to which it is anchored: choose Inset from Paragraph.
Move selected shapes by precise, designated amounts
1. Select the shape(s) you want to change.
2. Use the steppers or enter a value using the keyboard to move the selected shape(s) to the Left,
Right, towards the Top, or Bottom.
a.
Click (turn off) to un-link the Left and Right and/or the Top and Bottom controls so that
moving one side does not move the other. This enables the shape to change its size.
b. Click (turn on) to link the Left and Right and/or the Top and Bottom controls so that
moving one side also moves the other. This maintains the shape’s size, but changes its
location.
These buttons correspond to the commands Shift Left, Shift Right, Shift Up and Shift
Down found on the Shape Metrics sub-menu of the Tools menu.
!
You can move a floating image so that it prints beyond the margins, but within the printer
limits, as illustrated in Figure 208 below.
Width Link button
Off
On
Height Link button
Off
On
Aspect Ratio Link button
Off
On