Using the shape wrap palette, Make an inline image into a floating image – Nisus Writer Pro User Manual
Page 176
156
Working with Floating Images
Graphics: Images and Shapes
Using the Shape Wrap palette
You can make any inline image into a floating image. When you do this, an entire range of
additional tools become available.
Make an inline image into a floating image
1. Click the image to select it.
If the Tooldrawer is open, the drawing tools palette group appears.
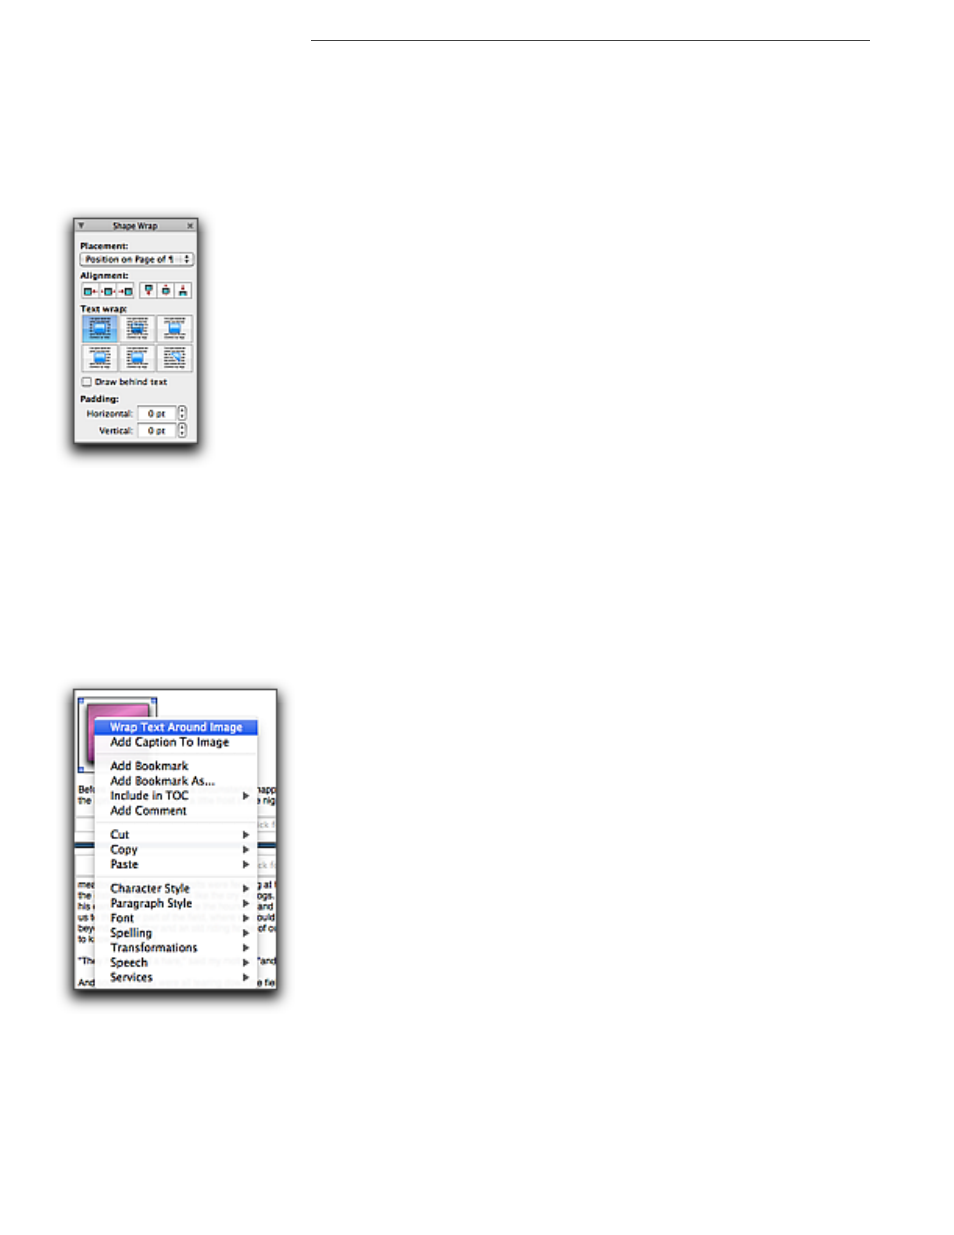
Figure 175
The Shape Wrap palette default options when set to Position on page of 
2. Choose either Moves with paragraph or Position on page of ¶. from the Placement pop-up
menu in the Shape Wrap palette.
Choosing Position on page of ¶ enables all the options for image alignment and text wrap.
However, choosing Moves with paragraph, because the image retains its vertical position relative
to a particular paragraph of text, does not enable the vertical alignment controls.
!
As an alternative, you can
6
Click, or Right-Click an inline image and a contextual menu appears
with the commands Wrap Text Around Image and Add Caption To Image. Each of these commands
cause the image to float. Adding captions to images is discussed further on page 170. You can also
select an inline image and choose the menu command Tools > Shapes > Wrap Text Around Shape.
Figure 176
The contextual menu with an un-resized or cropped inline image selected