Nisus Writer Pro User Manual
Page 336
316
Using PowerFind
Finding and Replacing Text
The tag illustrated is
7. Choose the menu command Gear > Match > Found (this time beside the lower Gear, beneath
Replace with) inside the Find/Replace window.
8. Type the closing HTML tag you want.
The tag illustrated is
9. Press @ once again to select all the “text” in the Find what area.
10. Apply the attributes you want to find (that match the HTML tags you’ve entered) from the
Format menu.
11. Test your find/replace expression by clicking Find Next and then Replace a couple of times.
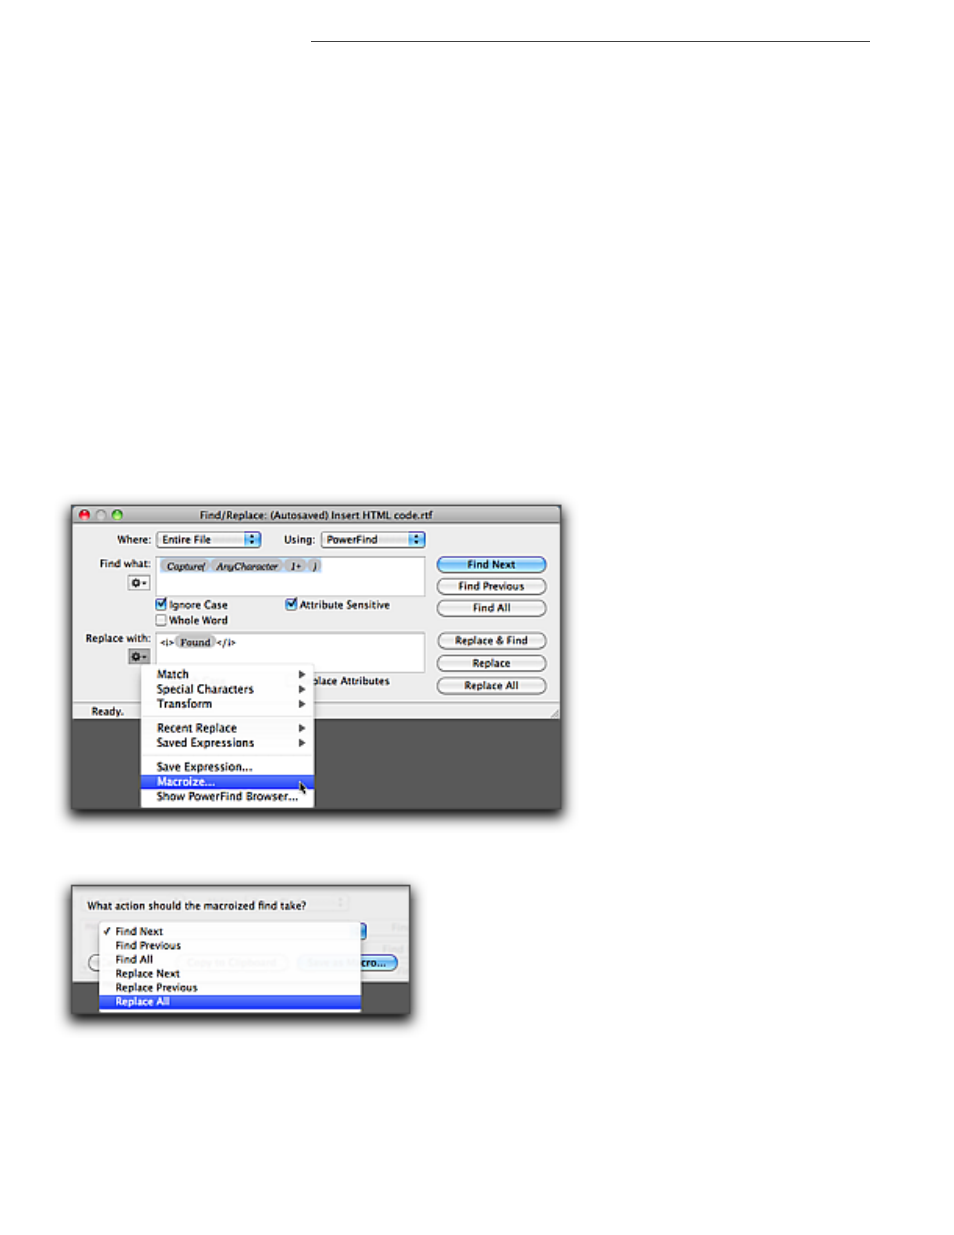
12. Choose the menu command Gear > Macroize (once again, beside the lower Gear, beneath
Replace with) inside the Find/Replace window as illustrated in Figure 353. The Macroize sheet
in the Find/Replace window appears as illustrated in Figure 329 on page 300.
13. Choose Replace All from the pop-up menu as illustrated in Figure 354. The other options are
explained on page 300.
14. Click the Save as Macro… button. The Save As dialog appears pointing to the Macros folder of
Nisus Writer Pro as illustrated in Figure 355.
15. Make sure the File Format is set to Nisus Macro, name the file what you want as illustrated in
Figure 356 and click Save.
16. Continue steps 6 through 13 for each of the styles you want to add to the macro and instead of
step 14 click Copy to Clipboard.
17. Paste the new line of code at the end of the existing macro and click Save once again.
18. Repeat steps 16 and 17 as needed.
The name you use to save the file becomes the command name that appears on the Macro menu of
Nisus Writer Pro.
Figure 353
The Find/Replace window with the find and replace expressions created
Figure 354
The pop-up menu in the Macroize sheet