Exporting source names and destination, Names, Assigning the [side flag] button – Sony GP-X1EM Grip Extension User Manual
Page 418: Exporting source names and destination names

418
• After copying, the remote panel settings data is
overwritten.
• After copying, the function button settings on the remote
panel change as follows.
- Top left button: Status function
- Top right button: Source/Destination/Level function
- Bottom left button: Assign function
- Bottom right button: Lock Chop function
1
Open the Engineering Setup >Panel >Xpt Assign
menu (7322).
2
Select the copy destination remote panel and the copy
source cross-point assign table using the following
parameters.
a) 1: Main table
2 to 15: Table 1 to 14
3
In the
4
Check the message, then press [Yes].
Exporting Source Names and
Destination Names
You can send the source names and destination names to
the S-Bus.
Source names and destination names cannot be exported
manually for an NS-Bus.
1
In the Engineering Setup >Panel >Xpt Assign menu
(7322), press [Name Export].
The Name Export menu (7322.9) appears.
2
Set the destination station ID.
a) If set to “255”, the names are sent to all stations (“All” is displayed
in the status area).
3
Press [Src Name Export].
The source names are exported to the station set in step
2
.
4
Press [Dest Name Export].
The destination names are exported to the station set in
step
2
.
Destination names cannot be specified arbitrarily, so
fixed names are used.
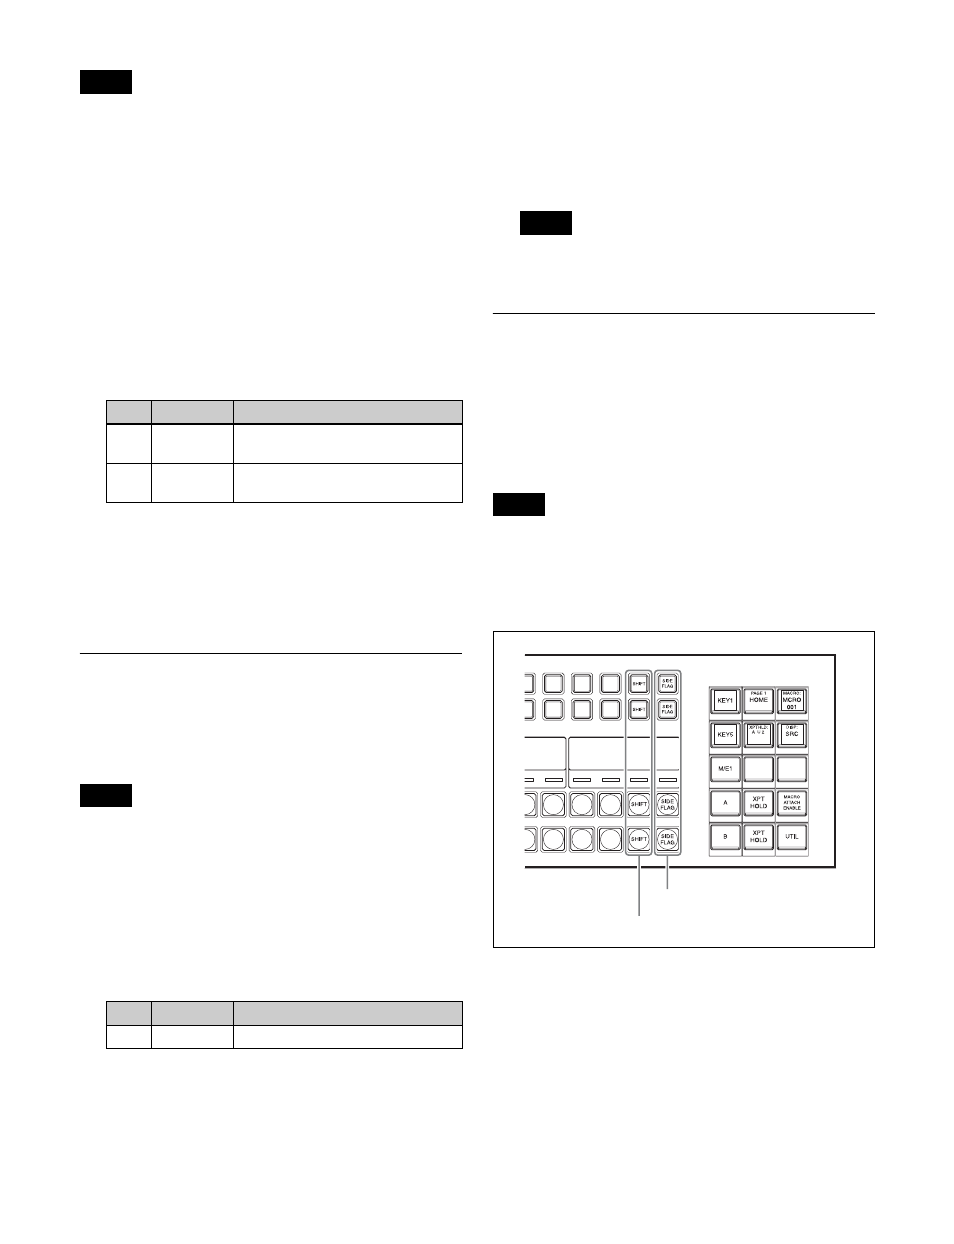
Assigning the [SIDE FLAG] Button
You can assign the [SIDE FLAG] button to the right hand
edge of the cross-point button row for enabling and
disabling side flags. The settings are common to the M/E
and PGM/PST banks.
Assigning the [SIDE FLAG] button moves the [SHIFT]
button one space to the left.
If a macro attachment is set for the button, assigning the
side flag button shifts the number of the button, so pressing
the button will no longer execute the macro. The settings,
however, are maintained, so that when you cancel the side
flag assignment, the macro can be executed once more.
Cross-point control block
For details about side flags, see “Side Flags” (page 198).
1
In the Engineering Setup >Panel >Xpt Assign menu
(7322), press [Side Flags Button Assign].
The Side Flags Button Assign menu (7322.10)
appears.
2
Press [Side Flags Btn Assign], turning it on.
Notes
No.
Parameter
Adjustment
4
Aux
Remote
Remote panel number
5
Table
Assign
Cross-point assign table
a)
Note
No.
Parameter
Adjustment
1
Station ID
Station ID setting
a)
Note
Note
SHIFT button moves one space to the left
SIDE FLAG button
