Apply the motor cable shield clamp – Rockwell Automation 2094-xMxx-S Kinetix 6000 Multi-axis Servo Drives User Manual User Manual
Page 114
114
Rockwell Automation Publication 2094-UM001H-EN-P - June 2013
Chapter 5
Connecting the Kinetix 6000 Drive System
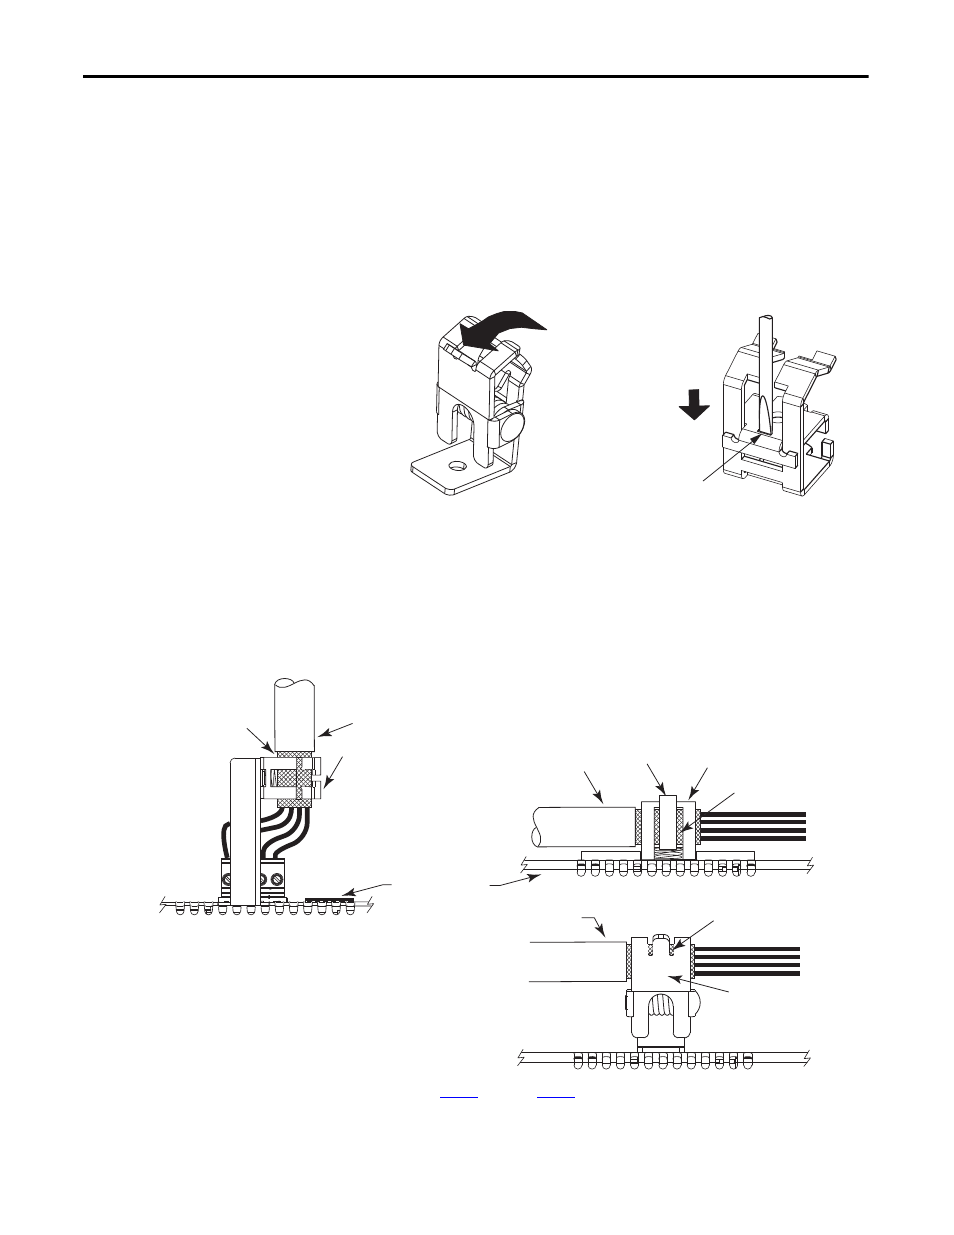
Apply the Motor Cable Shield
Clamp
This procedure assumes you have completed wiring your motor power (MP)
connector and are ready to apply the cable shield clamp.
Follow these steps to apply the motor cable shield clamp.
1. Depress the spring loaded clamp.
2. Position the exposed portion of the cable braid directly in line with the
clamp.
3. Release the spring, making sure the cable and cable braid are held secure by
the clamp.
4. Attach tie wrap (slide-open clamp only) around cable and clamp for
additional strain relief.
5. Repeat
step 1
through
step 4
for each IAM, AM, or IPIM module.
TIP
Your drive can be equipped with either the pivot-open or slide-open cable
clamp.
Screwdriver Tip
3.5 mm (0.14 in.)
Screwdriver
Tip in Slot
Slide-open Cable Clamp
Pivot-open Cable Clamp
Pry clamp back
with thumb.
The pivot-open cable clamp was designed to
replace the slide-open cable clamp.
Pivot-open clamp features include:
• Screwdriver not required for depressing
the spring
• Tie wrap not required or recommended
Tie Wrap
Outer Insulation
Motor Cable
Exposed Braid
(under clamp)
Slide-open Cable Clamp
Vent holes on top
of IAM/AM module.
Motor
Cable
Exposed Braid
(under clamp)
Cable Clamp
Outer Insulation
Horizontal Cable Clamp Orientation Examples
Vertical Cable Clamp
Orientation Example
Motor Cable
Outer Insulation
Exposed Braid
(under clamp)
Pivot-open Cable Clamp
Vent holes on top of IAM/AM module.