Grass Valley LVS 100 v.3.15 User Manual
Page 199
Timeline Window
Profile LVS Event Management System Instruction Manual
4-81
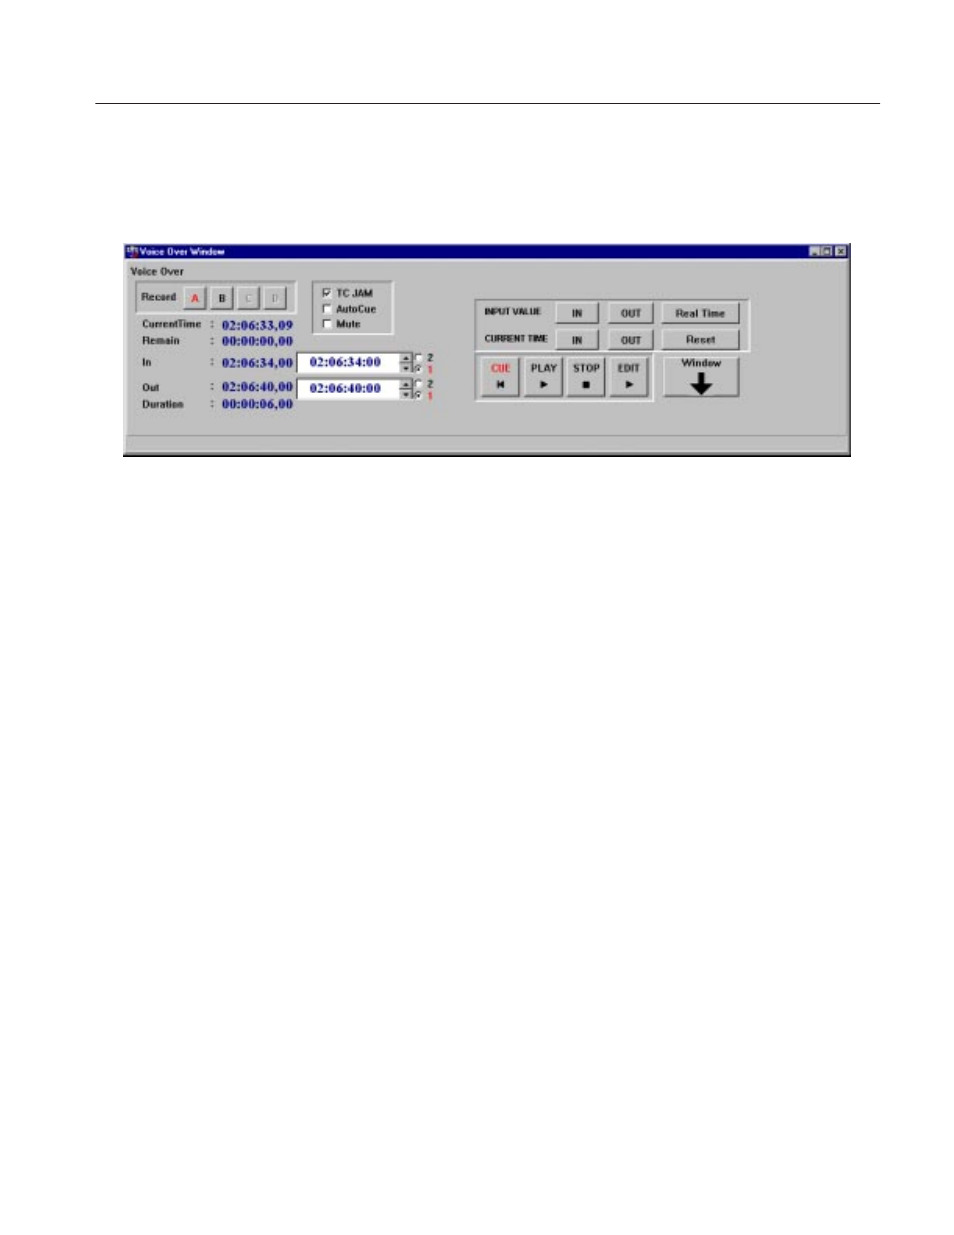
Press the right arrow button at the bottom of the Voice Over Window expand the
window and display additional controls. Press the down arrow button at the
bottom of the Voice Over Window to return to the collapsed view of the window.
Figure 4-44: Voice Over Window - Expanded
1. Select the channel for voice–over recording.
Select one of the resources from A to D in the Record channel selection
panel. The selected channel is displayed in red.
2. Select the audio track.
Set the audio tracks on which you wish to record your voice–over by
selecting the appropriate Audio check boxes at the left end of the Timeline
Window. Be sure to de–select the the video track for voice–over recording.
3. Determine the In and Out for recording the voice–over on the timeline. There
are two ways to do this:
a. Using INPUT VALUE
Real Time input is set by default. Enter the absolute time code of the In
or Out, then press the IN or OUT button for the INPUT VALUE.
Pressing the Real Time button will change the name of the button to
Relative Time. Use relative time to enter a time code value which will
be added to or subtracted from the displayed In or Out point to determine
the start or end of the voice–over. Once you have entered the value in
the approptriate time code box, press the IN or OUT button for the
INPUT VALUE.
Use the 1 or 2 options to set the starting or ending field number for the
voice–over.
b. Using CURRENT TIME
You can press the CURRENT TIME IN or OUT button during playback
to set the time code at which to begin or end the voice–over recording.
Operation