28 switch to split transaction view, 29 switch to transfer view, Switch to split – Teledyne LeCroy USB Protocol Suite User Manual (Voyager_Advisor T3_Mercury) User Manual
Page 136: Switch to transfer view
Teledyne LeCroy Corporation
Switch to Split Transaction View
136
USB Protocol Suite User Manual
2. Select Expand This Transaction.
The screen displays the selected transaction in expanded format.
Note:
The Expand/Collapse transaction feature operates as a toggle: when one format is active, the
other appears as an option on the Expand/Collapse drop‐down menu.
To collapse a transaction, perform the same operation and select Collapse This
Transaction.
Note that you can choose to expand or collapse
Only the selected Transaction
OR
All Transactions
It is not necessary to use the Expand/Collapse Transactions menu to shift between
expanded and collapsed views of a transaction. You can double‐click the Transaction
number field to toggle back and forth between collapsed and expanded views.
5.28
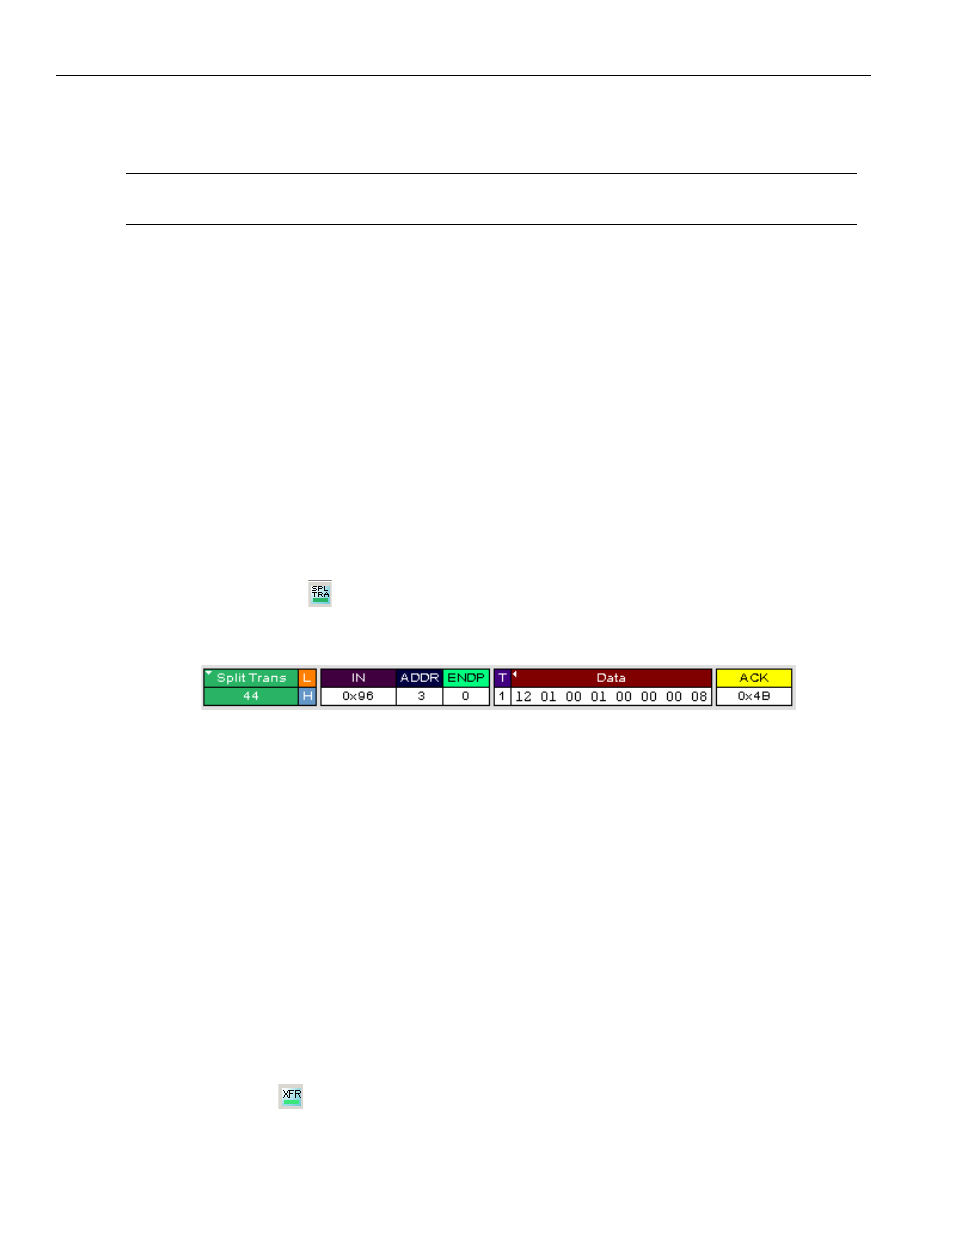
Switch to Split Transaction View
To select Split Transaction View:
1. Click the
button on the toolbar.
The Trace View screen is re‐drawn to display Split Transactions.
Figure 5.40: Split Transaction View
You can also switch to Split Transactions View from the Menu Bar:
1. Select Display Options under Setup.
You see the Display Options General window:
2. Check Split Transaction.
5.29
Switch to Transfer View
A Transfer is defined in the USB specification as one or more transactions between a
software client and its function. USB transfers can be one of four kinds: Control,
Interrupt, Bulk, and Isochronous. The system can display all four types.
The default display mode is Packet View. Before you can view decoded transfers, you
must switch from Packet View (or Transaction View) to Transfer View.
To select Transfer View:
1. Click
on the toolbar.
The Trace View screen is re‐drawn to display Transfers.