H3C Technologies H3C Intelligent Management Center User Manual
Page 207
1.
Click Service > MPLS TE Manager > MPLS TE Tunnel Mng from the tabular navigation system on the
top of the IMC main page.
2.
In the MPLS TE Tunnel Query List section of the page, click Add.
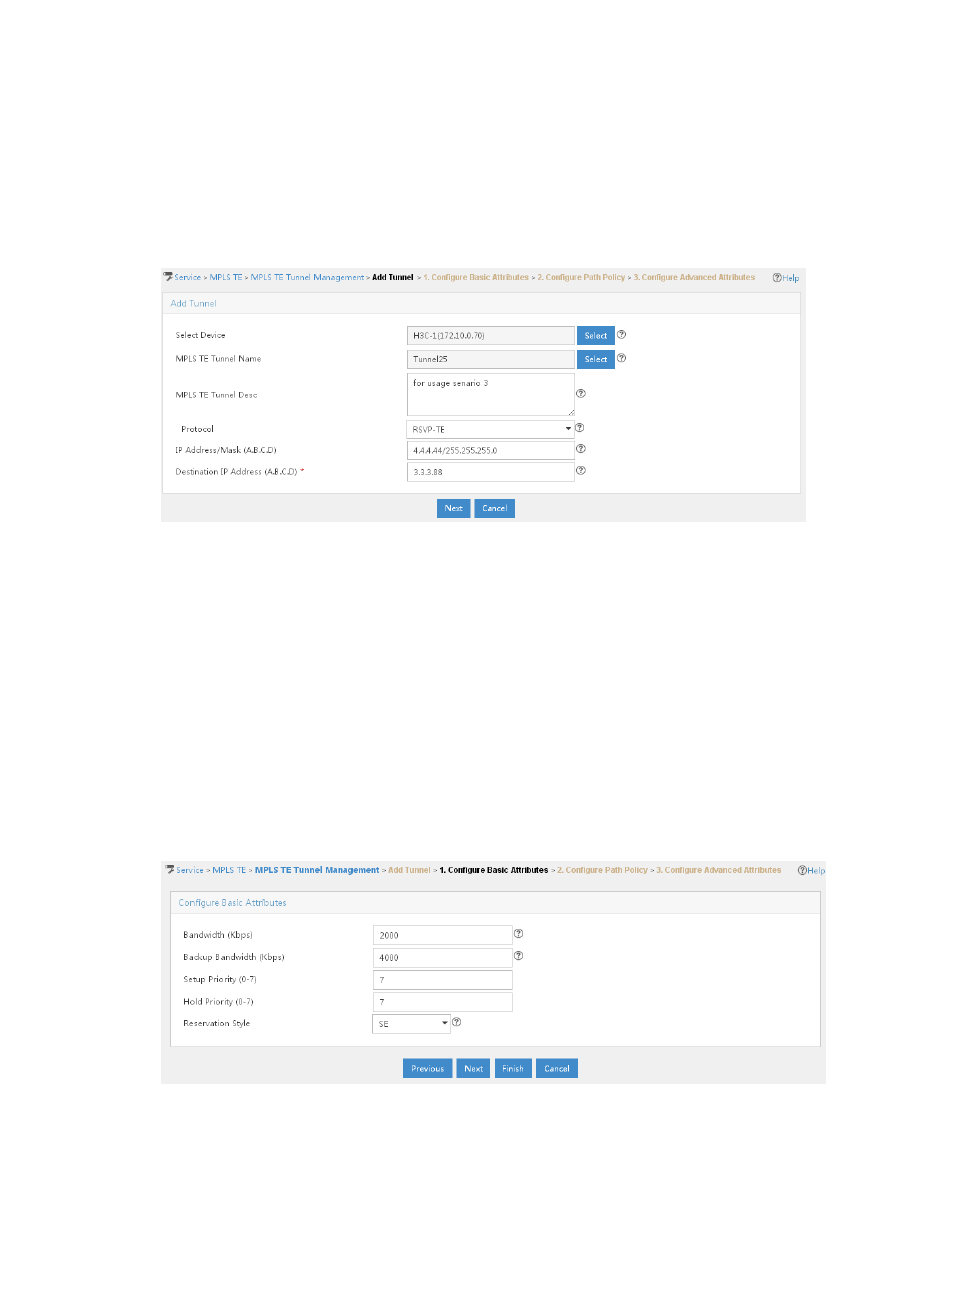
The Add Tunnel page appears, as shown in
Figure 75 Usage scenario 3 — Add Tunnel page
3.
Specify the configuration information for the dynamic MPLS TE tunnel.
a.
Click Select next to Select Device, enter part or the entire name of Router A and click Query. All
devices that match the description appear in the Device Query List section of the page. Select
Router A, and then click OK.
b.
Click Select next to MPLS TE Tunnel Name, assign a name to the tunnel, and then click OK.
c.
Select RSVP-TE from the Protocol list.
d.
Assign the IP address/mask to the tunnel, if needed.
e.
In the Destination IP Address (A.B.C.D) field, enter the loopback address of Router D, and then
click Next. You are directed to the Configure Basic Attributes page, as shown in
.
Figure 76 Usage scenario 3 — Configure Basic Attributes page
a.
Enter information in the Bandwidth (Kbps) field and the Backup Bandwidth (Kbps) field. You
need to configure the same settings accordingly on your devices.
b.
Click Next. You are directed to the Configure Path Policy page, as shown in
197