Keri Systems Doors16 User Manual
Page 77
Keri Systems, Inc.
Doors™ Users Guide
01821-001
October 1998
Revision 2.1
Page 77
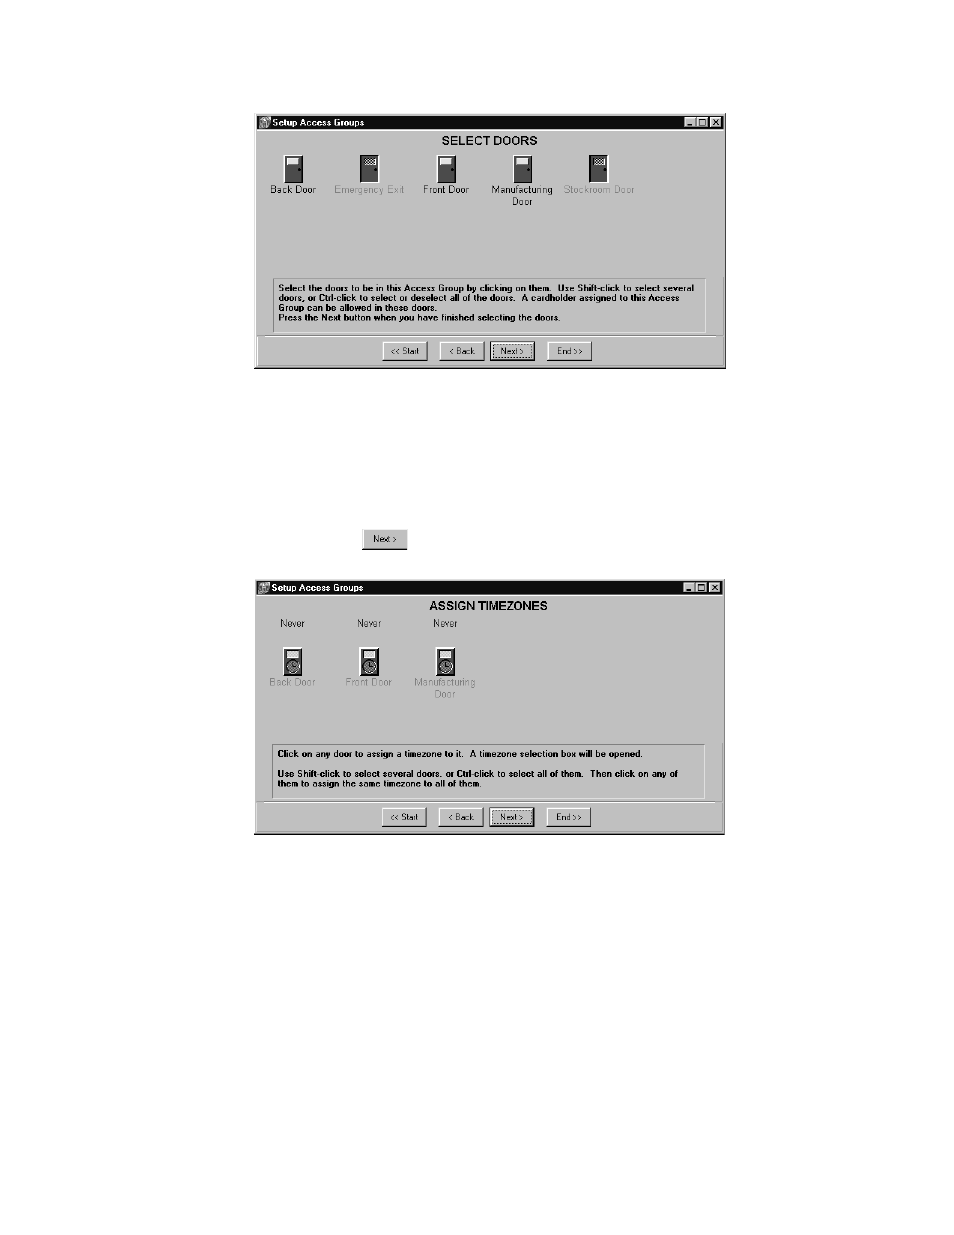
Figure 45 – Assigning Doors to the New Access Group
NOTE: Selected doors can be differentiated from unselected doors by the appearance of the
door icon. Selected doors stand out from the window and their door names are written in
black text. Unselected doors appear to recede into the window and their door names are
written in grey text.
6.
Click on the
button and the Assign Timezones window appears (see Figure 46).
Figure 46 – Assigning Time Zones to the Access Group Doors
7.
The selected door icons should appear in this window. If a door icon is missing or an
unwanted door icon is in the window, click on the Back button to return to the previous
window and make the necessary changes.
8.
Click on the Back Door icon. A time zone list window appears in the middle of the
Assign Timezones access group window (see Figure 47).