5 connecting to the kv-10 to 80, Kv -300 – KEYENCE Visual KV Series User Manual
Page 372
9.3 Installation
KV-10/80 Series Only
KV
-300
KV-10/80
Chapter 9 KV-AD4/DA4 Analog I/O Unit
1-348
9
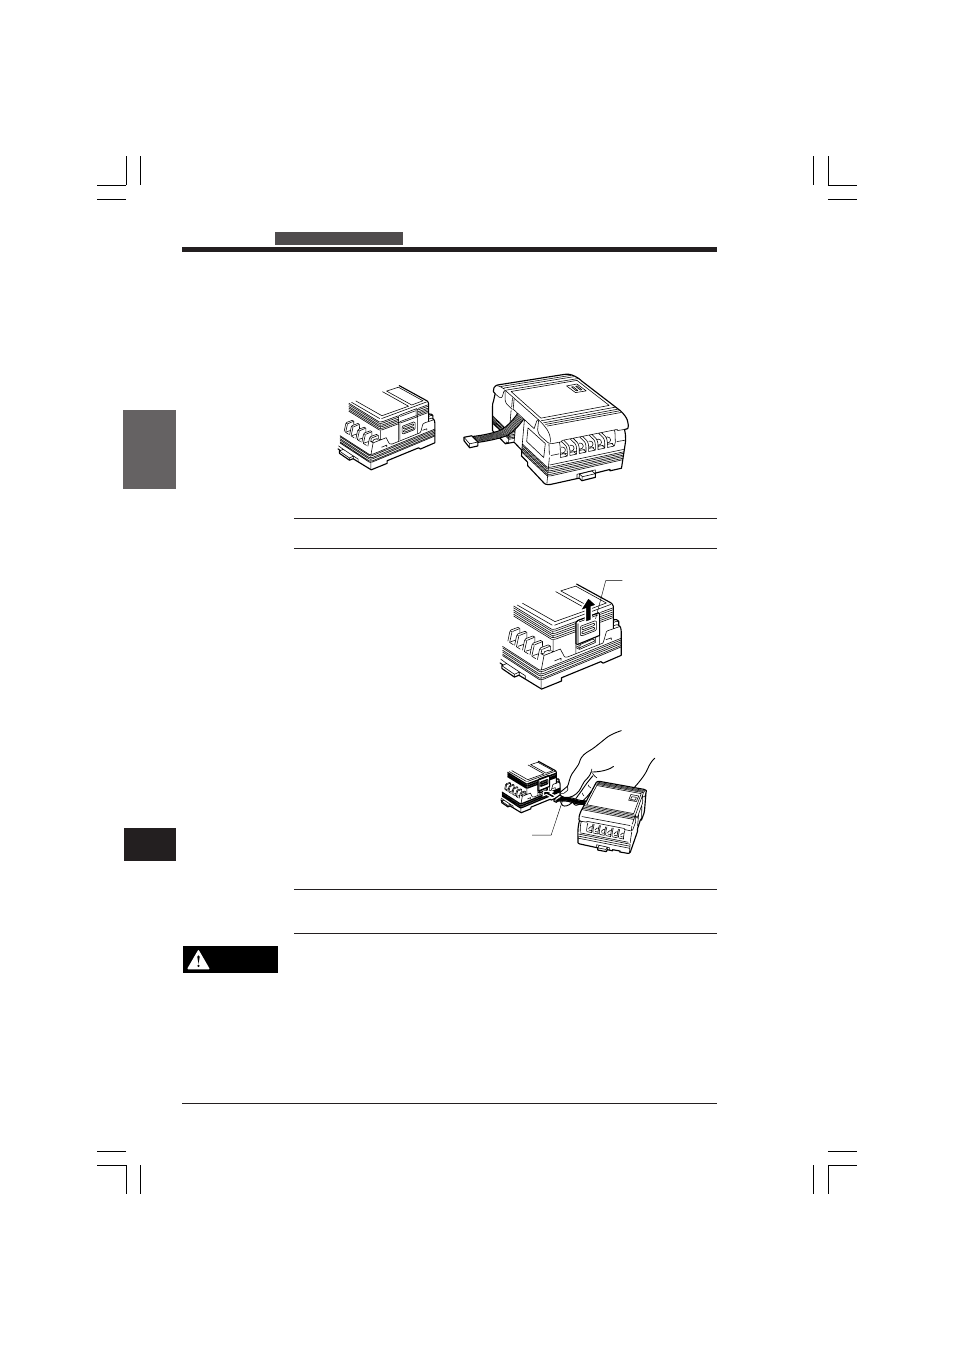
Note: Make sure that the power is turned OFF before connecting the KV-AD4/DA4
to the KV-10 to 80.
1. Slide up the protective cover on the
right of KV-10 to 80.
2. Connect the connector cable from
the KV-AD4/DA4 to the connector
on the KV-10 to 80.
Protective cover
9.3.5
Connecting to the KV-10 to 80
Connect the KV-AD4/DA4 to the KV-10 to 80 CPU.
The following example describes how to connect a KV-AD4 to the right side of a KV-
10.
KV-10
KV-AD4
Connector cable
CAUTION
Note: Connector cables cannot be extended.
➮ For details on how to connect the I/O expansion unit and the KV-AD4/DA4, see "9.2.3 System
Configuration" page 1-341.
•
When connecting the connector cable do not hold it by its cable. Hold it by
the connector. Applying unnecessary force on the cable may cause the unit
to malfunction.
•
Always connect the connector cable by hand. Using a tool to connect the
connector cable may apply excessive force on the unit, causing it to mal-
function.
KVHKA Chap 09.p65
08.3.11, 11:20 AM
348