Kv -300 – KEYENCE Visual KV Series User Manual
Page 214
5.3 Module/Unit Connections
KV
-300
KV-10/80
5
Chapter 5 KV-300 Hardware
1-190
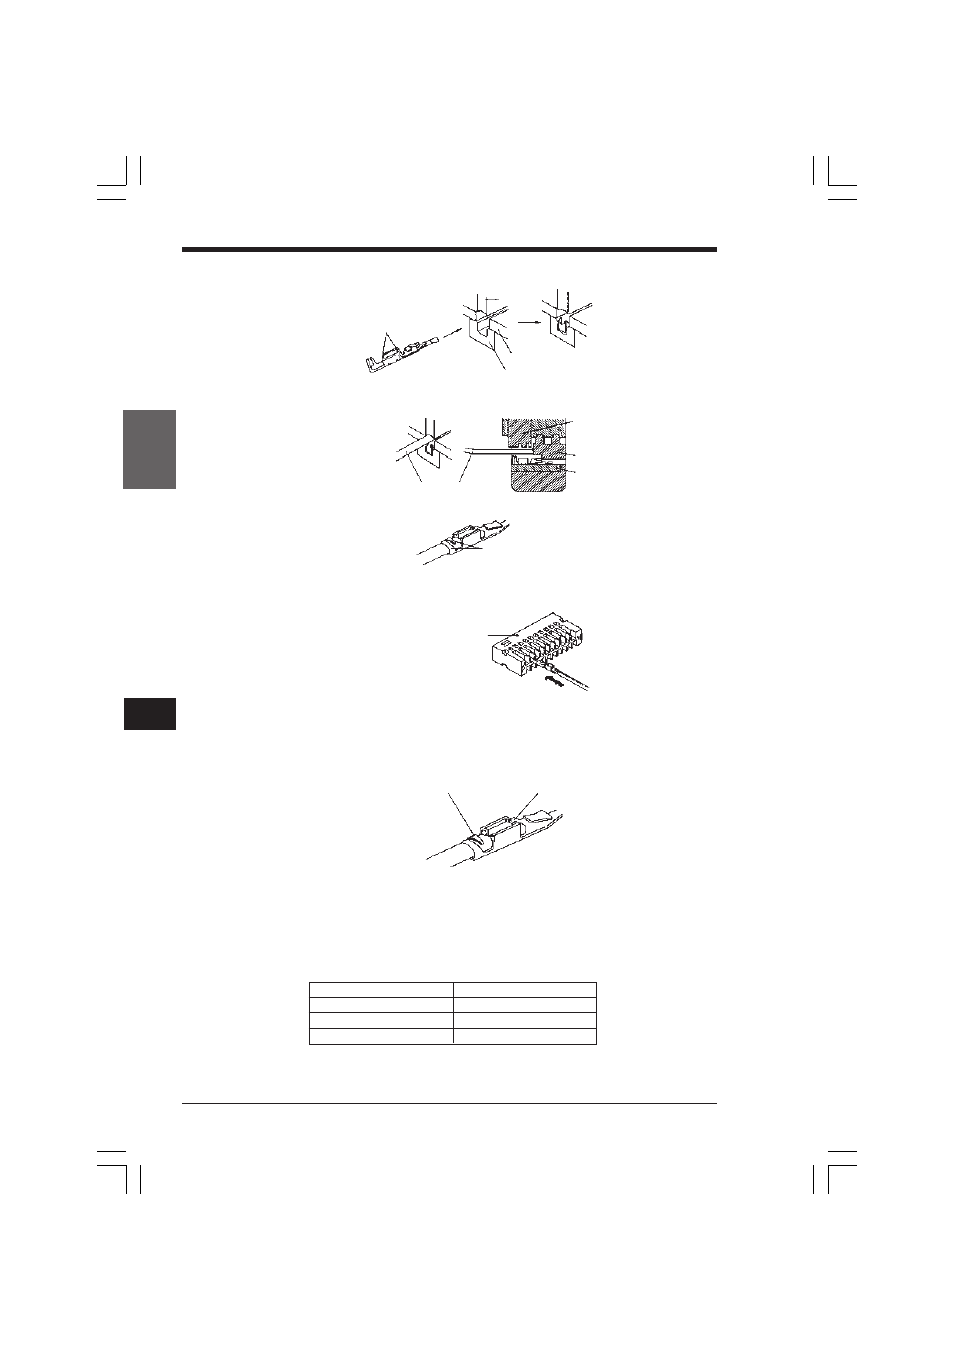
2. Insert the contact directly until it touches the contact holder.
3. Insert the cable directly to the end along the crimping slot.
4. Grip the handle until the contact clamp fully encircles the cable.
5. Gently pull the cable and remove the crimped contact from the contact holder.
Insert it into a housing containing no contact.
Crimping tool cautions
•
Choose an appropriate cable.
•
Cut the cable tip sharply so that no burrs remain. It is not necessary to peel back
the sheath.
•
After crimping, check the following:
•
The crimping tool is plastic and is designed to be lightweight. It may break if
excessive force is applied to the handle after crimping.
•
The precision mechanism of the crimping tool may malfunction if it is dropped or
jarred. Do not disassemble the tool.
•
The plastic material will melt upon contact with strong solvents such as acetone,
trichlene, or benzine. Do not allow solvents to contact the tool.
•
Even if no crimping tool is available, you may be able to solder the contact and
cable.
•
A flat cable can be used, as the connector conforms to the MIL Standard.
Crimping grooves
Crimping
punch
Cover
Guide
Cable
Cable
Crimping punch
Cover
Guide
The clamp should fully encircle the cable.
Housing with no contact
The clamp must fully
encircle the cable.
The cable must be inserted
completely into the contact.
Special crimping tool
Part no. OP-21734
34-pin connector
Part no. OP-23139
20-pin connector
Part no. OP-22185
Contacts (200)
Part no. OP-22186
KVHKA Chap 05.p65
08.3.11, 11:14 AM
190