Share projects, clips, and ranges, 378 share projects, clips, and ranges, Share projects, clips, and – Apple Final Cut Pro X (10.0.9) User Manual
Page 378: Ranges
Chapter 14
Share your project
378
You can easily replace the default set of destinations with your own customized destinations.
You modify existing destinations and create new destinations using the Destinations pane of
Final Cut Pro preferences. You can also create a bundle of destinations to export several types
of output at once. For more information, see
on page 427.
To further customize your output, you can use Compressor, the professional transcoding
application. For more information, see
Export your project using Compressor
on page 386.
Share projects, clips, and ranges
You can share an entire project, an entire clip, or a portion of a project or clip (indicated with a
range selection). You can also share a project’s roles, exporting each role as a separate media
stem. If you want to export the same roles from another project or clip later, you can save your
settings as a preset.
Because the transcoding required to create the shared file happens in the background, you can
continue working on your projects in Final Cut Pro after sharing. (Keep in mind that changes you
make to a project after the transcoding process begins are not reflected in the output files.)
Share a project, clip, or range
1
Do one of the following:
•
Select a project in the Project Library.
•
Select a clip in the Event Browser.
•
Select a range in a project in the Timeline or in a clip in the Event Browser.
2
Do one of the following:
•
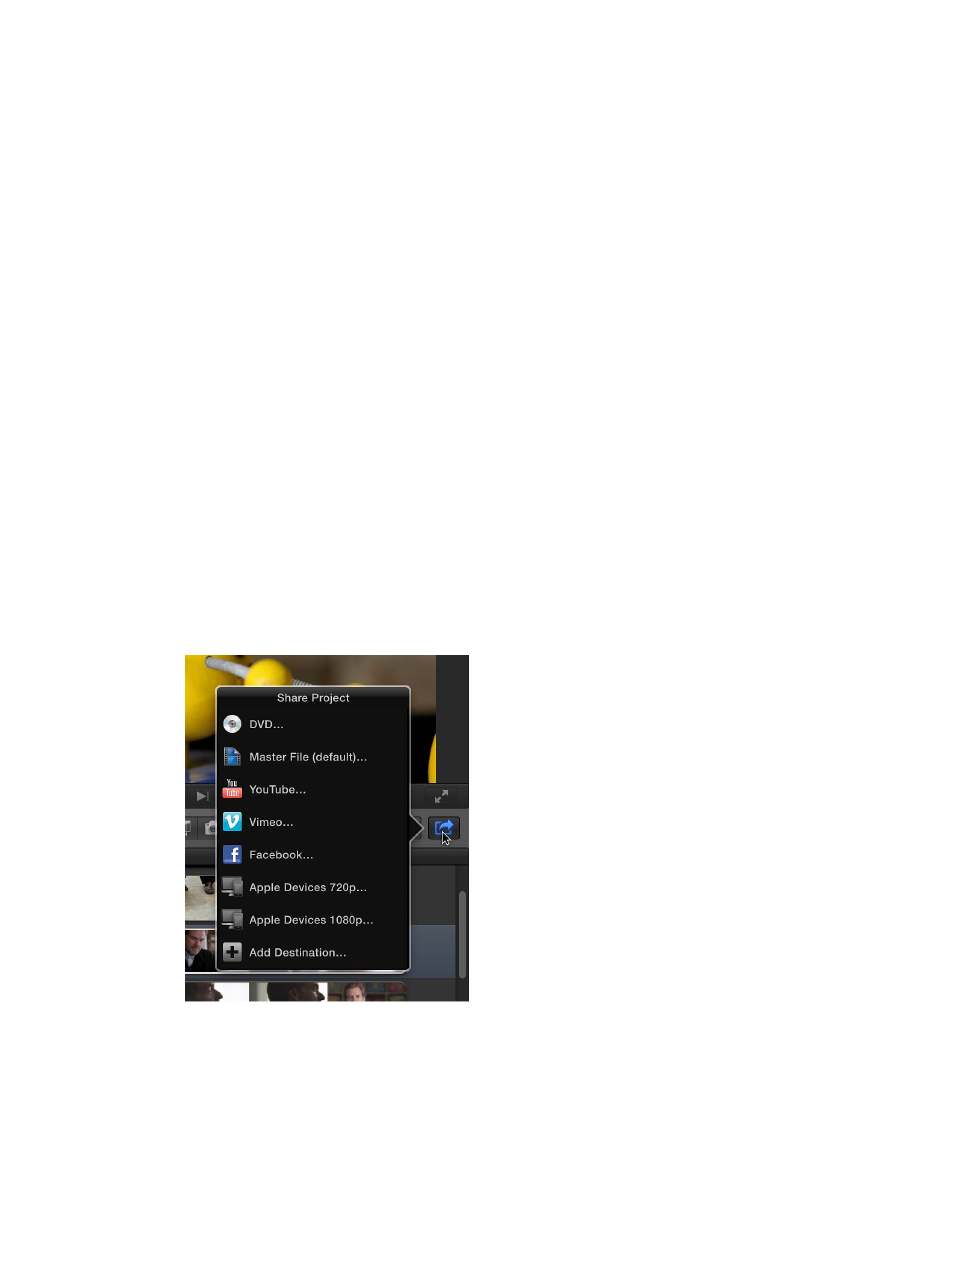
Choose File > Share, and choose a destination from the submenu.
•
Click the Share button in the toolbar, and choose a destination from the pop-up menu.