Adjust timeline settings – Apple Final Cut Pro X (10.0.9) User Manual
Page 141
Chapter 8
Edit your project
141
Adjust Timeline settings
In Final Cut Pro, it’s very easy to adjust the Timeline display options. For example, you can show
clips with or without video filmstrips or audio waveforms. Or you can change the vertical height
of the clips or the size of filmstrips or audio waveforms in relation to the video thumbnails that
appear in the filmstrip of each clip in the Timeline. You can also show only the clip labels.
The snapping behavior makes it easier and quicker to do things like line up a video clip with an
audio clip, or align the playhead to a particular marker. When snapping is turned on, items you
move in the Timeline appear to jump, or “snap,” directly to certain points in the Timeline. This can
help you quickly line up edits with other items in the project.
Snapping affects the functions of many of the editing tools in Final Cut Pro, including the
Select tool, the Trim tool, the Position tool, the Range Selection tool, and the Blade tool. Several
elements trigger snapping in the Timeline:
•
Clip boundaries (start and end points)
•
The playhead and the skimmer
•
Markers
•
Keyframes
•
Range selections
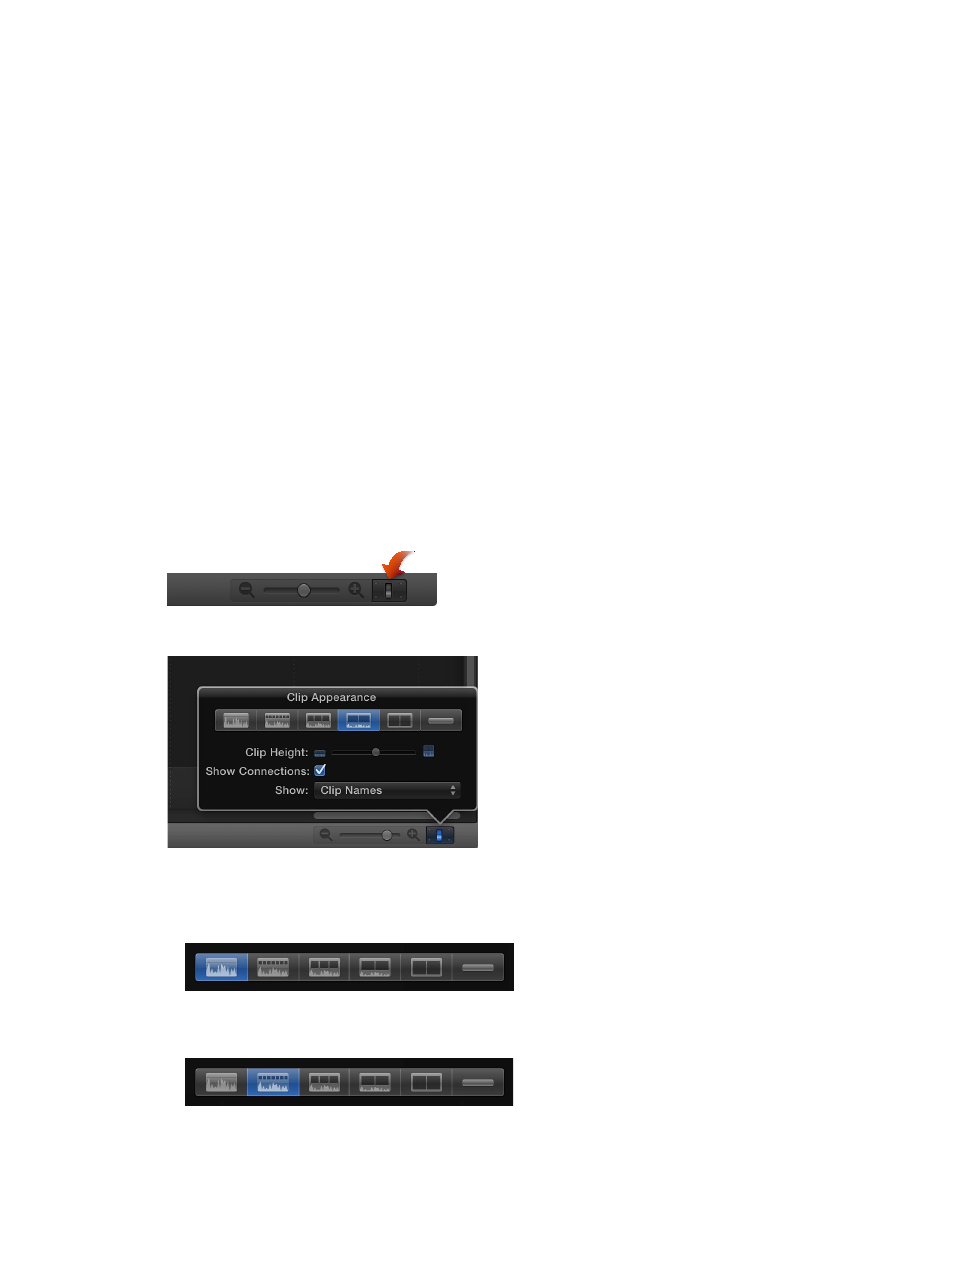
Adjust Timeline clip appearance and height
1
Click the Clip Appearance button in the lower-right corner of the Timeline.
The Clip Appearance window appears.
2
Do one of the following:
•
To display clips with large audio waveforms only: Click the leftmost Clip Appearance button (or
press Option-Control-1).
•
To display clips with large audio waveforms and small filmstrips: Click the second Clip
Appearance button from the left (or press Option-Control-2).