Apple Final Cut Pro X (10.0.9) User Manual
Page 229
Chapter 10
Add transitions, titles, effects, and generators
229
1
Select a clip in the Timeline and put the playhead at its start.
2
Choose Transform from the pop-up menu in the lower-left corner of the Viewer (or press Shift-T),
and drag the onscreen controls to reduce the image’s size and place it in the upper-left corner.
3
Click the Add Keyframe button.
4
Move the Timeline playhead to the middle of the clip.
5
Use the Transform onscreen controls to move the image to the upper-right corner.
A keyframe is automatically added, and a red line appears showing the animation’s path so far.
6
Move the Timeline playhead to the end of the clip.
7
Use the Transform onscreen controls to move the image to the bottom center.
A keyframe is automatically added, and the red line extends to this new point.
8
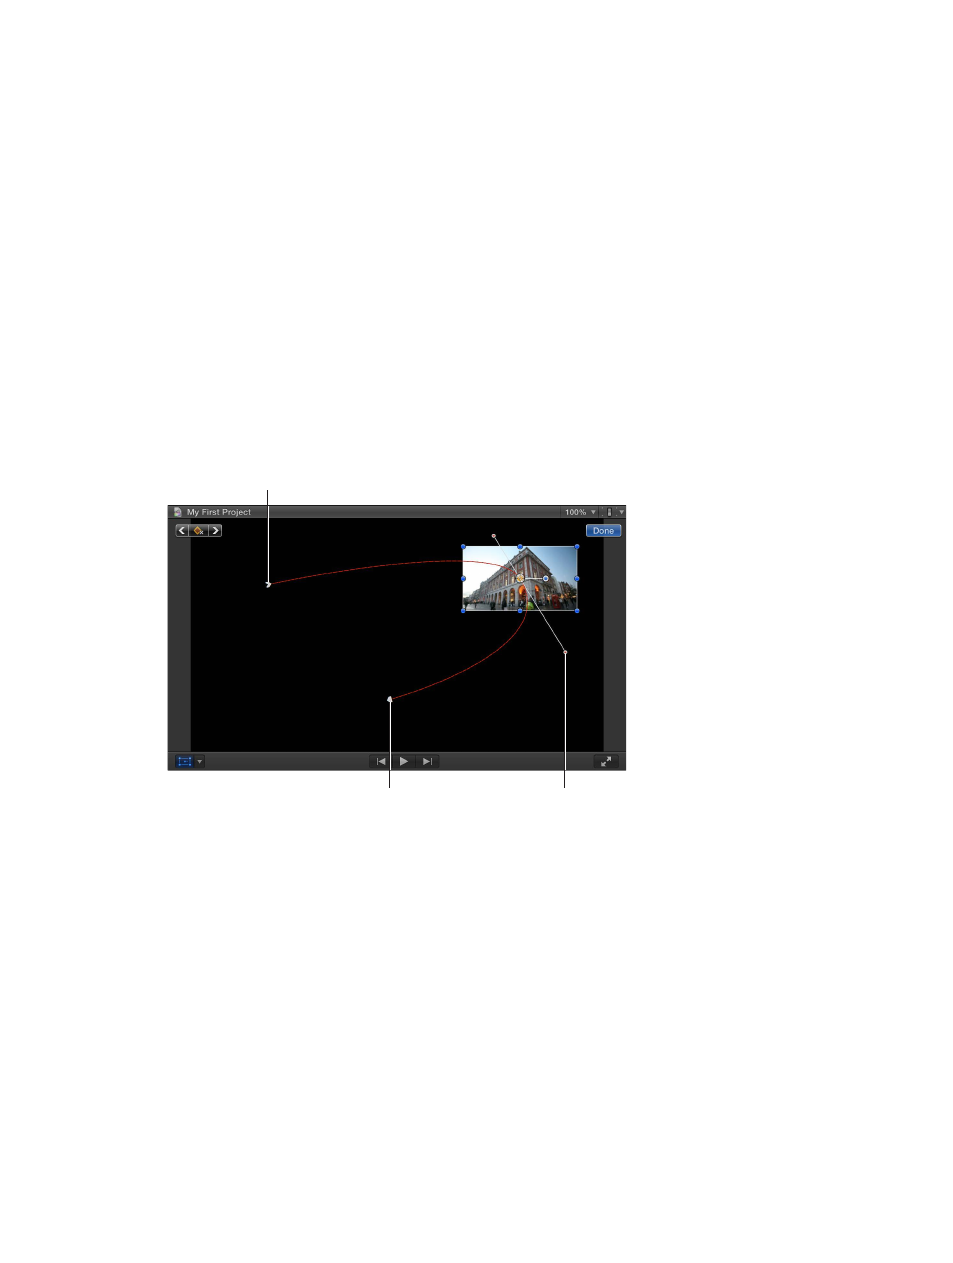
To jump between the keyframes, click the white squares along the red line.
The first and last keyframes have white arrows.
By default, the red line indicates a smooth path (indicated by how it curves).
9
To control the curve of the path, click the starting or middle keyframe and drag the
curve handles.
Drag these handles
on a middle keyframe to
adjust the path’s curve.
The starting keyframe
The ending keyframe
10
Control-click a keyframe and choose an option from the shortcut menu:
•
Linear: Use for direct, non-curved paths in and out of that keyframe.
•
Smooth: Use for curved paths in and out of that keyframe, providing a more
natural movement.
•
Delete Point: Use to delete that keyframe.
•
Lock Point: Use to prevent that keyframe from being adjusted. It changes to Unlock Point
once set.
•
Disable Point: Use to ignore that keyframe, but keep the keyframe in place in case you want
to use it later. It changes to Enable Point once set.