Apple Final Cut Pro X (10.0.9) User Manual
Page 228
Chapter 10
Add transitions, titles, effects, and generators
228
6
Move the playhead to the end of the clip.
7
Adjust the effect’s controls to set the end position.
A keyframe is automatically added. Additionally, for Transform effects, a line showing the image’s
path appears.
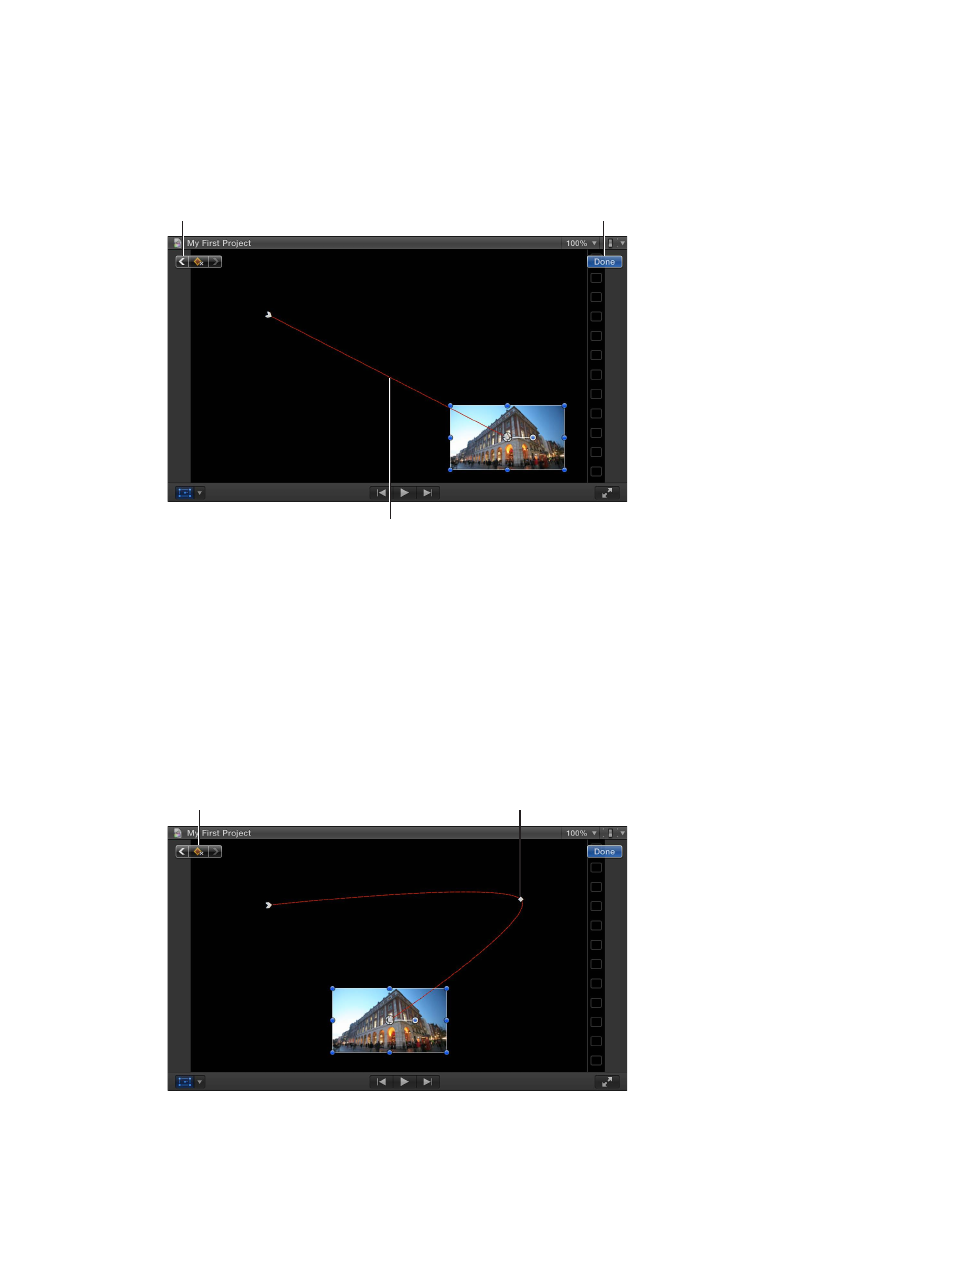
Click the Left Arrow
button to jump back
to the first keyframe.
Click Done when you
are finished creating
the animation.
The red line shows the
path of the image’s center.
8
To finish, click Done in the upper-right corner of the Viewer.
When you play the clip, the video moves smoothly between the keyframes, creating an animated
effect. You can actually add multiple keyframes by moving the playhead to a new position and
changing the effect’s controls. For more information on working with keyframes, see
on page 247.
Adjust the Transform effect animation path
Transform animations have additional keyframe controls you can use to fine-tune the animation
path. To show these, you first need to create a simple three-corner effect.
The Add Keyframe button
changes to a Delete Keyframe
button when you are positioned
on a keyframe.
The center keyframe