Creating a storage pool on a drive adapter – QNAP TVS-472XT 4-Bay NAS Enclosure User Manual
Page 100
Warning
• All data on the selected disks will be deleted.
• All unselected disks will be automatically assigned as spare disks, and cannot be used until
the RAID group has been deleted.
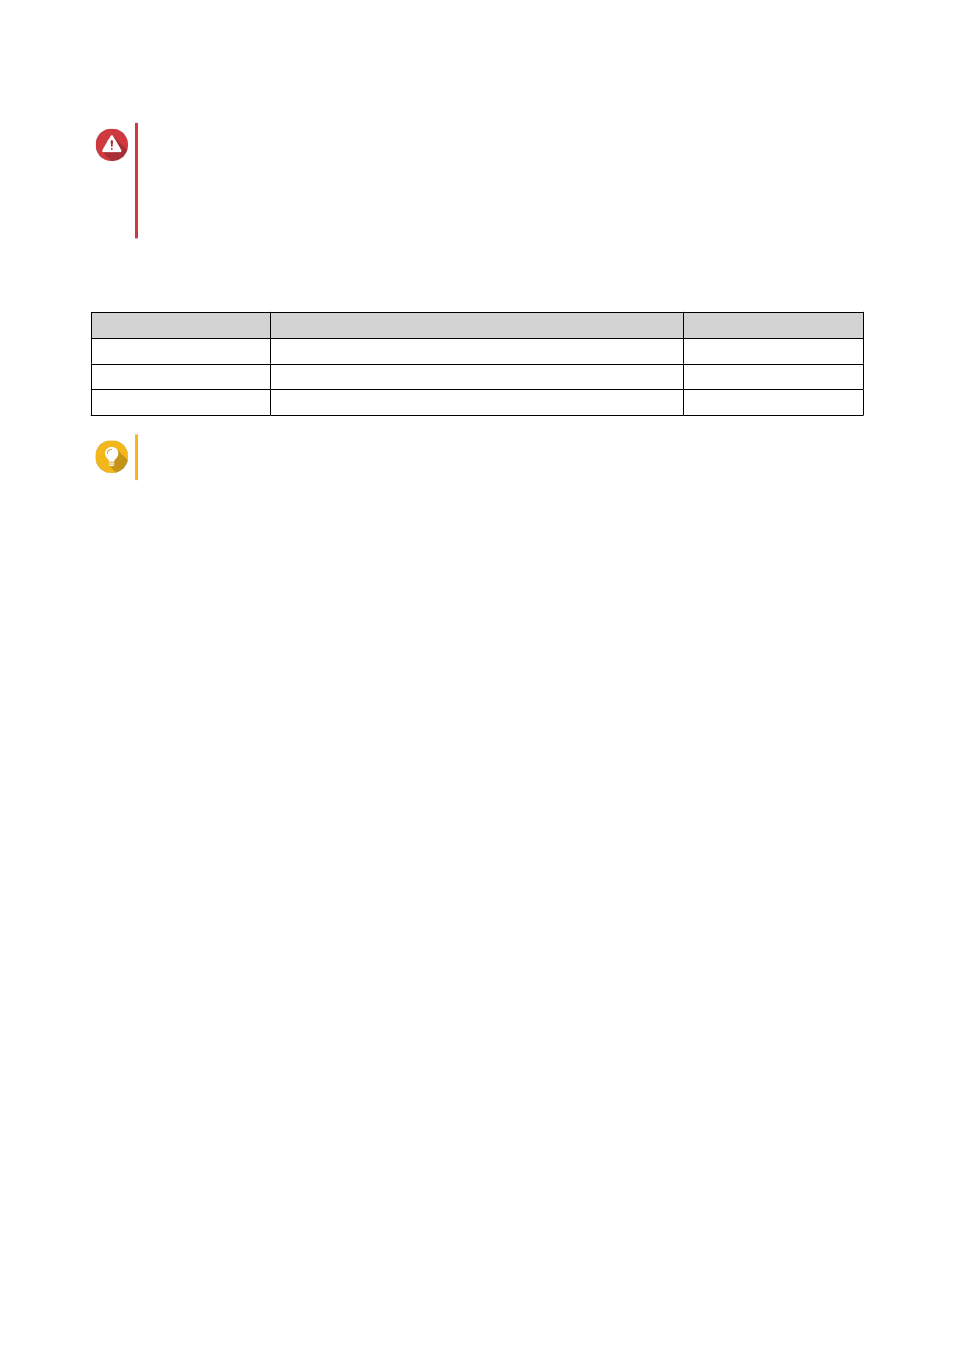
6. Select a RAID type.
QTS displays all available RAID types and automatically selects the most optimized RAID type.
Number of disks
Supported RAID Types
Default RAID Type
Two
JBOD, RAID 0, RAID 1
RAID 1
Three
JBOD, RAID 0, RAID 5
RAID 5
Four
JBOD, RAID 0, RAID 5, RAID 10
RAID 5
Tip
Use the default RAID type if you are unsure of which option to select.
7. Click Next.
8. Select Create Storage Pool.
9. Click Create.
A confirmation message appears.
10. Click OK.
• The RAID enclosure creates the RAID group.
• The Create Storage Pool Wizard opens on the Select Disks screen.
• The RAID group you created is automatically selected and the RAID type is set to
Single
.
11. Click Next.
12. Configure the alert threshold.
QTS issues a warning notification when the percentage of used pool space is equal to or above the
specified threshold.
13. Click Next.
14. Click Create.
A confirmation message appears.
15. Click OK.
QTS creates the storage pool and then displays the information on the Storage/Snapshots screen.
Creating a Storage Pool on a Drive Adapter
1. Set the drive adapter to the RAID mode that you want using the device's hardware Mode switch.
2. Install the drive adapter in the NAS.
For details, see the drive adapter's hardware user guide.
3. Go to Storage & Snapshots > Storage > Storage/Snapshots .
4. Perform one of the following actions.
QTS 4.4.x User Guide
Storage & Snapshots
99