Use maintenance kit to ensure good connections, Connecting to lane modules – Daktronics OmniSport 2000 Timing Console User Manual
Page 24
6
Timing System Setup
Easy servicing is an additional benefit of on-deck
cabling. If one lane goes bad, the whole harness does
not have to be replaced; only that individual lane
module needs replacing. Simply remove and replace
with another Daktronics lane module.
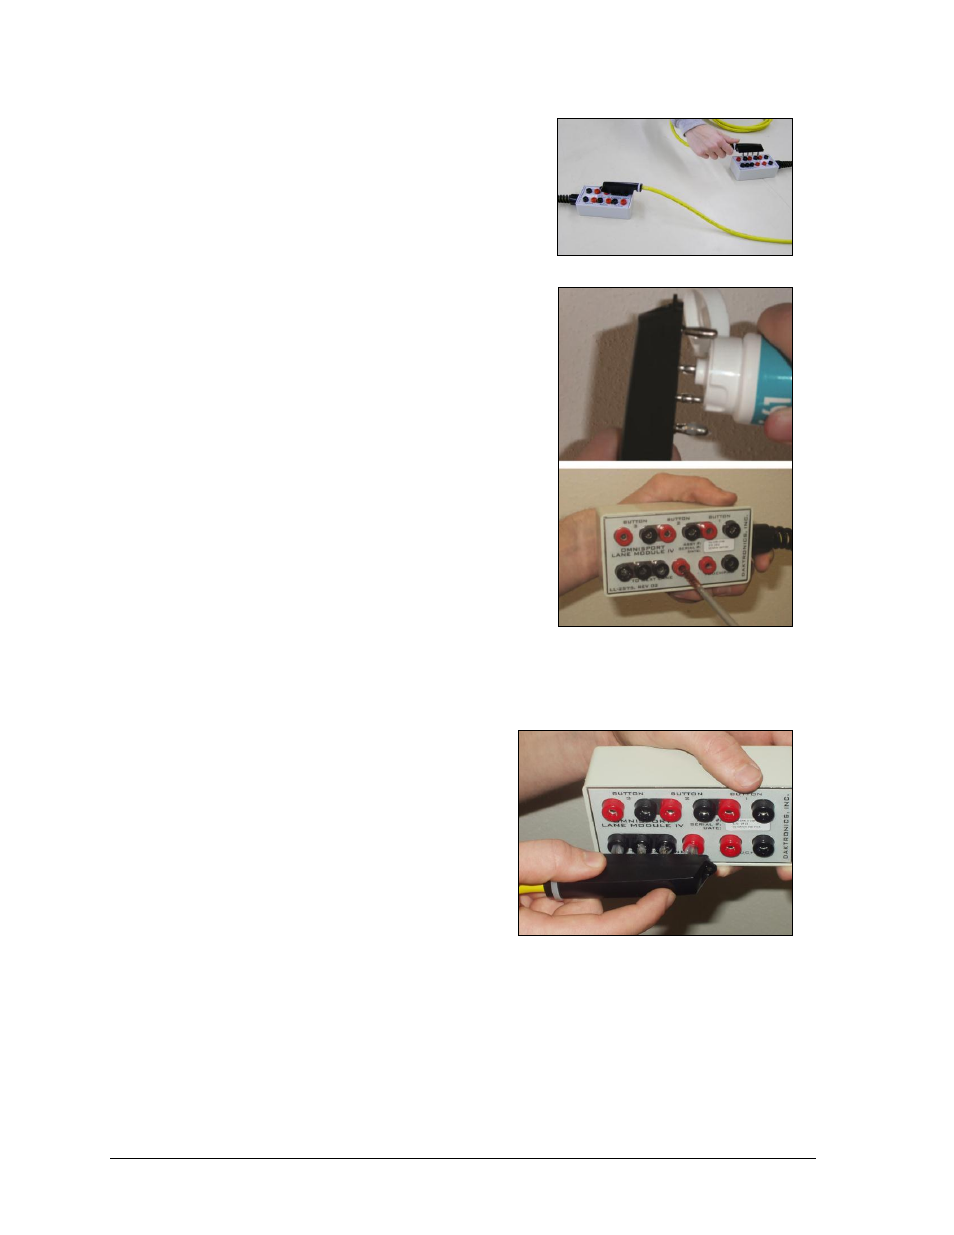
Use Maintenance Kit to Ensure Good
Connections
Use the brush provided in the kit to remove
any corrosion from the connections.
Use silicon lubricant every time the system is
set up and taken down to protect the jacks
and plugs. This will ensure a good connection
and reduce corrosion. Simply squeeze silicone
into the neck of the tube (Figure 12) and insert
male pins of banana connectors into the neck
to coat with silicone.
To order an OmniSport 2000 Console
Maintenance Kit (Daktronics part #
0A-1240-0003) call 1-800-DAKTRONICS.
Connecting to Lane Modules
Refer to Figure 13 to verify proper connection of the lane module to the touchpad, push
buttons and next lane connection. Refer to Figure 9 for an overview of a typical swimming
setup of lane modules with the timing system.
Note: Do not connect the far end lane
module harness into the near end lane
module harness. Each harness system
should connect to the OmniSport 2000
console separately. For more information on
how to connect to the timing console, refer
to Section 2.7.
Modules for each lane are connected
through the jacks labeled To Next Lane.
The lane cable will fit only one way.
Position lane modules so that they are out
of the way of the swimmers and are not directly submerged in water.
The lane module jack that connects to the touchpad is labeled Touchpad.
Figure 11: Daisy Chain Lane Modules
Figure 12: Silicone & Clean Module
Figure 13: Insert Lane Module to Next Lane