And figure 4-56 ), 4 - removal and re-installation – MagTek EC2000 99875607 User Manual
Page 81
4 - Removal and Re-installation
ExpressCard 2000| Instant Issuance Card Personalization System | Hardware Service Manual
Page 81
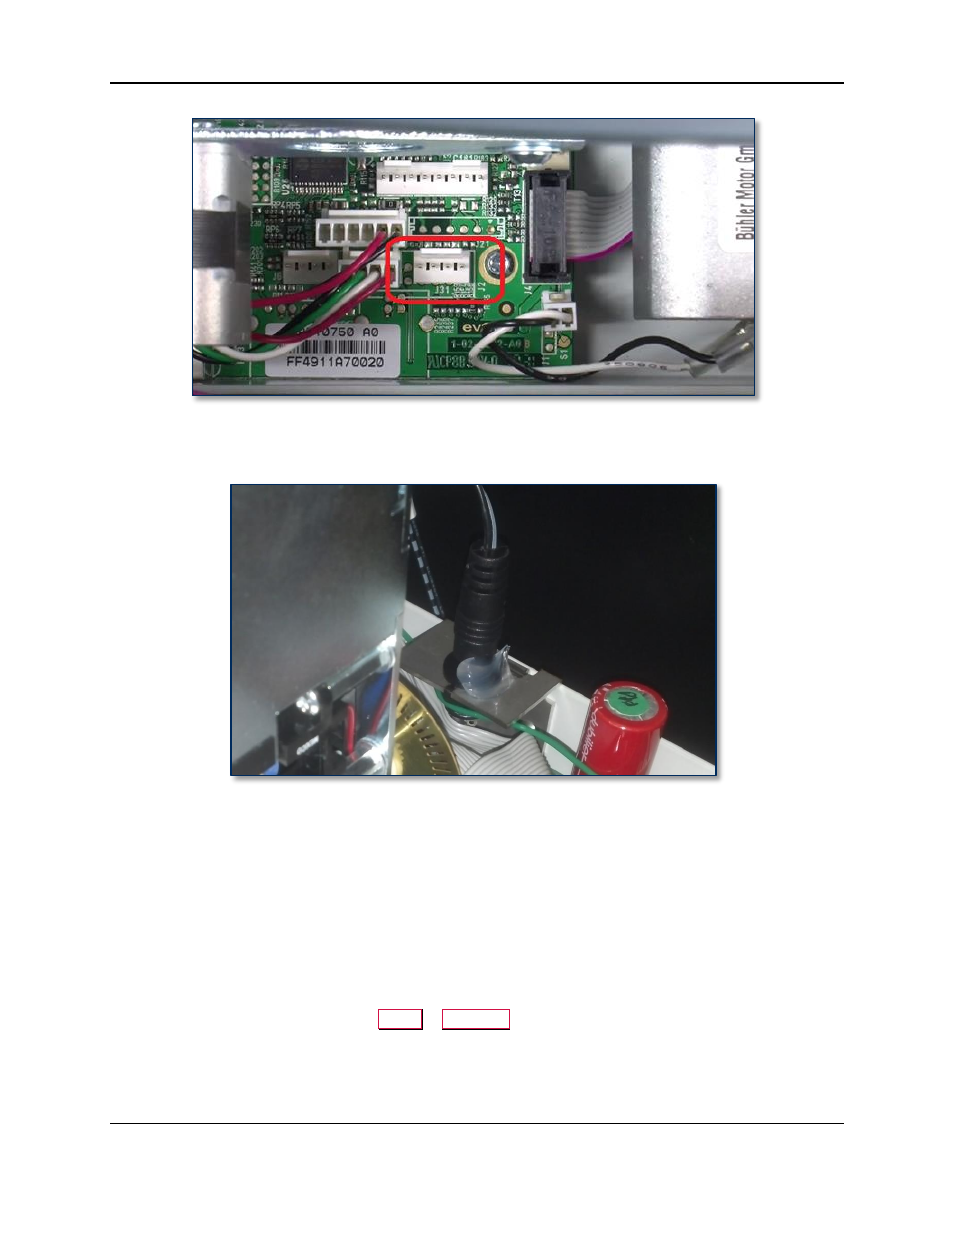
Figure 4-56 - Re-connect USB Cable to J31 (TOP VIEW FROM REAR)
6) Secure the power cable to its connector using a bead of silicone adhesive as shown in Figure 4-57.
Figure 4-57 - Silicone Adhesive On Image Printer Power Connector (FRONT RIGHT VIEW)
7) Re-attach the top access door by reversing the steps you used to lean it back.
8) Install the original printer ribbon, or obtain and install a new image printer ribbon from the customer.
9) Re-connect the power and network cables to the device and power it up.
10) Configure the image printer ribbon following the steps provided in 99875600 ExpressCard 2000
User Installation and Operation Manual.
11) Perform any relevant adjustments from section 5 Adjustments, notably section 5.6 How to
12) Close and secure the top access door.
13) From the touchscreen, navigate to
Menu
>
Samples
, create a sample card, and make sure the device
functions properly and the sample looks correct.