Figure 3-8, D figure 3-9 ), 3 - preventive maintenance – MagTek EC2000 99875607 User Manual
Page 41
3 - Preventive Maintenance
ExpressCard 2000| Instant Issuance Card Personalization System | Hardware Service Manual
Page 41
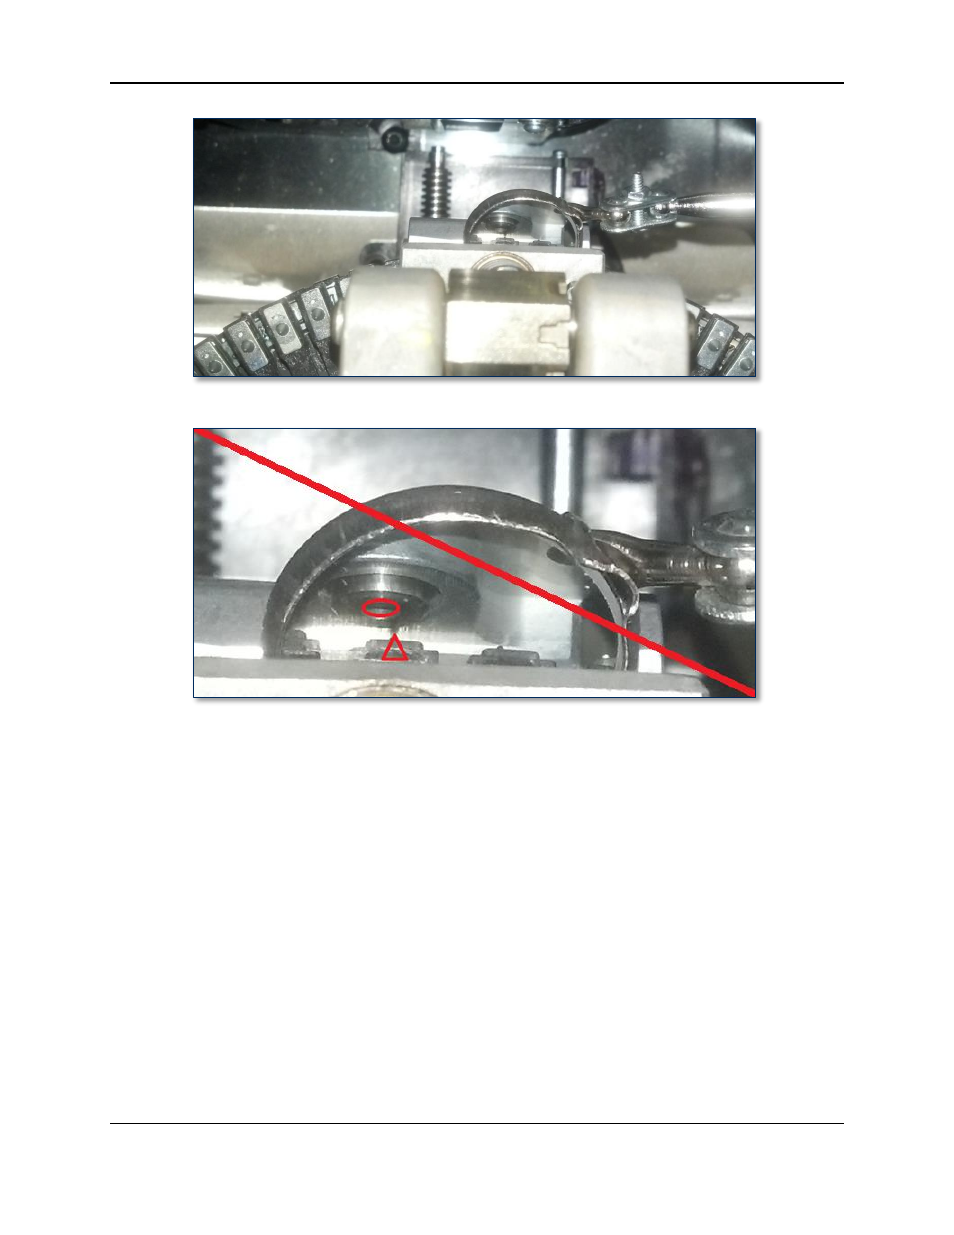
Figure 3-8 - Using Inspection Mirror to Check Tine / Hammer Alignment (TOP VIEW FROM FRONT)
Figure 3-9 - Bad Embosser Wheel Alignment (Figure 3-8 MAGNIFIED)
6) If any cones are broken or bent, replace the characters in the same location if possible. If replacement
is not feasible, cut off the top and bottom tines using the diagonal side cutters, remove the character
from the tines, and install it to another set of tines, and re-map the character to another tine after
preventive maintenance is complete and the device is powered up (see section 4.10 How to Remove /
Re-install Embosser Fonts and section 2.9.4 How to Use the Character Mapping Page).
7) Check the daisy wheel alignment by standing in front of the device and looking straight down at the
embosser. Use an inspection mirror as shown in Figure 3-8 so you can see the cone on the bottom of
the current character and the hole in the embosser hammer. Figure 3-9 shows a cone and hole that
are not properly aligned.
8) Check embossed character heights using the steps in section 5.4 How to Calibrate the Embosser,
and adjust them if necessary to account for normal wear. Pay special attention to any characters you
have replaced or re-mapped.