4 - removal and re-installation – MagTek EC2000 99875607 User Manual
Page 78
4 - Removal and Re-installation
ExpressCard 2000| Instant Issuance Card Personalization System | Hardware Service Manual
Page 78
3) Disengage and lean back the top access door by following the steps in section 4.2 How to Remove /
Re-install the Top Access Door up to the point where the top access door is leaning up and back
behind the device (Figure 4-3).
4) Remove the image printer ribbon and set it aside in a secure location or give it to the customer for
temporary storage or secure disposal.
5) Move the hopper transport away from the image printer, toward the front of the device (see section
2.8 How to Safely Move Transports By Hand).
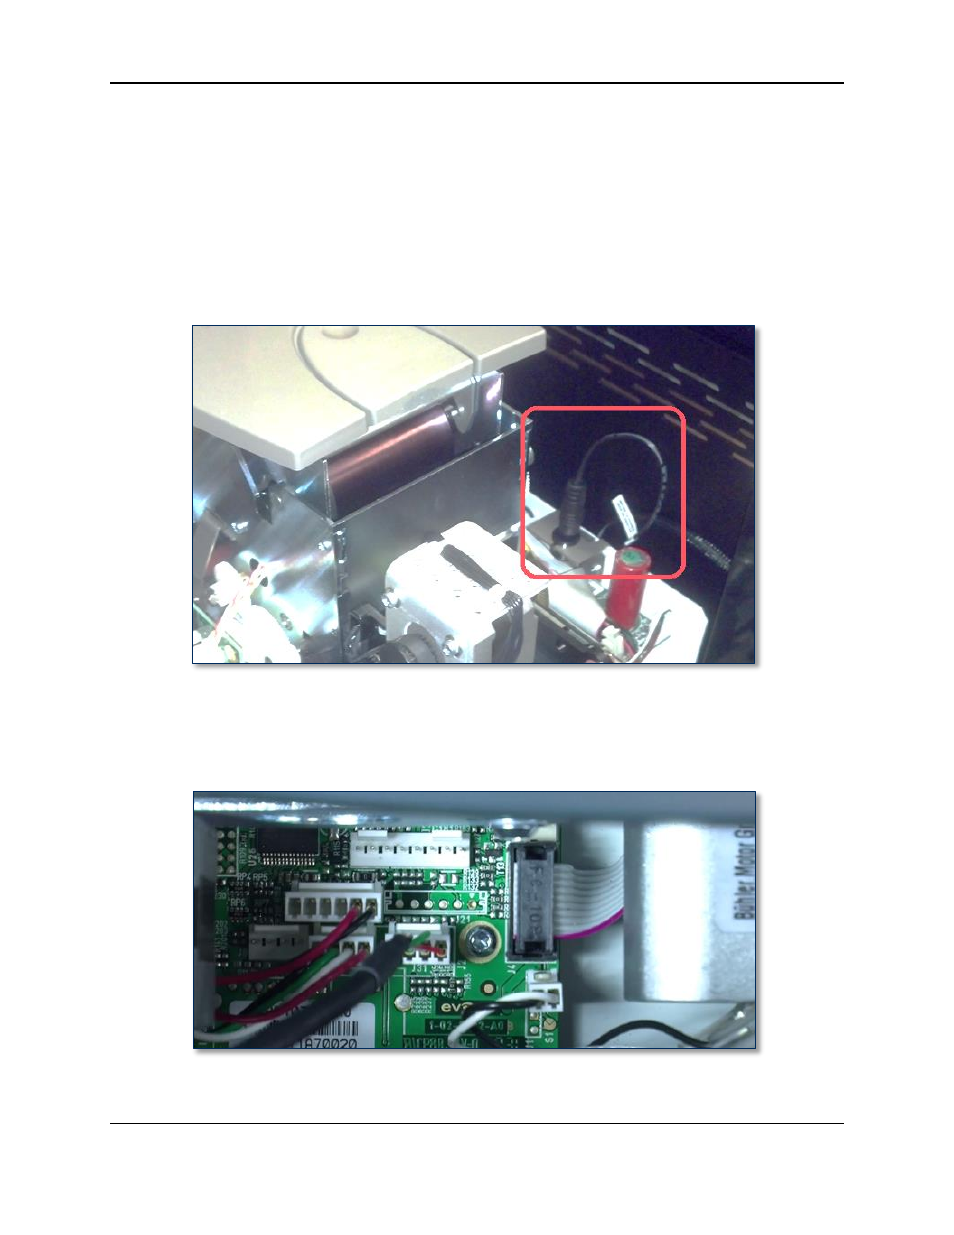
6) On the rear right side of the image printer, locate the power cable shown in Figure 4-52. Remove
any adhesive securing it to its connector, and disconnect it.
Figure 4-52 - Image Printer Power Connector (FRONT RIGHT VIEW)
7) From the power connector, look left across the rear wall of the EC2000, past a motor, to a circuit
board with several white connectors. Find connector J31 on the circuit board, and unplug the black
insulated cable from it (see Figure 4-53 and Figure 4-56). This is the image printer USB cable.
Figure 4-53 - Image Printer USB Cable Connected to J31 (TOP VIEW FROM REAR)