2 - introduction – MagTek EC2000 99875607 User Manual
Page 12
2 - Introduction
ExpressCard 2000| Instant Issuance Card Personalization System | Hardware Service Manual
Page 12
2.9 How to Use Maintenance Functions On the Touchscreen
This section explains how to use the maintenance functions on the EC2000’s touchscreen. Most of the
functions let you isolate the various subsystems during troubleshooting to determine the failure point, and
to verify repairs have corrected the problem.
To visually inspect the device while it is running, open the top access door and block the sensor mounted
to the rear left of the top access door track. For convenience, 33011008 ASM TOOL KIT,FIELD
SERVICE,EC2000 provides heat shrink tubing that fits snugly over the top access door sensor. Be sure
to put it back in your toolkit before closing the top access door.
To access most maintenance functions of the device using the touchscreen, do the following:
1) Press the
Menu
button to open the
Main Menu
page.
2) Press the
Settings
button to open the
Settings Menu
page. The
Settings Menu
page provides
access to user and service functions of the device, some of which require a password. If customers
have changed the passwords, request the new passwords from them. Otherwise the passwords will be
the factory defaults provided in the sections below.
3) Additional maintenance functions can be accessed from the
Settings Menu
page by pressing the
Service
button to open the
Service Menu
page. For example, you can use the Sensor Utility page
to view the status of the EC2000’s sensors, or use the
MCP Commands
page to move the various
parts of the EC2000 individually rather than as part of a standard sequence.
2.9.1 How to Use the MCP Commands Page
The move the various parts of the EC2000 individually rather than as part of a standard sequence, use the
touchscreen to navigate to
Menu
>
Settings
>
Service
>
MCP Commands
to open the
MCP
Commands
page. Note that the
MCP Commands
page may allow you to make moves that could
damage the device -- think carefully before sending a direct move command!
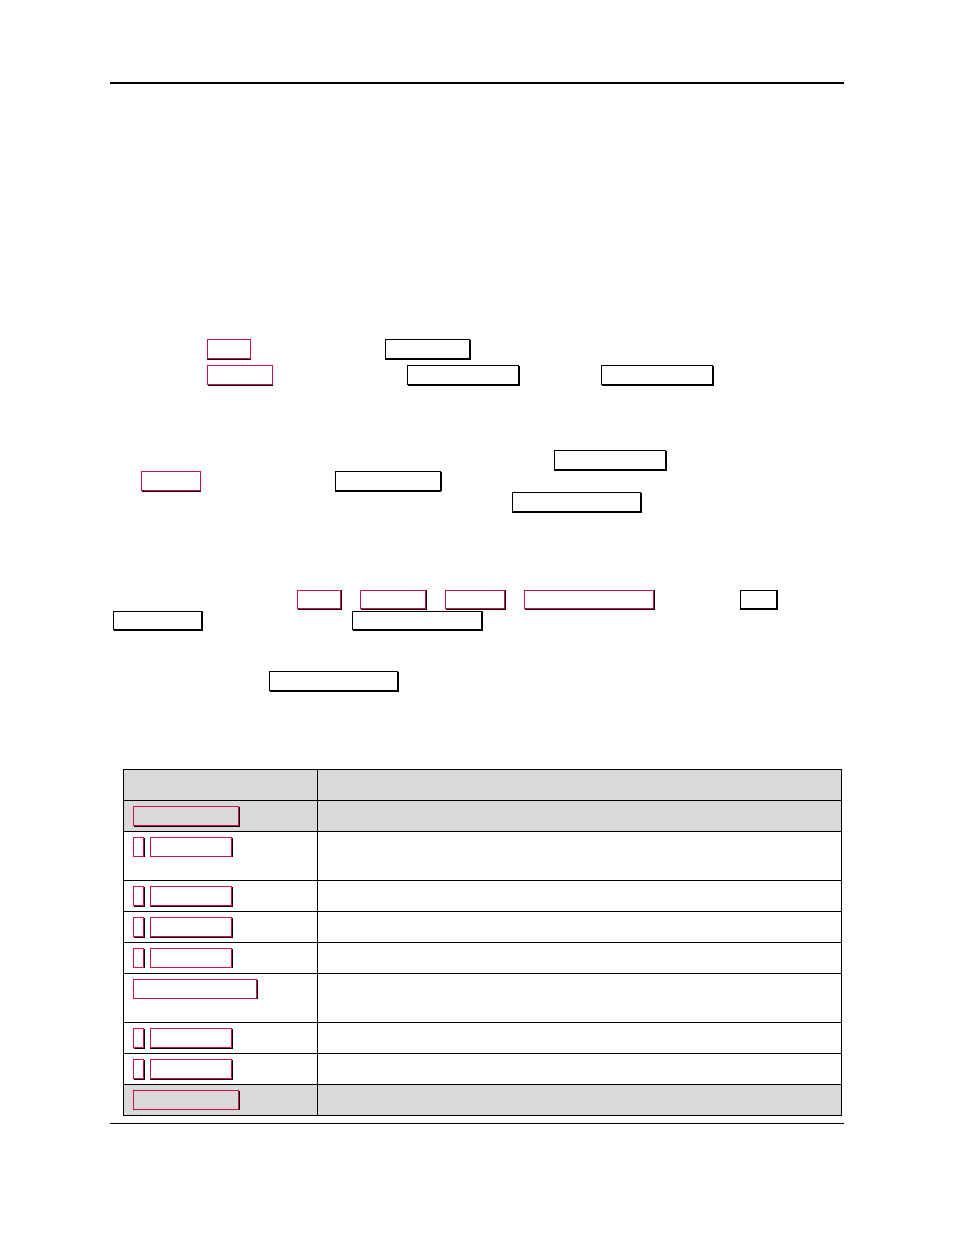
Table 2.1 provides an
MCP Commands
sequence that tests most subsystems by moving a card from
hopper 1 to the output bin. You can test by pressing each button in the list and verifying the described
action happens correctly. The gray highlighted lines make up a shorter sequence that does the same thing.
Table 2.1 - Controller Buttons and Corresponding Movements
Press This Button
Verify This Happens
Pusher Home
Hopper transport’s pusher moves into safe position for move
8
To Hopper
Hopper transport moves to (or stays at) manual feed slot, slot light
flashes
7
To Hopper
Hopper transport moves to (or stays at) hopper 1, slot light stops flashing
6
To Hopper
Hopper transport moves to (or stays at) hopper 1
5
To Hopper
Hopper transport moves to (or stays at) hopper 1
To Manual Feed
Hopper transport moves to (or stays at) manual feed slot, slot light
flashes
4
To Hopper
Hopper transport moves to (or stays at) hopper 1
3
To Hopper
Hopper transport moves to (or stays at) hopper 1
Shuttle Home
Hopper transport moves near hopper 1