Assigning a trace – Rockwell Automation 7000 PowerFlex Medium Voltage AC Drive (B Frame) - ForGe Control (PanelView 550) User Manual
Page 234
234
Rockwell Automation Publication 7000-UM151E-EN-P - January 2013
Chapter 5 Drive Programming and Parameters
If a defined trigger is currently “Stopped”, re-start it by pressing [F7]. If the status
is “Running”, you can force the trigger to occur by pressing [F2]. Note that in
doing so, that the trigger condition does not actually occur, but the drive buffers
all data for viewing as if the condition has occurred.
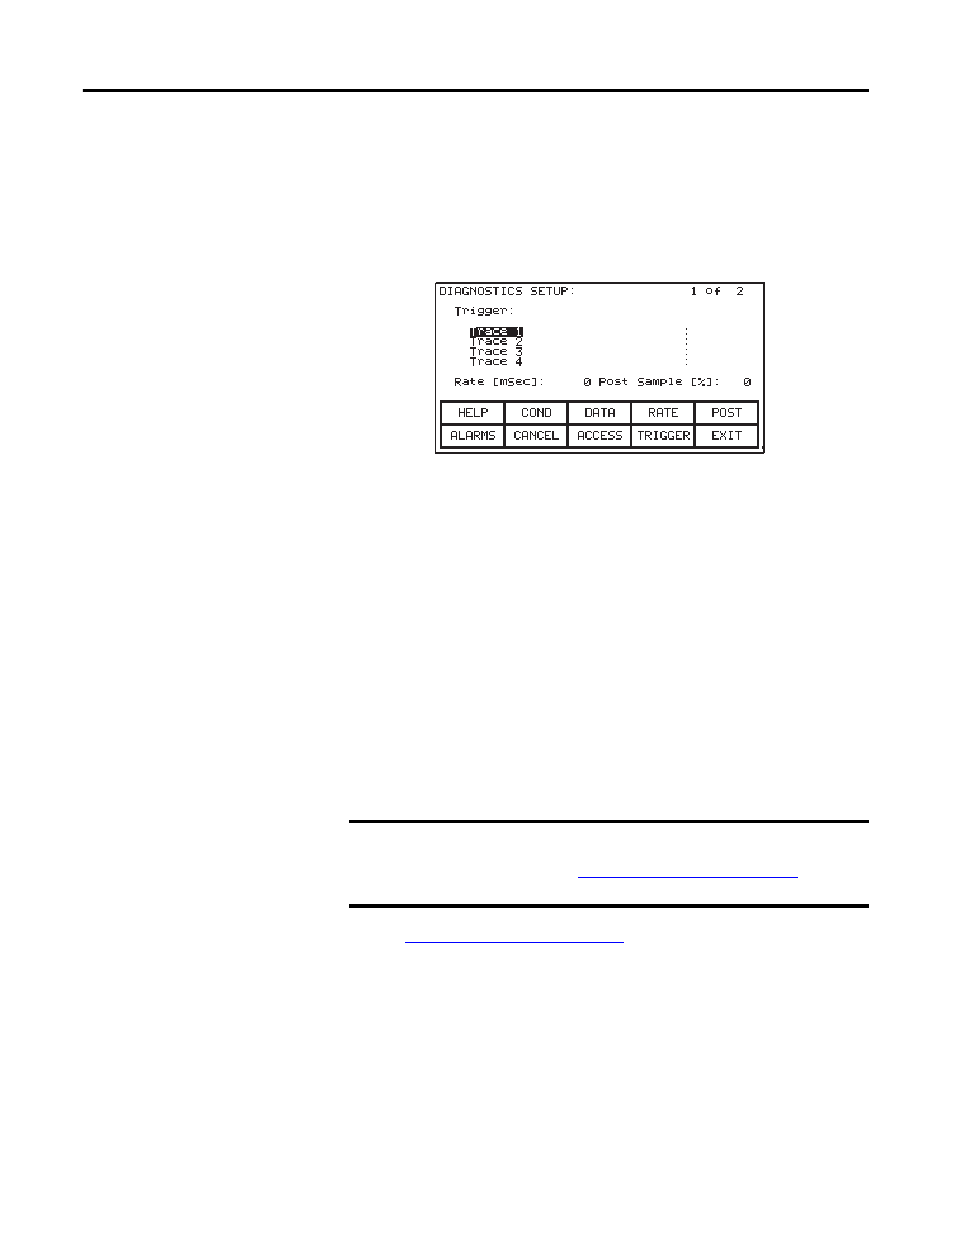
To define a trend, press [F8] to open the configuration screen.
Figure 223 - Diagnostics setup
From this screen, assign tags to a trace. The tag which you assign to the first trace
'Trace 1' becomes the trigger parameter.
By default, when assigning a tag to Trace 1, the trigger value (i.e. data) is the tag's
minimum value and the trigger condition is 'equal to'. Assign a tag to Trace 1
before defining the trigger value or condition. Use this screen to configure the
interval between samples (i.e. Rate), and the trigger point location within the
view buffer. By default, the trigger occurs in the middle of the buffer; change this
by indicating the percentage of samples that follow (i.e. Post) the trigger point.
Assigning a Trace
To assign a tag to a trace, use
▲
or
▼
to select a trace from the list and press
[Enter].
Selecting a Parameter on page 205
for more information on selecting
options.
IMPORTANT To edit ANY parameter, you must have an access level above 'Monitor'.
Press [F8] and enter the appropriate PIN to access and modify drive
parameters. Refer to
Configuring Access Levels on page 210
for more
information on access security.