Maintenance informations – JLG X23J - X700AJ Service Manual User Manual
Page 46
SECTION 3 - CHASSIS & TURNTABLE
3121448
– JLG Lift –
3-19
FIRST START UP AND RUNNING IN
In this first stage it is advised to follow the measures given
below.
11. Bleed air from every part of the hydraulic circuit and
add oil in the tank if necessary.
INFORMATION
THE PRESENCE OF RESIDUAL AIR IN THE HYDRAU-
LIC CIRCUIT WILL MANIFEST ITSELF WITH THE
PRESENCE OF FOAM IN THE TANK AND WILL LEAD
TO A JERKING OF THE MOTOR AS WELL AS EXCES-
SIVE NOISE COMING FROM THE MOTOR AND THE
VALVES.
12. Start the gearmotor at a low speed and gradually
increase it after having verified that it is functioning
correctly without any noises or vibrations.
INFORMATION
DO NOT REACH MAXIMUM PRESSURE UNLESS THE
ENTIRE SYSTEM HAS BEEN FILTERED TO ELIMI-
NATE ANY PARTICLES OF DIRT THAT MAY BE PRES-
ENT.
During the running-in stage follow the steps given below.
13. Make sure that the speed and direction of rotation
are correct.
14. Make sure that the functioning is regular and without
any excessive noises and vibrations.
15. Make sure that the oil temperature does not exceed
60°C.
After having terminated this first running-in, follow the
steps given below.
16. Check that there are no oil leakages. If present, pro-
ceed to remove them.
17. Check that there are no other problems in general.
MAINTENANCE INFORMATIONS
PERIODIC MAINTENANCE
The gearmotor only requires the scheduled maintenance
procedures set out by the manufacturer (see Table
below).
Good maintenance will ensure an on going functioning in
time as well as maximum reliability.
Should irregularities in function arise, it will be necessary
to consult the troubleshooting checklist to find the most
adequate solution.
If unsuccessful, it may be necessary to disassemble par-
tially or completely the motor gearbox.
Table 3-4.
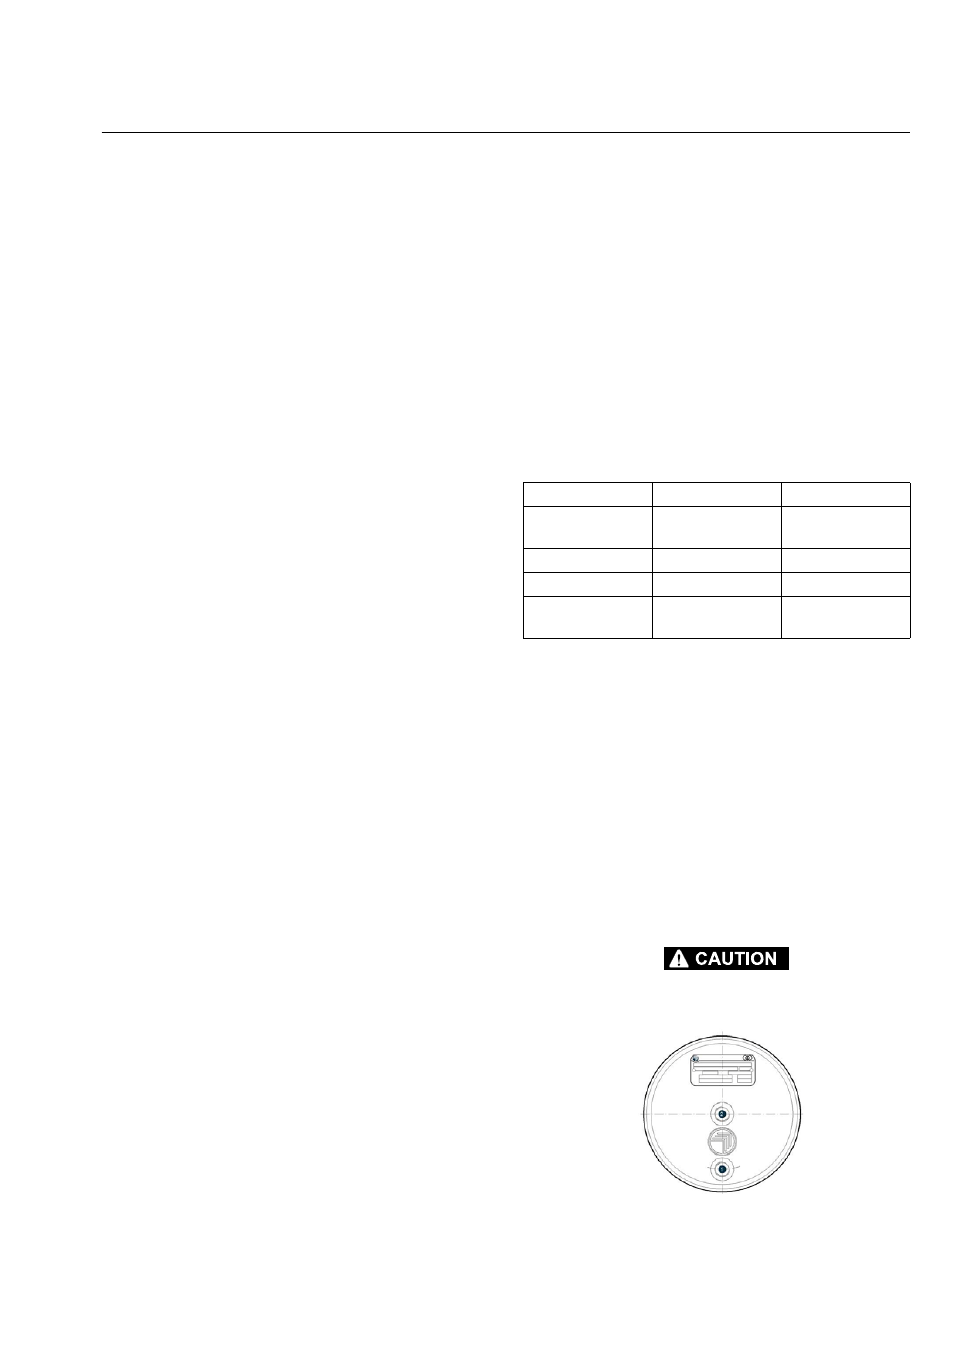
CHANGING THE LUBRICATING OIL
1. Place a large enough container (about 1 litre) under
the oil drain plug.
2. Unscrew the plug (2).
3. Unscrew the oil drain plug (1) and allow the oil to
drain. To facilitate the draining operation, it is better
to work with hot oil.
4. Wait a few minutes until all the oil is drained and
than proceed to screw on drain plugs (1-2).
5. Proceed with the oil fill-up following the procedures
given.
DO NOT DISPOSE OF THE OIL IN THE NATURAL ENVIRONMENT
BUT BE CAREFUL TO ELIMINATE IT IN COMPLIANCE WITH THE
RELATIVE RULES AND REGULATIONS THAT GOVERN LOCALLY.
Inspection
Frequency
Action
Tightening screws After the first 50
hours
Screws tighening
torque check
Oil level
Every 100 hours
Refill oil
1st oil change
At 150 hours
Oil replacement
Following oil
changes
Every 100 hours or
1year
Oil replacement