JLG X23J - X700AJ Service Manual User Manual
Page 371
SECTION 3 - CHASSIS & TURNTABLE
3-344
– JLG Lift –
3121448
INSTALLATION PROCEDURE
KEEP ALL PARTS CLEAN FROM CONTAMINANTS. CONTAMI-
NANTS MAY CAUSE RAPID WEAR AND SHORTENED COMPONENT
LIFE.
NOTE: The two cylinder, the three cylinder and the four cyl-
inder engines have different exhaust manifolds. The
installation procedure is similar for all models.
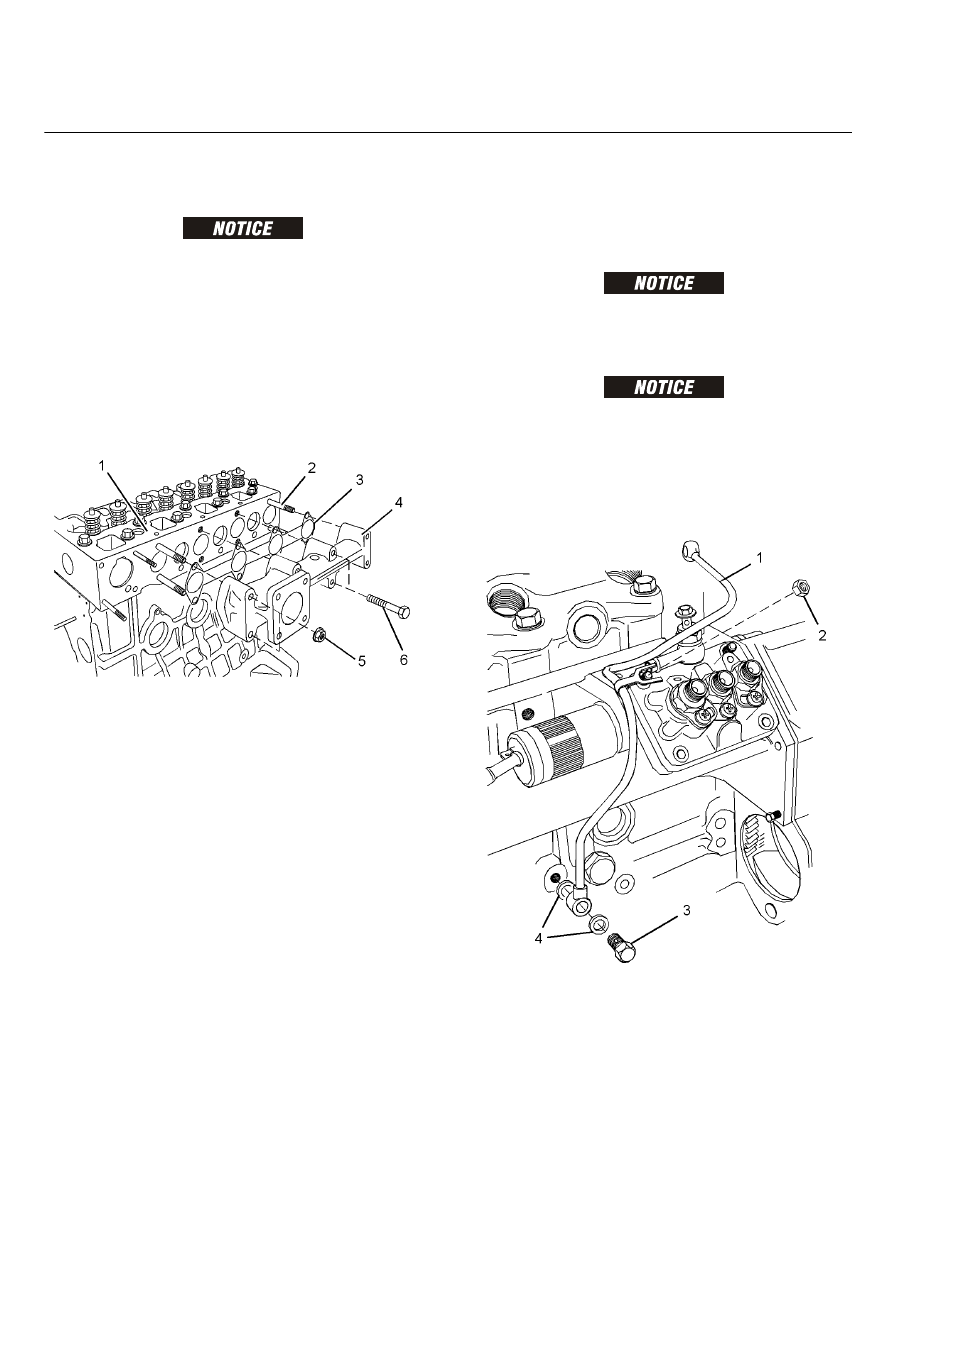
6. Ensure that the mating surfaces of the cylinder head
and the exhaust manifold are clean and free from
damage.
7. If necessary, install exhaust manifold studs (2) to cyl-
inder head (1).
8. Install a new exhaust manifold gasket (3) to cylinder
head (1).
9. Align exhaust manifold (4) with studs (2) and install
the exhaust manifold to cylinder head (1).
NOTE: Note: Ensure that the exhaust manifold is installed in
the correct orientation.
10. Install nuts (5) and bolts (6) finger tight.
NOTE: Note: Ensure that bolts of different lengths are
installed in the correct positions.
11. For 402D-05, 403D-07, 403D-11, 403D-15, 403D-
15T, 403D-17, and 404D-15 engines, tighten nuts (5)
and bolts (6) to a torque of 10 N·m (89 lb in).
NOTE: On three cylinder engines and four cylinder engines,
tighten the inner bolts first.
End By:
a. If the engine is equipped with a turbocharger,
install the turbocharger. Refer to Disassembly
and Assembly, “Turbocharger, Remove and
Install”.
ENGINE OIL LINE - REMOVE AND INSTALL
REMOVAL PROCEDURE
KEEP ALL PARTS CLEAN FROM CONTAMINANTS. CONTAMI-
NANTS MAY CAUSE RAPID WEAR AND SHORTENED COMPONENT
LIFE.
CARE MUST BE TAKEN TO ENSURE THAT FLUIDS ARE CON-
TAINED DURING PERFORMANCE OF INSPECTION, MAINTE-
NANCE, TESTING, ADJUSTING AND REPAIR OF THE PRODUCT.
BE PREPARED TO COLLECT THE FLUID WITH SUITABLE CON-
TAINERS BEFORE OPENING ANY COMPARTMENT OR DISASSEM-
BLING ANY COMPONENT CONTAINING FLUIDS. DISPOSE OF ALL
FLUIDS ACCORDING TO LOCAL REGULATIONS AND MANDATES.
1. Loosen nut (2) that attaches the clip on oil line (1) to
the fuel injection pump.
2. Remove banjo bolt (3) and remove washers (4) from
the cylinder block.