Adobe Premiere Pro CS6 User Manual
Page 457

Such adjustments can simulate real-world motion. For example, you can change the motion of a clip so that it slows down just before a keyframe
and then speeds up just after the keyframe. You can control the values approaching and leaving a keyframe together, or you can control each
value separately.
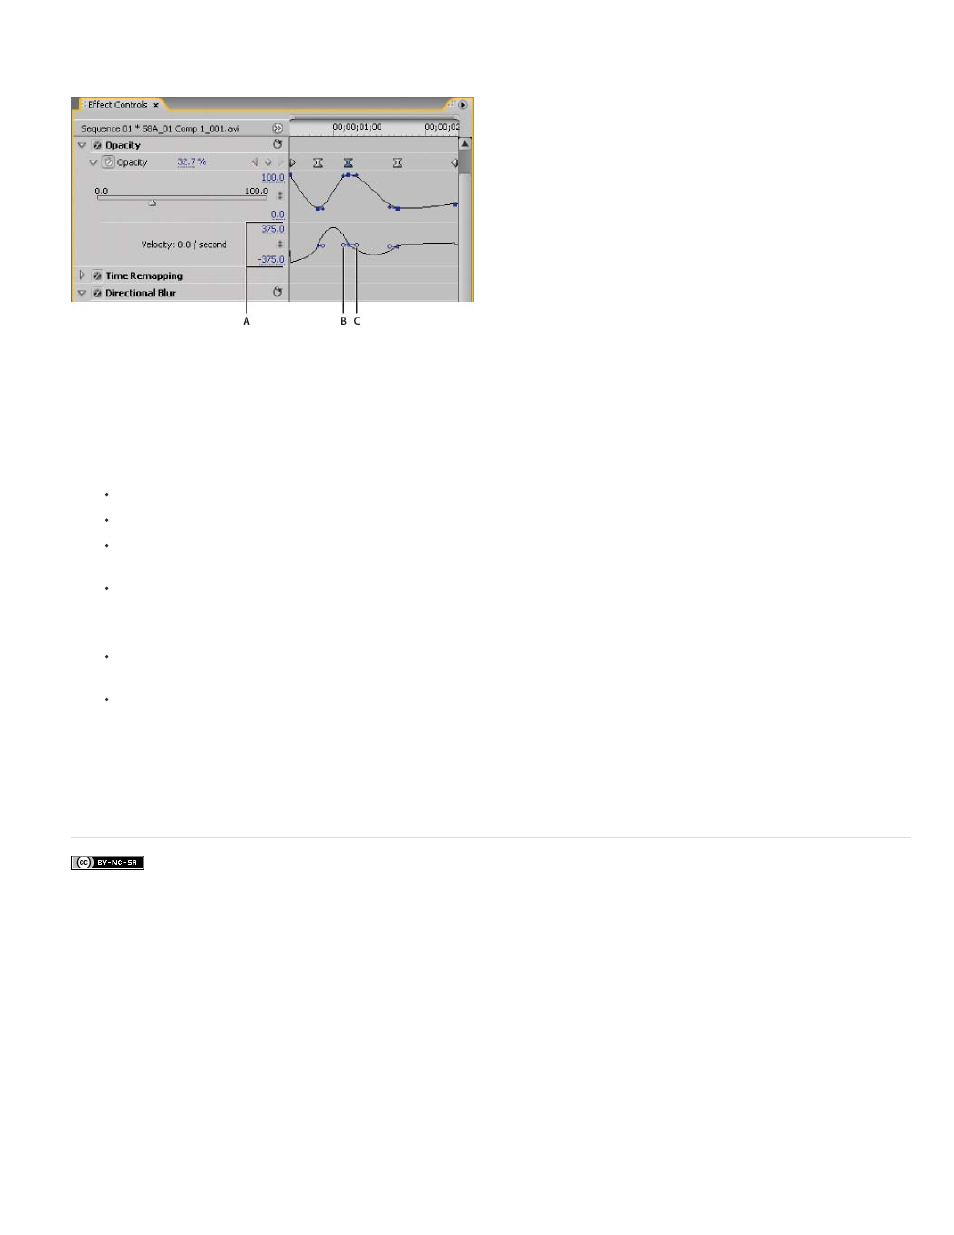
Velocity graph
A. Speed controls B. Incoming direction handles C. Outgoing direction handles
1. In the Effect Controls panel, click the triangle to expand the effect property with keyframes that you want to adjust.
Note: If no keyframes have been added, the graphs appear as flat lines.
2. In the Value graph, use the Selection or Pen tool to click the keyframe marker for the keyframe you want to adjust. This displays the
direction handles and speed controls for the keyframe in the Velocity graph.
3. In the Velocity graph, use the Selection or Pen tool to do one of the following:
To accelerate entering and leaving the keyframe, drag a direction handle up. Both the incoming and outgoing handles move together.
To decelerate entering and leaving the keyframe, drag a direction handle down. Both the incoming and outgoing handles move together.
To accelerate or decelerate entering the keyframe only, Ctrl-click (Windows) or Command-click (Mac OS) the incoming direction handle
and drag it up or down.
To accelerate or decelerate leaving the keyframe only, Ctrl-click (Windows) or Command-click (Mac OS) the outgoing direction handle
and drag it up or down.
Note: To rejoin the incoming and outgoing handles, Ctrl-click (Windows) or Command-click (Mac OS) them again.
To increase or decrease the influence of a keyframe value on the previous keyframe, drag the incoming direction handle to the left or
right.
To increase or decrease the influence of a keyframe value on the next keyframe, drag the outgoing direction handle to the right or left.
Note: Influence determines how quickly the Velocity graph reaches the value you set at the keyframe, giving you an additional degree of
control over the shape of the graph.
The values (to the left of the Velocity graph) change as you adjust the graph. These numbers represent the upper and lower values of the
Velocity graph. You can also adjust the velocity by changing the numeric values.
More Help topics
453
