Organizing assets in the project panel – Adobe Premiere Pro CS6 User Manual
Page 150

Organizing assets in the Project panel
Working with bins
Label assets
Rename assets
Jump to an asset in the Project panel
Find assets in the Project panel
Find assets matching criteria
Finding clips with Face Detection
Remove assets from a project
Define a different thumbnail for clips
Edit cells in the Project panel
Viewing clip properties
Viewing field order for clips
Determining if a clip has interlaced or progressive scanning
Change the frame rate of clips
Working with bins
The Project panel can include bins, which you can use to organize project contents in much the same way as folders in Windows® Explorer or
Mac OS® Finder. Bins can contain source files, sequences, and other bins.
As your project grows, you can make new bins to contain those items. While it is not absolutely necessary to create and use bins (especially with
short-form projects), most editors find them indispensable for staying organized.
You may want to use bins in the following ways:
To store offline clips for batch capture.
To store main sequences and backup sequences.
To organize files by type, such as video, still images, and audio files.
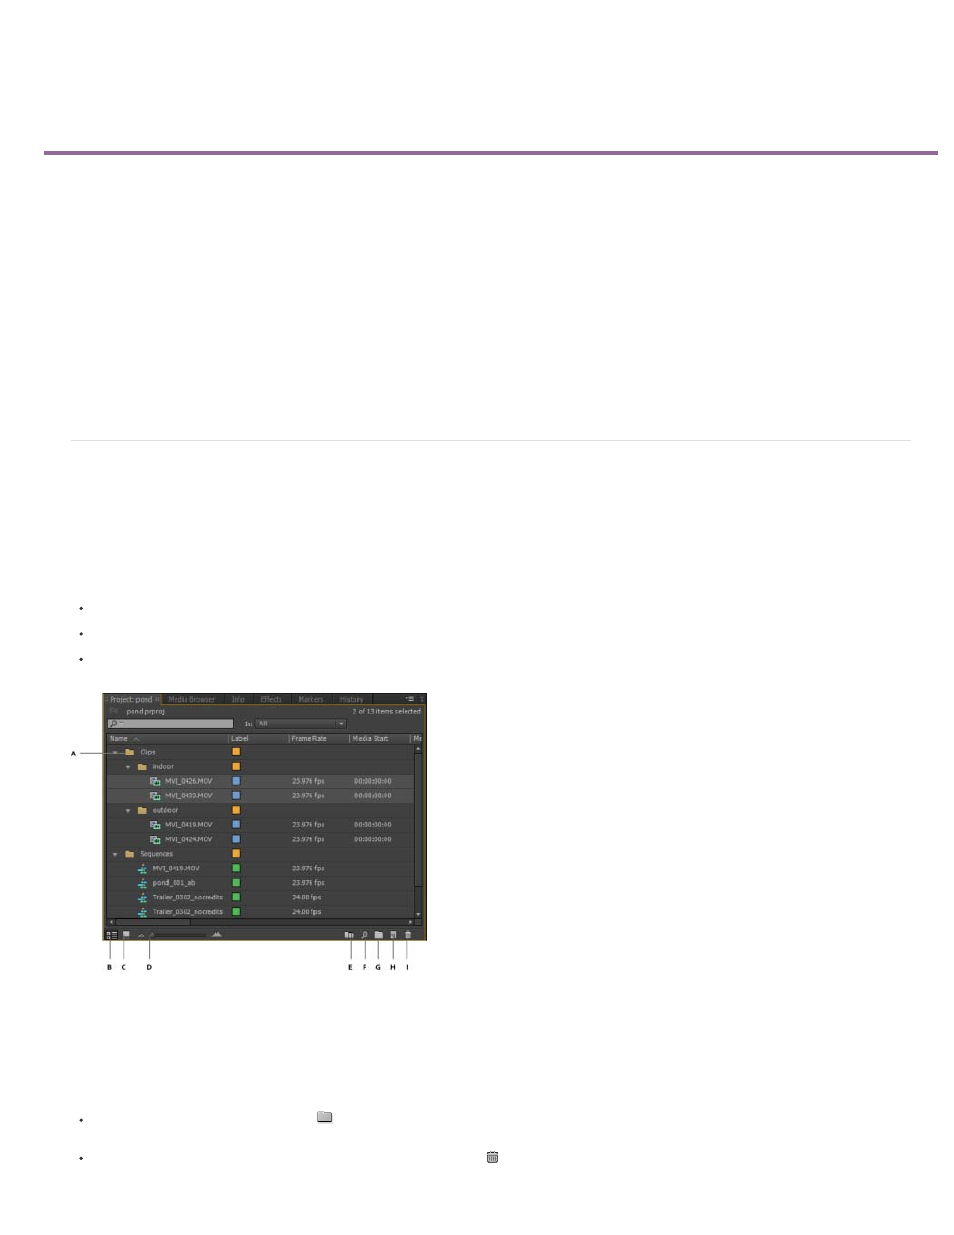
A. Bin in a bin B. List view C. Icon view D. Zoom slider E. Automate to sequence F. Find G. New bin H. New item I. Clear
These are the default behaviors of bins in the Project panel. You can change the last three bin default behaviors by editing bin behavior in general
preferences.
To learn more about working with bins, see the video tutorial, Enhanced Bins In Premiere Pro CS3, on the
Adding and deleting bins
To add a bin, click the New Bin button
at the bottom of the Project panel. You can also use the keyboard shortcut Control+/ (Windows) or
Command+/ (MacOS).
To delete one or more bins, select the bins and click the Delete icon at the bottom of the Project panel. You can also delete bins by
146
