Adjust luminance using levels, Adjust, Luminance using levels – Adobe Premiere Pro CS6 User Manual
Page 360

Black Output slider
White Output slider
6. Do one of the following to make curve adjustments:
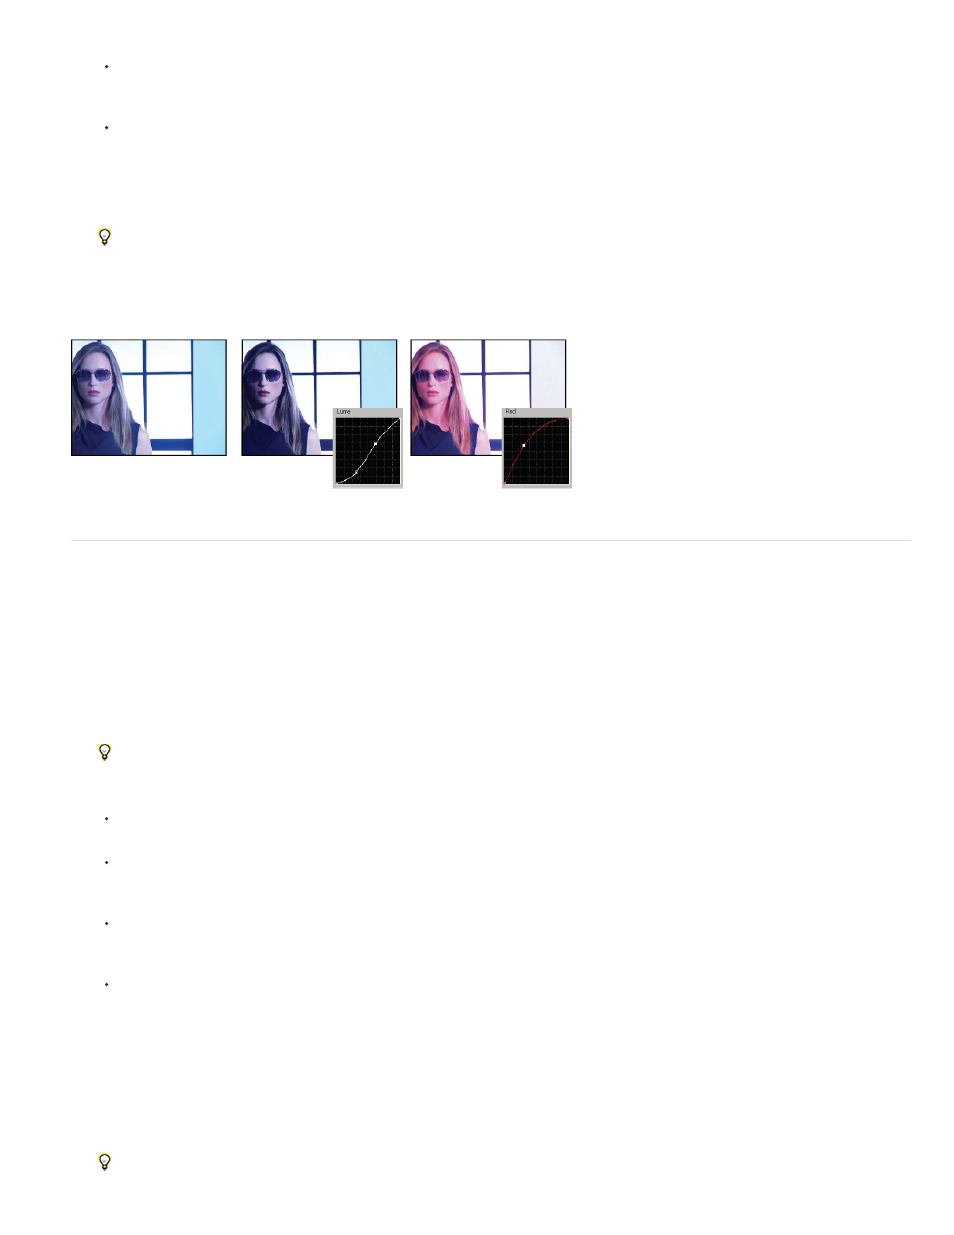
To adjust the luminance, click to add a point on the Luma or Master graph and drag to change the shape of the curve. Bowing the curve
upward lightens the clip and bowing the curve downward darkens the clip. The steeper sections of the curve represent portions of the
image with greater contrast.
To adjust both the color and luminance using the RGB Curves effect, click to add a point on the appropriate graph to adjust all color
channels (Master), the red channel, the green channel, or the blue channel. Drag to change the shape of the curve. Bowing the curve
upward lightens the pixel values and bowing the curve downward darkens the pixel values. The steeper sections of the curve represent
portions of the image with greater contrast.
You can add a maximum of 16 points to the curve. To delete a point, drag it off the graph.
As you make adjustments, watch carefully for banding, noise, or polarization in the image. If you notice any of these, reduce the value
you are adjusting.
Jeff Sengstack explains how to adjust color channels using RGB Color Corrector and RGB Curves effects
tutorial -- Premiere Pro: Color Correction and Enhancement.
Original image (left), adjusting luminance (center), adjusting color (right)
Adjust luminance using levels
The Fast Color Corrector and the Three-way Color Corrector effects have Input Levels and Output Levels controls to adjust the luminance in a
clip. The controls are similar to the ones in Photoshop’s Levels dialog box. In the Fast Color Corrector effect, control settings are applied to all
three color channels in a clip. The Three-way Color Corrector effect lets you apply the levels adjustments to the entire tonal range in the clip, a
specific tonal range, or specific range of colors.
1. (Optional) Set up your workspace for color correction. When adjusting luminance, it might be best to view the YC Waveform in a Reference
Monitor ganged to the Program Monitor.
2. In the Effects panel, click the triangle to expand the Video Effects bin, and then click the triangle to expand the Color Correction bin.
3. Drag the Fast Color Corrector effect or the Three-way Color Corrector to the clip in a Timeline panel.
If the clip is already selected in a Timeline panel, you can drag the effect to the Video Effects area of the Effect Controls panel.
4. In the Effect Controls panel, click the triangle to expand the Fast Color Corrector or Three-way Color Corrector controls.
5. (Optional) Do any of the following to set preview options:
To view only the luminance values in a clip, choose Luma from the Output menu. This option only affects the preview in the Program
Monitor, it doesn’t remove the color from the video.
To display a before and after view of the clip in one monitor, select the Show Split View option. You can specify whether the split view is
horizontal or vertical by choosing from the Layout menu. You can also adjust the relative proportion of the before and after views.
6. (Optional for the Three-way Color Corrector only) Do any of the following:
To restrict your correction to a specific tonal range, choose Shadows, Midtones, or Highlights from the Tonal Range menu. Choosing
Master applies correction to the entire tonal range of the image. If necessary, use the Tonal Range Definition controls to define the
different tonal ranges.
To restrict your adjustments to a color or range of colors, click the triangle to expand the Secondary Color Correction controls. Define the
color or color range using the Eyedropper tool, slider controls or enter numeric values. See also
Specify a color or range of colors to
.
7. Use the Output Levels slider controls to set the maximum black and white levels:
Controls the resulting output of the shadows. The default is 0, where the pixels are completely black. Moving the slider
to the right specifies a lighter value for the darkest shadow.
Controls the resulting output of the highlights. The default is 255, where the pixels are completely white. Moving the
slider to the left specifies a darker value for the brightest highlight.
If the YC Waveform is displayed in a Reference Monitor, adjust the Black Output and White Output sliders so the maximum black and
356
