Adobe Premiere Pro CS6 User Manual
Page 228
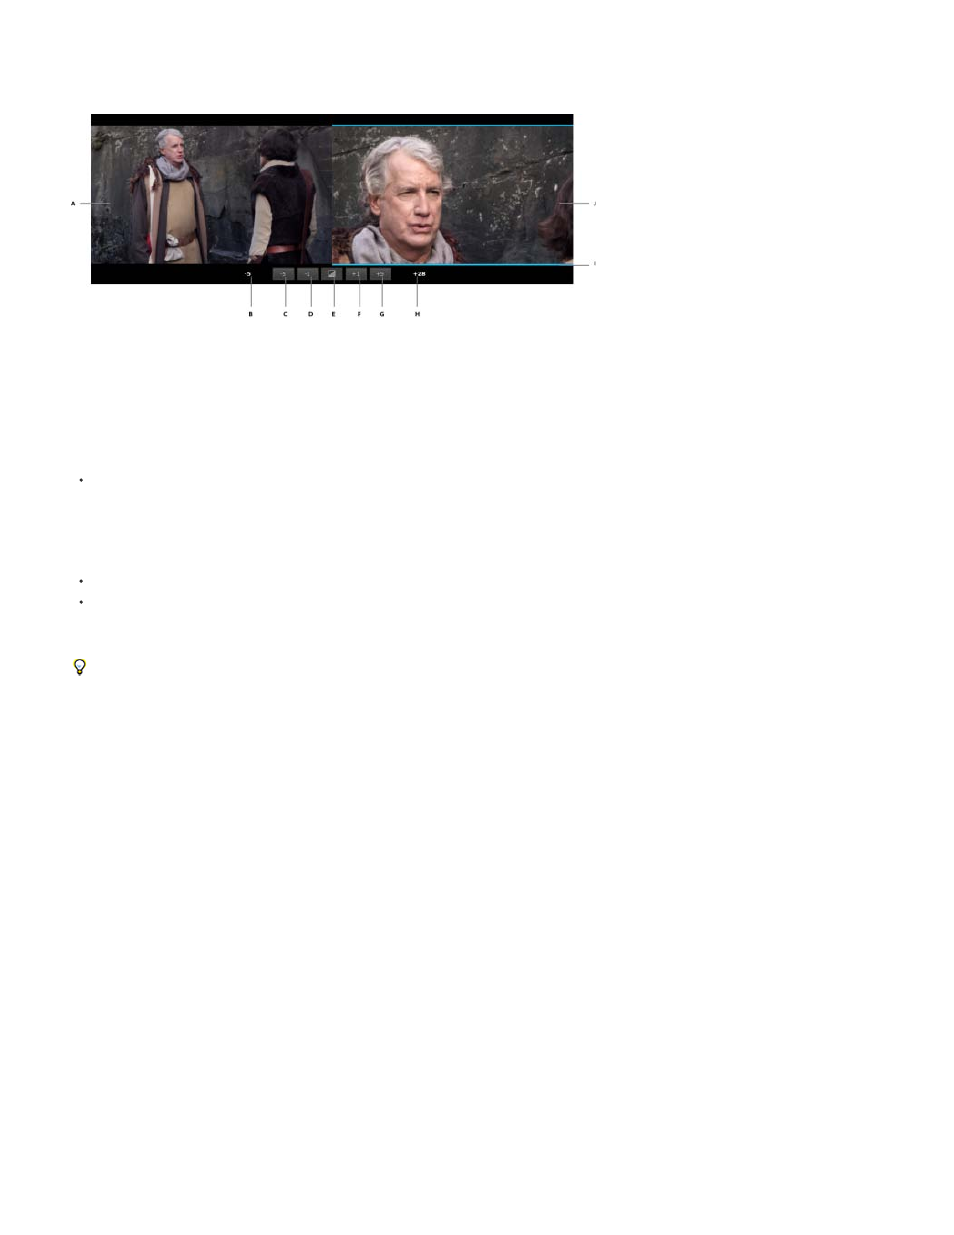
video view. The trim buttons and shift counters are placed directly below the video. All of the sequence's video tracks are composited together and
the audio heard during playback is all of the sequence's audio tracks mixed together. The playhead loops in the Timeline during playback so that
you can see the range of time that is being played.
A. Outgoing edit point B. Outshift counter C. Trim backward many D. Trim backward E. Add default transition F. Trim forward G. Trim forward
many H. Inshift counter I. Trim type Indicator J. Incoming edit point
Entering trim mode
Prior to entering trim mode, a good strategy is to select one or more edit points with a trim tool in the Timeline. These selected edits remain intact
once you enter trim mode. You can also enter trim mode without selecting edits ahead of time.
To enter trim mode, do one of the following:
Choose Sequence > Trim Edit (or press the T key).
If there is an active edit point selection, the playhead moves to the nearest selected edit point. If there is no edit point selected, then the
playhead automatically moves to the nearest edit point on the targeted tracks. Edit points are selected on the targeted tracks with the trim
type set to a rolling edit regardless of the currently active tool. If the Program Monitor is already in trim mode, then press the T key to toggle
out of trim mode.
Double-click an edit point with the Selection, Ripple Edit, or Rolling Edit tools in the Timeline.
Shift-select, or marquee
selected edit point and setting the Program Monitor to trim mode with the tool's trim type.
You can now trim clips in trim mode. To begin trimming, see
.
When double-clicking an edit point that has already been selected, be sure to use the same tool and same modifier keys that you used to
initially select the edit point, since the first click reselects the edit point based on the standard selection rules. The Program Monitor appears in
trim mode automatically.
In the Timeline, you can select additional edit points within the same sequence and remain in trim mode. You can also make changes in the
Timeline such as zooming in/out, scrolling, or changing track height, and remain in trim mode. If you are already in trim mode, you can use the
keyboard shortcuts for Go to Next Edit Point and Go to Previous Edit Point and select new edit points and remain in trim mode. If you are not in
trim mode, then these shortcuts move the playhead rather than select edit points.
Reviewing trims
To review the currently applied trims while the edit point selection is still active and you are in trim mode, press the Play button, or the Spacebar.
The playback loops around the current edit point selection, playing from a specified prerolling time before the first edit point and ending a specified
postrolling time after the last edit point. The prerolling and postrolling settings are set in Edit > Preferences > Playback (Windows), or Premiere Pro
> Preferences > Playback (Mac OS).
To stop playback, press the Play button or keyboard shortcut again, and the playhead is moved to the selected edit point nearest wherever you
stop.
J-K-L dynamic trim
When in trim mode, you can use combinations of the three shuttle keyboard shortcuts (J-K-L) to play the clips and perform a trim based on the
location of the playhead when playback stops. For details about using keyboard shortcuts for shuttling, see
The type of the edit point at the playhead is used to determine which side is played. For Ripple Out or Trim Out, the left side view is played. For
Ripple In or Trim In, the right side view is played. For a rolling edit, both sides are played.
If you reach the media limit of the trim (no more heads or tails), playback pauses but the trim is not performed until you explicitly stop playback
with the Shuttle Stop shortcut. This technique allows you to play back or single
frame for the trim.
224