Adobe Premiere Pro CS6 User Manual
Page 455

Controlling effect changes using keyframe interpolation
About interpolation
Change the keyframe interpolation method
Control change using Bezier keyframe interpolation
Fine-tune the speed of an effect
About interpolation
Interpolation is the process of filling in the unknown data between two known values. In digital video and film, this usually means generating new
values between two keyframes. For example, if you want a graphic element (such as a title) to move fifty pixels across the screen to the left, and
you want it to do so in 15 frames, you’d set the position of the graphic in the first and 15th frames, and mark them both as keyframes. Then the
software would complete the work of interpolating the frames in between to make the movement appear smooth. Because interpolation generates
all the frames between the two keyframes, interpolation is sometimes called tweening. Interpolation between keyframes can be used to animate
movement, effects, audio levels, image adjustments, transparency, color changes, and many other visual and auditory elements.
Temporal Interpolation applies the selected interpolation method to changes in motion. You can use Temporal Interpolation, for example, to
determine whether an object moves evenly or accelerates across a motion path. You can apply temporal interpolation of keyframes to only a few
effects in Premiere Pro.
Spatial Interpolation applies the selected interpolation method to changes in shape. You can use Spatial Interpolation, for example, to determine
whether corners should be rounded or angular. You can apply spatial interpolation to the keyframes of many effects in Premiere Pro.
For a video tutorial illustrating uses of temporal and spatial interpolation, see
by Jeff Schell on the
Digital Media Net website.
Andrew Devis shows panning, zooming, and using the Corner Pin effect
on the Creative COW website.
The two most common types of interpolation are linear interpolation and Bezier interpolation. You can apply either of these types of interpolation,
depending on the type of change you want.
Linear interpolation Creates an evenly-paced change from one keyframe to another, with each in-between frame given an equal share of the
changed value. Changes created with linear interpolation start and stop abruptly and develop at a constant rate between each pair of keyframes.
Bezier interpolation Allows the rate of change to accelerate or decelerate based on the shape of a Bezier curve, such as gently picking up speed
at the first keyframe and then slowly decelerating into the second.
Change the keyframe interpolation method
By changing and adjusting keyframe interpolation, you gain precise control over the rate of changes in your animations. You can choose either an
interpolation type from a context menu or you can directly change one keyframe type to another by manually adjusting the keyframe or the
handles.
Note: You can also use the Ease In and Ease Out commands to quickly adjust keyframe interpolation.
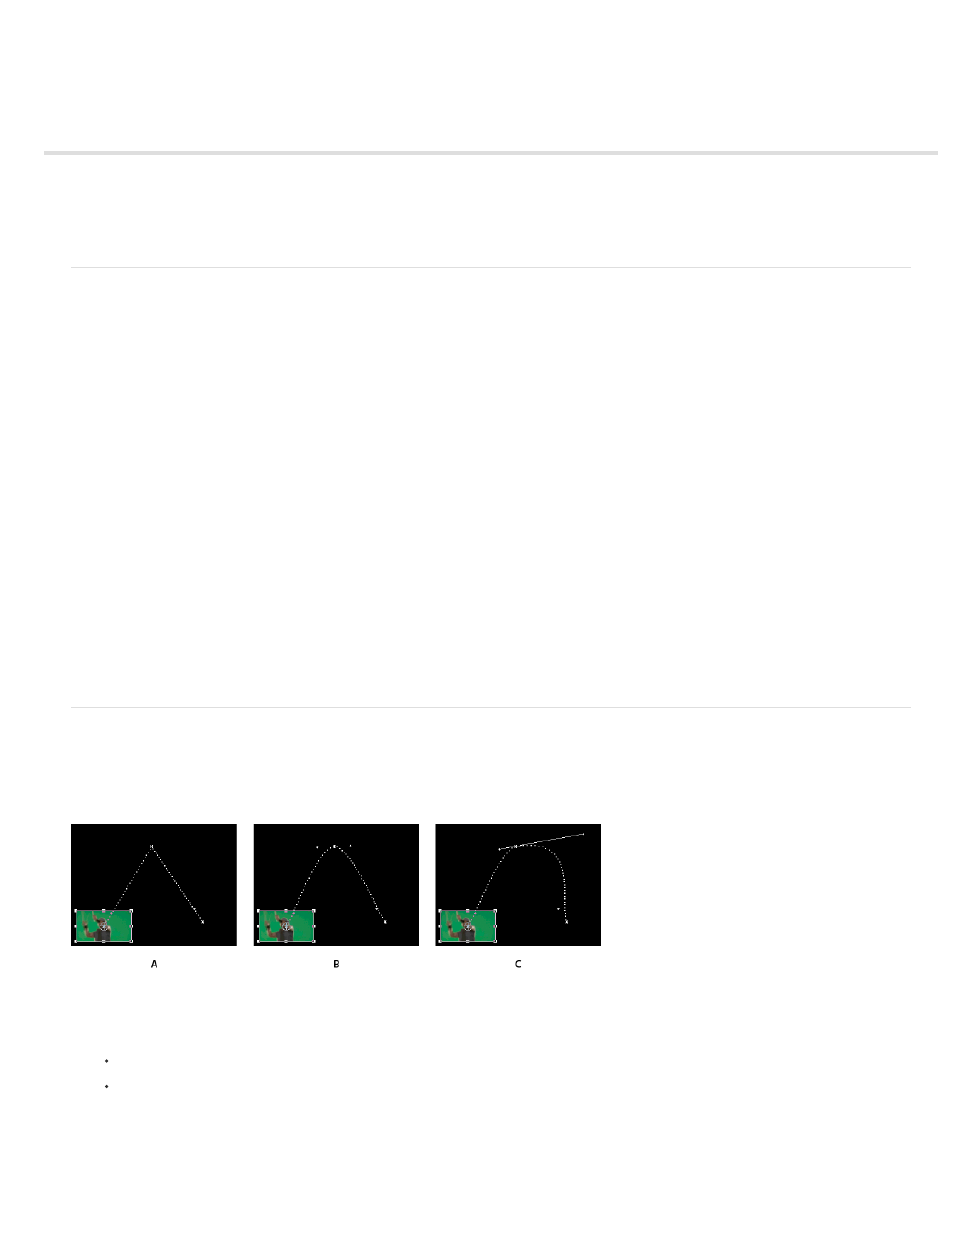
Changing keyframe interpolation for the Position property of the Motion effect
A Linear spatial keyframe B. Auto Bezier interpolation C. Continuous Bezier interpolation
1. Do one of the following:
In the Effect Controls panel, right-click a keyframe marker.
In a Timeline panel, right-click a keyframe.
2. Choose an interpolation method from the context menu:
Linear Creates a uniform rate of change between keyframes.
Bezier Lets you manually adjust the shape of the graph, and the rate of change, on either side of a keyframe. You can create very smooth
changes using this method.
451
