Working with clips in a sequence – Adobe Premiere Pro CS6 User Manual
Page 271

Working with clips in a sequence
Find a clip in any sequence with Clip Usage
View the source of a sequence clip in the Project panel
Analyze speech for text XMP metadata
Select one or more clips
Enable or disable a clip
Group clips
Snap clips
Find a clip in any sequence with Clip Usage
Note: You can also see the number of times a clip has been used by making the Video Usage column visible in the Project panel. For more
information, see Add a column
.You can see whether any clip in the Project panel has been used in a project, the number of uses, and the location of each use, with the Clip
Usage menu. The Clip Usage triangle appears next to the thumbnail viewer only if the selected clips has been used in a sequence.
1. Select a clip in the Project panel.
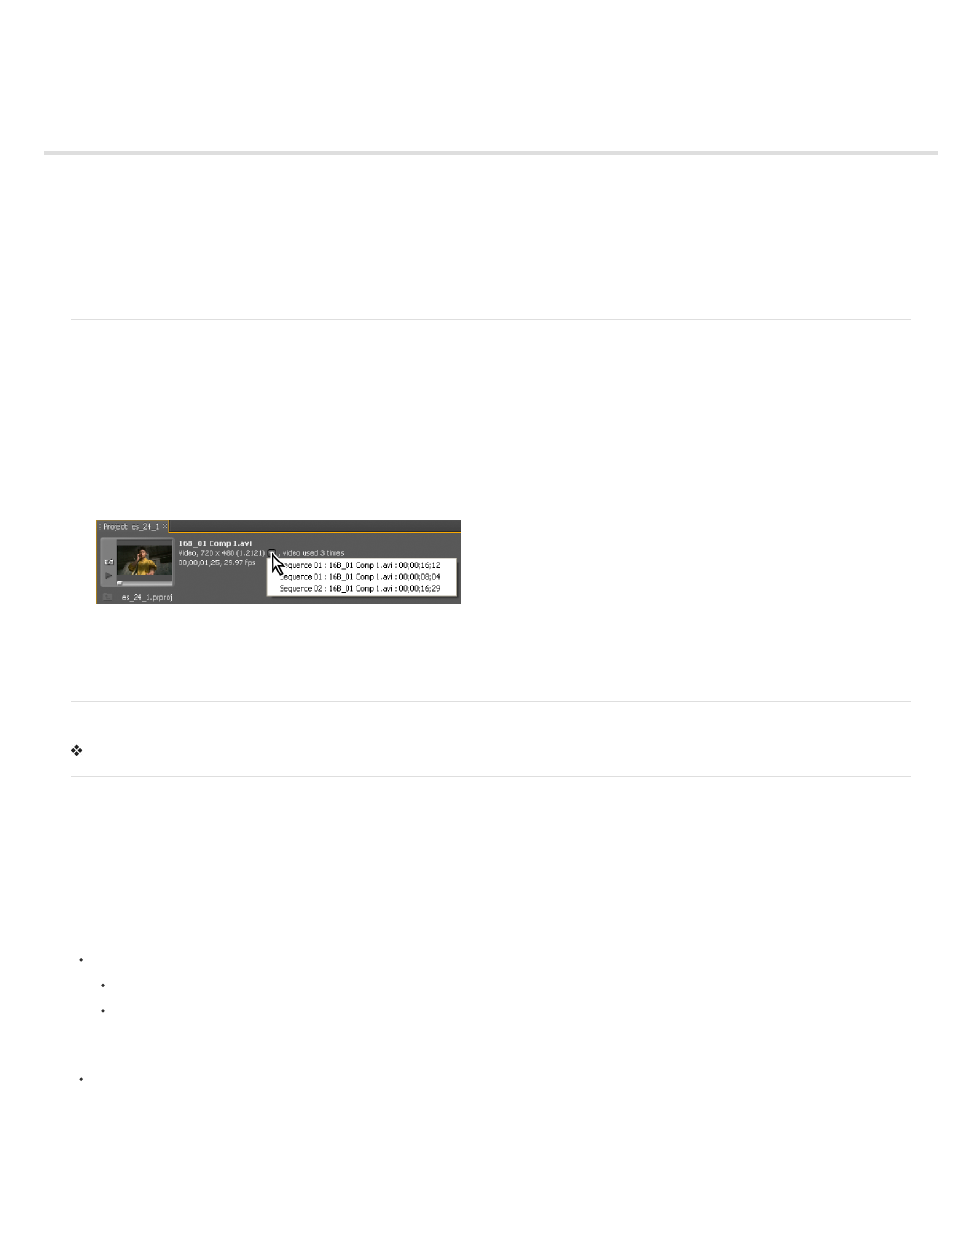
2. Toward the top of the project panel, next to the thumbnail for the clip, click the Clip Usage triangle on the Movie line next to the pixel aspect
ratio.
A popup menu will show the timecode location for the clip for any sequence in which it is used.
The locations of a clip in the Clip Usage menu of the Project panel
3. Click the desired location.
The desired sequence panel will move forward and the playhead will jump to the location of the clip.
View the source of a sequence clip in the Project panel
Right-click (Windows) or Ctrl-click (Mac OS) a clip in a sequence, and choose Reveal In Project.
Analyze speech for text XMP metadata
Adobe Premiere Pro and Soundbooth analyze spoken words and generate text metadata. You can edit and search text metadata like any other
metadata properties. You can then navigate to the times at which specific words are spoken, to better align edits, advertising, and subtitles.
The speech analysis feature can use any of several language-specific and dialect-specific libraries, such as libraries for Spanish and UK English.
To download more language-specific and dialect-specific libraries,
on the Adobe website.
In Premiere Pro CS5.5 and later, the Speech Analysis feature is also available for clips when there is at least one component audio clip in the
merged clip. Users can choose to analyze all audio tracks in a merged clip, or a single one.
To analyze speech in all tracks, do one of the following:
Set the File pop up menu to “All Files”, and then click the Analyze button in the Speech Analysis section of the Metadata panel.
Select the merged clip, and then choose Clip > Analyze Content.
Note: You can analyze multiple merged clips, multiple clips, or a combination of both by selecting the clips, and then choose Clip >
Analyze Content.
To analyze a specific track for speech, set the File pop up menu to the component audio clip you wish to analyze, and then click the Analyze
button in the Speech Analysis section of the Metadata panel.
Note: Useful results from speech analysis require good audio quality. Background noise significantly reduces accuracy. To remove such noise,
use the tools and processes in Soundbooth.
Dan Ebberts provides a tutorial on the
that demonstrates the use of XMP metadata features. The tutorial shows how to convert
267
