Distort effects – Adobe Premiere Pro CS6 User Manual
Page 405

Video Limiter effect
The Video Limiter effect lets you limit the luminance and color in a clip so that they fall within parameters that you define. These parameters are
useful for preserving the video as much as possible while making its signal fall within the broadcasting limits.
Show Split View Displays one part of the image as the corrected view and the other part of the image as the uncorrected view.
Layout Determines whether the Split View images are side by side (Horizontal) or above and below (Vertical).
Split View Percent Adjusts the size of the corrected view. The default is 50%.
Reduction Axis Lets you set the limits defining the range of luminance (Luma), color (Chroma), both color and luminance (Chroma and Luma), or
the overall video signal (Smart Limit). The Min and Max controls available depend on the Reduction Axis option you choose.
Luma Min Specifies the darkest level in an image.
Luma Max Specifies the brightest level in an image.
Chroma Min Specifies the lowest saturation for the colors in an image.
Chroma Max Specifies the maximum saturation for the colors in an image.
Signal Min Specifies the minimum video signal including both brightness and saturation.
Signal Max Specifies the maximum video signal including both brightness and saturation.
Reduction Method Lets you compress specific tonal ranges to preserve detail in important tonal ranges (Highlights Compression, Midtones
Compression, Shadows Compression, or Highlights and Shadows Compression) or compress all tonal ranges (Compress All). Compress All is the
default.
Tonal Range Definition Defines the tonal range of the shadows, midtones, and highlights in a clip. Drag the square sliders to adjust the threshold
values. Drag the triangle sliders to adjust the amount of softness (feathering).
Shadow Threshold, Shadow Softness, Highlight Threshold, Highlight Softness Determine the threshold and softness of the shadows,
midtones, and highlights in a clip. Enter values or click the triangle next to the option name and drag the slider.
Distort effects
Bend effect (Windows only)
The Bend effect distorts a clip by producing the appearance of a wave traveling both vertically and horizontally through the clip. You can produce a
number of different wave shapes at various sizes and rates.
Direction Specifies the direction of the wave:
Left Specifies that waves move toward the left.
Right Specifies that waves move toward the right.
Up Specifies that waves move upward.
Down Specifies that waves move downward.
In Specifies that waves move toward the center of the clip.
Out Specifies that waves start in the center and move to the edge of the clip.
Wave Specifies the shape of the wave. Choose from a sine wave, circle, triangle, or square.
Intensity Specifies the height of the wave.
Rate Specifies the frequency of the wave. To produce a wave only vertically or horizontally, move the Rate slider all the way to the left for the
direction you do not want.
Width Specifies the wave width.
Corner Pin effect
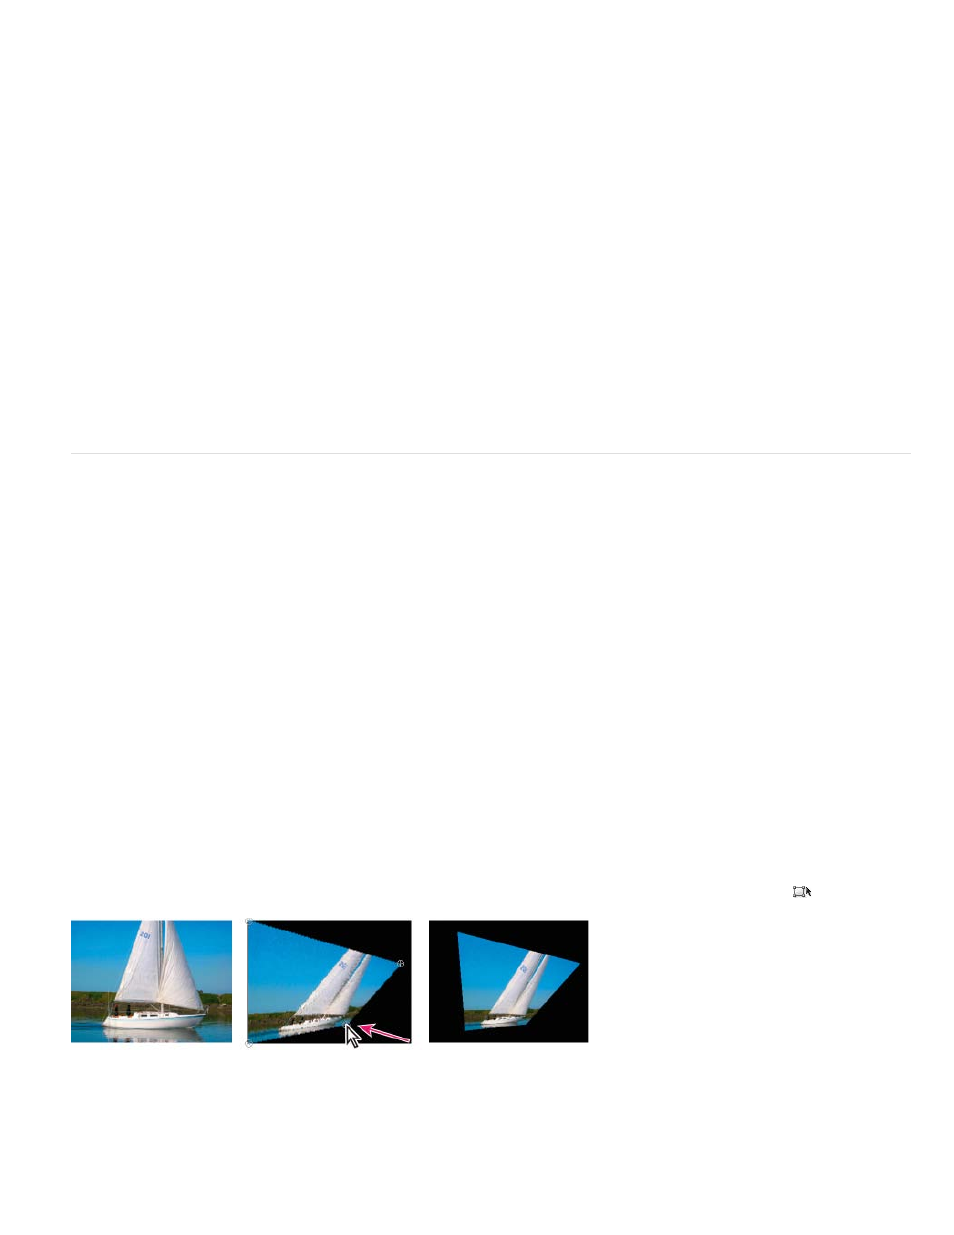
The Corner Pin effect distorts an image by changing the position of each of its four corners. Use it to stretch, shrink, skew, or twist an image, or to
simulate perspective or movement that pivots from the edge of a clip, such as a door opening.
Note: You can directly manipulate the Corner Pin effect properties in the Program monitor when you click the Transform icon
next to Corner
Pin in the Effect Controls panel. Drag one of the four corner handles to adjust the properties.
Original image (left), corner moved (center), and final image (right)
Lens Distortion effect (Windows only)
The Lens Distortion effect simulates a distorted lens through which the clip is viewed.
Curvature Changes the curvature of the lens. Specify a negative value to make the image concave, or a positive value to make the image
convex.
401
