Adobe Premiere Pro CS6 User Manual
Page 415

Mid Point Chooses the balance point for the contrast value. Values range from 0 through 100. 0 does not affect the image. The default value is
50.
Spill Suppression
Desaturate Controls the saturation of the color channel background color. Desaturates colors that are close to being fully transparent. Values
range from 0 through 50. 0 does not affect the image, The default value is 25.
Range Controls the amount of spill that is corrected. Values range from 0 through 100. 0 does not affect the image. The default value is 50.
Spill Adjusts the amount of spill compensation. Values range from 0 through 100. 0 does not affect the image. The default value is 50.
Luma Works with the alpha channel to restore the original luminance of the source. Values range from 0 through 100. 0 does not affect the image.
The default value is 50.
Color Correction
Saturation Controls the saturation of the foreground source. Values range from 0 through 200. A setting of zero removes all chroma. The default
value is 100.
Hue Controls the hue. Values range from -180° to +180 °. The default value is 0°.
Luminance Controls the luminance of the foreground source. Values range from 0 through 200. 0 is black. 100 is 4x. The default value is 100.
Color Key effect
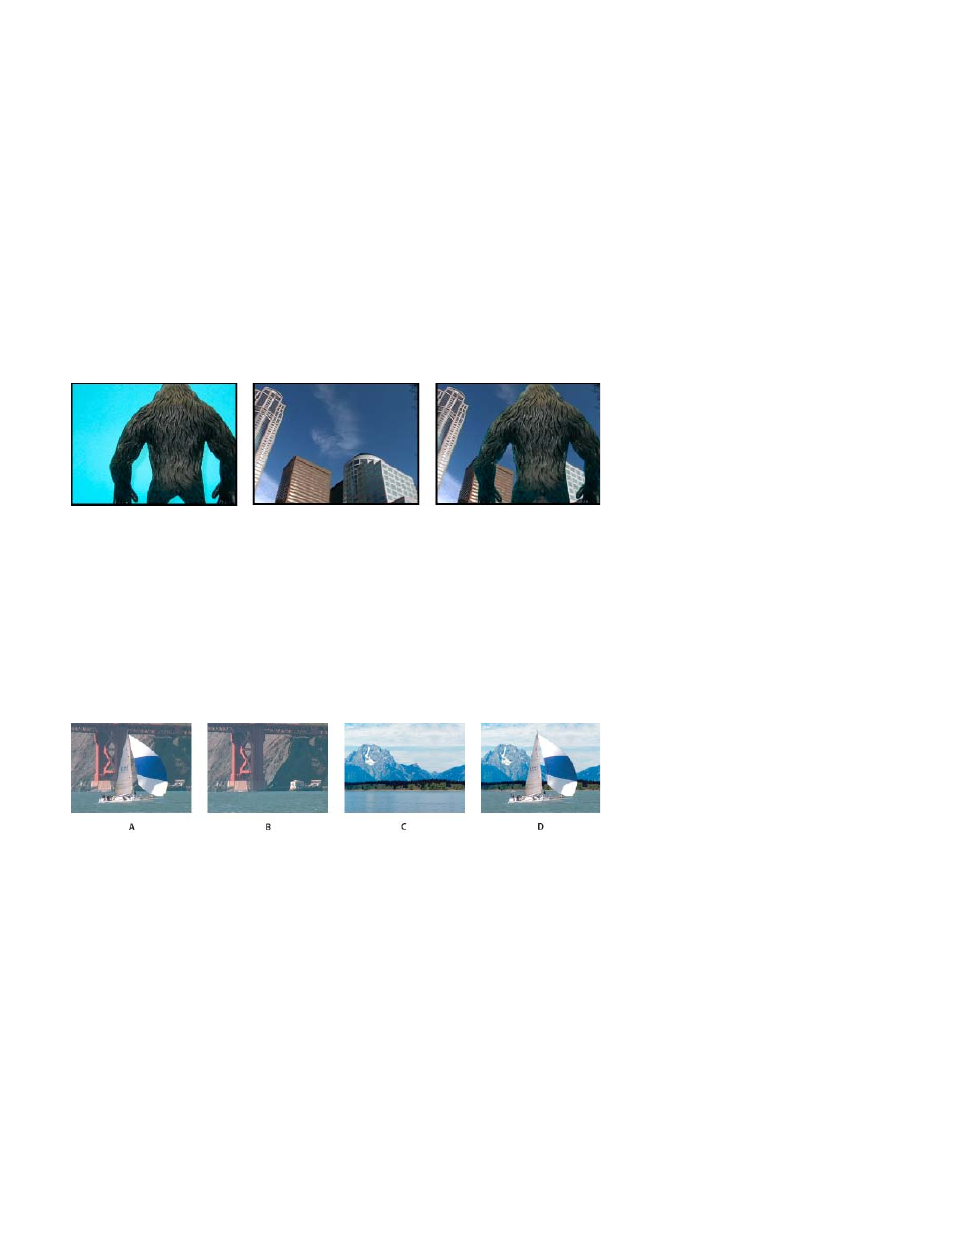
The Color Key effect keys out all image pixels that are similar to a specified key color. This effect modifies only the alpha channel of a clip.
Nonstandard blue screen (left) and background (center) are combined with Color Key effect (right).
When you key out a color value in a clip, that color or range of colors becomes transparent for the entire clip. Control the range of transparent
colors by adjusting the tolerance level. You can also feather the edges of the transparent area to create a smooth transition between the
transparent and opaque areas.
Difference Matte effect
The Difference Matte effect creates transparency by comparing a source clip with a difference clip, and then keying out pixels in the source image
that match both the position and color in the difference image. Typically, it’s used to key out a static background behind a moving object, which is
then placed on a different background. Often the difference clip is simply a frame of background footage (before the moving object has entered the
scene). For this reason, the Difference Matte effect is best used for scenes that have been shot with a stationary camera and an unmoving
background. For more information on using the Difference Matte effect, watch the
the Total Training website.
Difference Matte effect
A. Original image B. Background image C. Image on second track D. Final composite image
Replace a static background with Difference Matte
The Difference Matte creates transparency by comparing a specified still image with a specified clip and then eliminating areas in the clip that
match those in the image. This key can be used to create special effects. Depending on the clip, it’s possible to use Difference Matte to key out a
static background and replace it with another still or moving image.
You can create the matte by saving a frame from a clip that shows the static background before the moving object enters the scene. For best
results, neither the camera nor anything in the background should move.
The following Difference Matte settings are adjusted in the Effect Controls panel:
View Specifies whether the Program Monitor shows the Final Output, Source Only, or Matte Only.
Difference Layer Specifies the track to be used as the matte.
If Layer Sizes Differ Specifies whether to center the foreground image or stretch it to fit.
Matching Tolerance Specifies the degree to which the matte must match the foreground in order to be keyed.
Matching Softness Specifies the degree of softness at the edges of the matte.
Note: The RGB Difference Key uses color to define transparency much as the Difference Matte uses a still image.
Blur Before Difference Specifies the degree of blur added to the matte.
411
