Working with text and objects in titles – Adobe Premiere Pro CS6 User Manual
Page 323
Working with text and objects in titles
Change the stacking order of objects in titles
Align and distribute objects in titles
Transform objects in titles
Change the stacking order of objects in titles
An object is any shape or text box you create in the Titler. When you create objects that overlap each other, you can control their stacking order in
the Titler.
1. Select the object you want to move.
2. Choose Title > Arrange and then choose one of the following:
Bring To Front Brings the selected object to the top of the stacking order.
Bring Forward Switches the selected object with the object directly in front of it.
Send To Back Moves the selected object to the bottom of the stacking order.
Send Backward Switches the selected object with the object directly behind it.
Note: If your text or shape elements are densely stacked, selecting an element within the stack is difficult. You can use the Title > Select
command to navigate easily through the stacked elements to reach the target element.
Align and distribute objects in titles
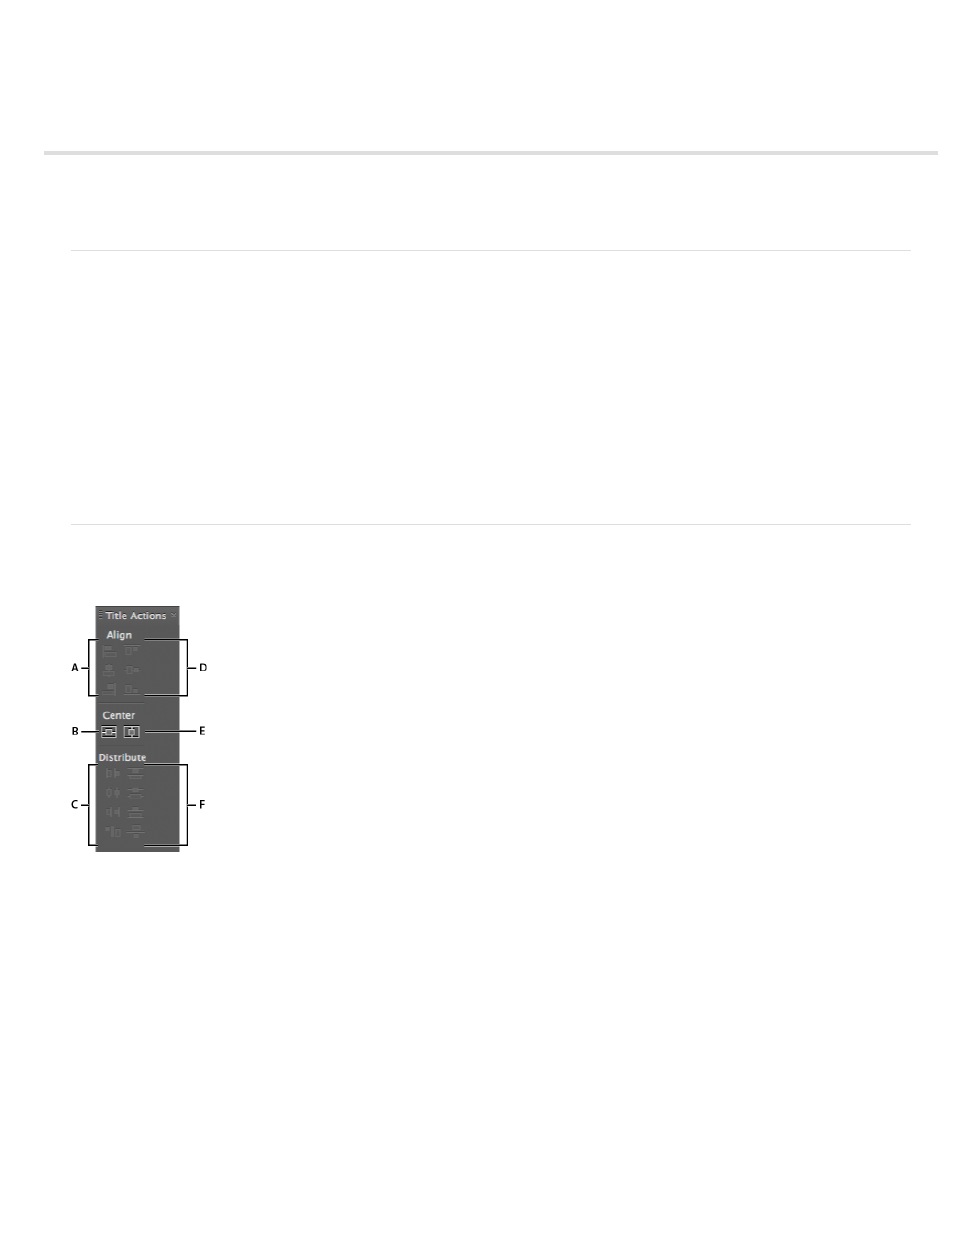
The Title Actions panel includes buttons to arrange objects in the drawing area. You can align, center, and distribute objects along horizontal or
vertical axes.
Title Actions Panel
A. Horizontal alignment buttons B. Vertical centering button C. Horizontal distribution buttons D. Vertical alignment buttons E. Horizontal
centering button F. Vertical distribution buttons
Center objects in titles
1. In the Titler, select one or more objects.
2. In the Title Actions panel, click the button for the type of centering you want.
Note: You can center objects using the Title > Position command and selecting the option you want. Additionally, you can choose Title >
Position > Lower Third to position the selected object along the bottom edge of the title-safe margin. To center an object both horizontally
and vertically within the drawing area, click both centering buttons.
Align objects in titles
An alignment option aligns selected objects to the object that most closely represents the new alignment. For example, for right alignment, all
selected objects align to the selected object that is farthest to the right.
1. In the Titler, select two or more objects.
2. In the Title Actions panel, click the button for the type of alignment you want.
319