Search xmp metadata show or hide xmp metadata, Search xmp metadata, Show or hide xmp metadata – Adobe Premiere Pro CS6 User Manual
Page 159
If you selected multiple items, the panel displays properties as follows:
If a property matches for all items, the matching entry appears.
If a property differs,
Search XMP metadata
1. Select the files or clips you want to search.
2. In the search box at the top of the Metadata panel, enter the text you want to find.
The list of metadata collapses to reveal only properties that contain your search string.
3. (Adobe Premiere Pro only) To navigate through the search results, click the Previous and Next buttons to the right of the search box, or
press Tab.
4. To exit the search mode and return to the full list of metadata, click the close button to the right of the search box.
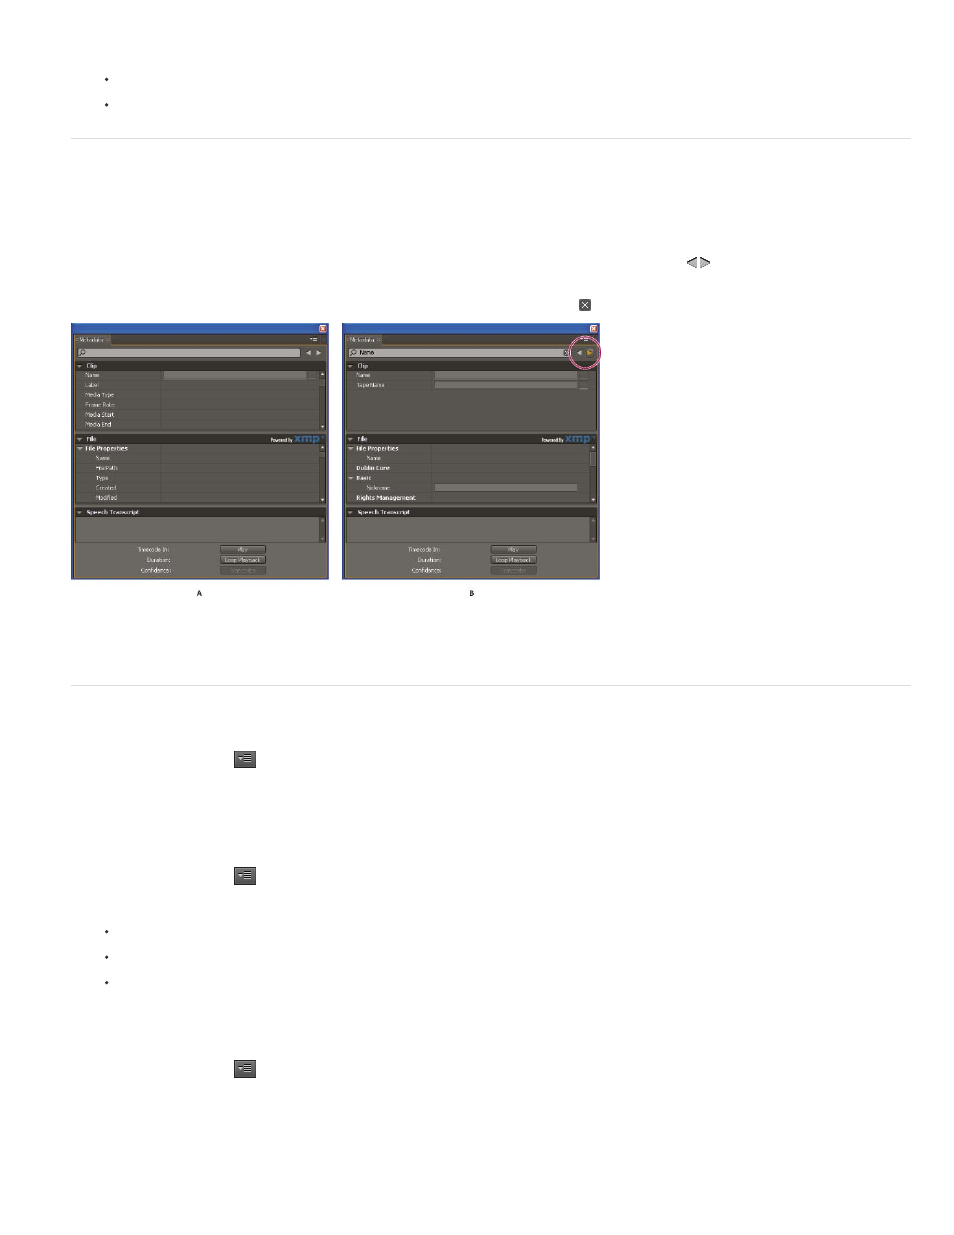
Metadata panel
A. Before search, all properties appear B. After search, only properties with search string appear. In Adobe Premiere Pro, Previous and Next
buttons navigate through search results.
Show or hide XMP metadata
To optimize the Metadata panel for your workflow, show or hide entire schemas or individual properties, displaying only those that you need.
1. From the options menu
for the Metadata panel, select Metadata Display.
2. To show or hide schemas or properties, select or deselect them from the list.
Save, switch, or delete metadata sets
If you use multiple workflows, each requiring different sets of displayed metadata, you can save sets and switch between them.
1. From the options menu
for the Metadata panel, select Metadata Display.
2. Do any of the following:
To save a customized set of displayed metadata, click Save Settings. Then enter a name, and click OK.
To display a previously saved set of metadata, select it from the menu.
To delete a previously saved set of metadata, select it from the menu, and click Delete Settings.
Create schemas and properties
If you have a unique, customized workflow that the default metadata options don’t address, create your own schemas and properties.
1. From the options menu
for the Metadata panel, select Metadata Display.
2. Click New Schema, and enter a name.
3. In the list, click Add Property to the right of the schema name.
4. Enter a property name, and select one of the following for Type:
155