Mute input during recording – Adobe Premiere Pro CS6 User Manual
Page 293
the Audio Mixer for each track you add to a Timeline.
5. In the Audio Mixer, click the Enable Track For Recording icon
for the track you added for your audio device. In Premiere Pro CS6, the
Enable Track For Recording icon has been replaced with an “R” icon.
6. Choose the recording input channel from the Track Input Channel menu.
Note: The Track Input Channel menu appears after you click the Enable Track For Recording icon.
7. Repeat steps 3 and 4 as necessary if you’re recording to multiple tracks.
8. (Optional) Create a new sequence.
Note: It’s also possible to record to an existing sequence. Doing so is useful for recording voice-overs. You can record your voice while
watching the playback of the sequence. When you record voice-overs to an existing sequence, it’s good practice to click the Solo Track
icon
in the Audio Mixer for the track that you’re recording to. Clicking the icon mutes the other audio tracks.
In Premiere Pro CS6, the Solo Track icon has been replaced with a “S” icon.
9. (Optional) Select the audio track that you want to record to.
10. (Optional) Adjust the levels on the input device to achieve the proper recording level.
11. Select Meter Input(s) Only in the Audio Mixer panel menu to meter only the sound card’s inputs.
12. Click the Record button
at the bottom of the Audio Mixer to enter Record mode.
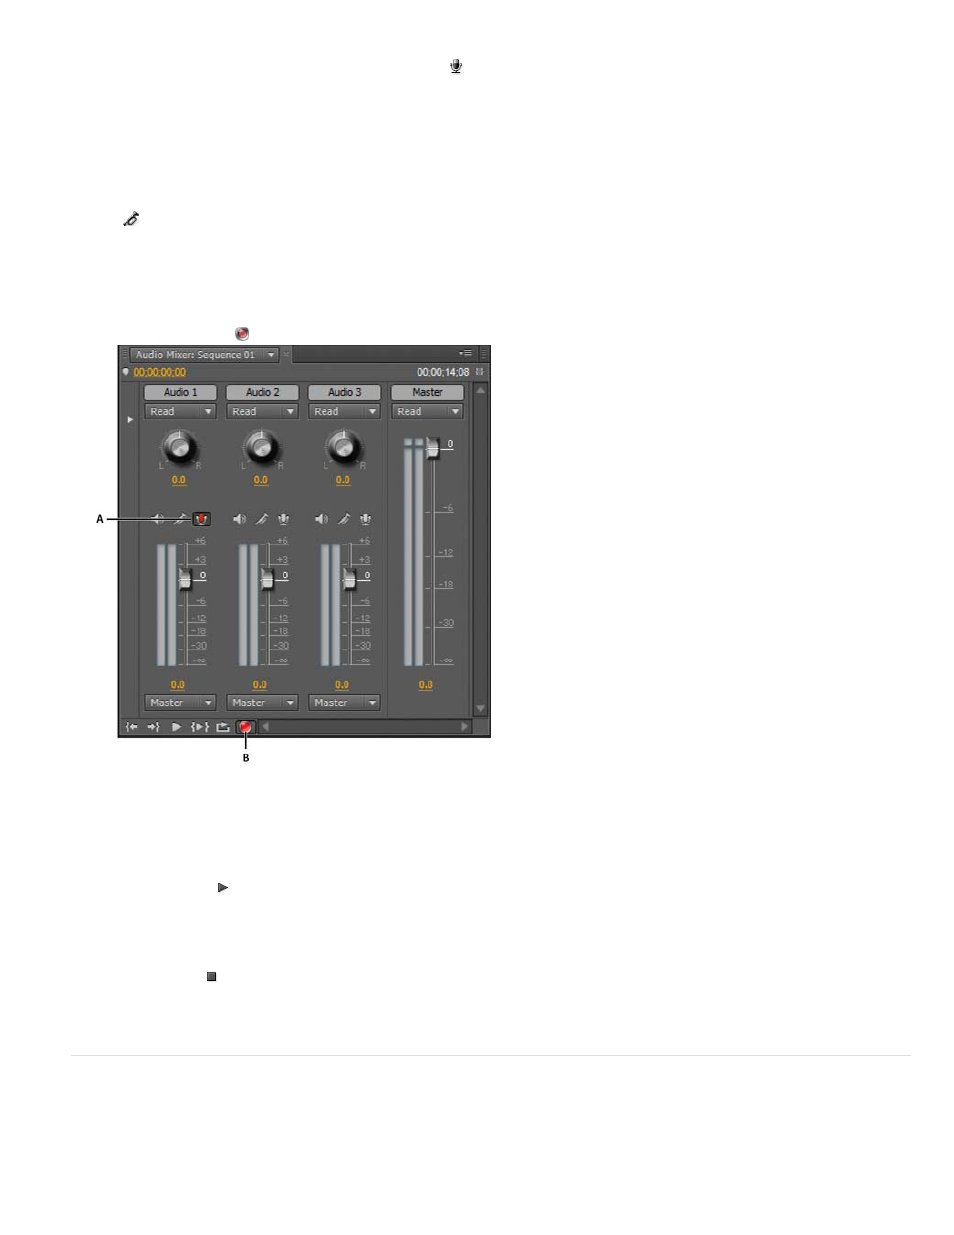
Audio Mixer recording controls
A. Record Enable button for track B. Record button for Audio Mixer
13. Test the input levels by playing a selection from the analog source, or by having the narrator speak into the microphone. Watch the Audio
Mixer level meters to ensure that the input levels for record-enabled tracks are high but not clipping.
14. (Optional) When you finish testing, deselect Meter Input(s) Only in the Audio Mixer panel menu to meter the project’s audio tracks also.
15. Click the Play button to start recording.
16. If necessary, adjust the track volume slider up (louder) or down (quieter) as you record to maintain the monitor level you want.
The red indicators at the top of the VU meters light up if the audio is clipped. Make sure that the audio level isn’t loud enough to cause
clipping. Generally, loud audio registers near 0 dB, and quiet audio registers around -18 dB.
17. Click the Stop icon to stop recording.
The recorded audio appears as a clip in the audio track and as a master clip in the Project panel. You can always select the clip in the
Project panel and rename or delete it.
Mute input during recording
Muting input can prevent feedback or echo when the computer is connected to speakers.
1. Choose Edit > Preferences > Audio (Windows) or Premiere Pro > Preferences > Audio (Mac OS).
2. Select Mute Input During Timeline Recording.
289