Adobe Premiere Pro CS6 User Manual
Page 441
By default, a clip anchor point is set at the exact center of a clip. You can change the position of a clip in relation to its frame or motion path,
however, by moving the clip anchor point. Further, you can change the location of the clip anchor point over time, allowing the clip to move in
relation to its frame or motion path. Animating the clip anchor point can be used, for example, to create an image-panning effect.
1. In a Timeline panel, place the current-time indicator at the beginning of a clip.
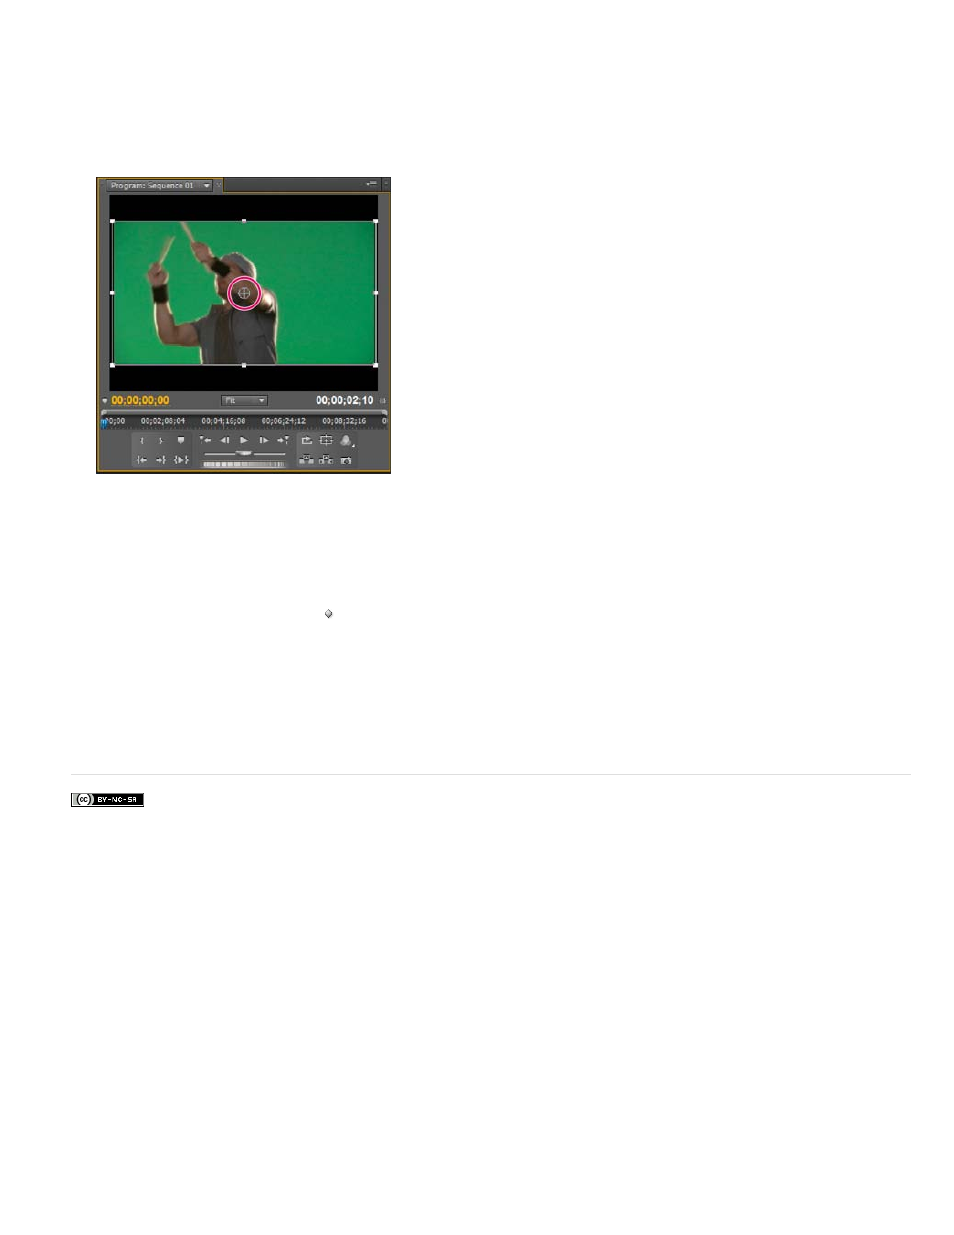
2. Click on the clip in the Program Monitor.
The clip anchor point becomes visible at the center of the clip.
The clip anchor point in the Program Monitor
3. Select the Effect Controls tab, and, if necessary, click the triangle next to the Motion heading to open the Motion controls.
4. Drag the anchor point horizontal control to the left (decreasing the number value) to offset the anchor point to the left of the clip, or drag it to
the right (increasing the number value) to offset it to the right.
5. Drag the anchor point vertical control to the left (decreasing the number value) to offset the anchor point toward the top of the clip, or to the
right (increasing the number value) to offset it toward the bottom.
6. Click the Add/Remove Keyframe button to set the keyframe.
7. (Optional) To change the location of the clip anchor point over time, move the current-time indicator in the Effect Controls panel or in a
Timeline panel to a different point in time. Change the horizontal and vertical anchor controls to new values.
Another keyframe marks the location of the clip anchor point at the selected frame.
8. (Optional) To set the rate of the change in the anchor point location, drag the handles in the anchor point Velocity graph.
More Help topics
437