Single- and double-sided transitions, Applying transitions – Adobe Premiere Pro CS6 User Manual
Page 443
A clip with handles
A. Media Start B. Handle C. In point D. Out point E. Handle F. Media End
In some cases, the source media may not contain enough frames for clip handles. If you apply a transition, and the handle duration is too short to
cover the transition duration, an alert appears to warn you that frames will be repeated to cover the duration. If you decide to proceed, the
transition appears in a Timeline panel with diagonal warning bars through it.
Transition using duplicate frames
For best results with transitions, shoot and capture source media with sufficient handles beyond the In and Out points of the actual clip duration
you want to use.
Single- and double-sided transitions
Transitions are typically double-sided—they combine the last video or audio material from the clip before the cut with the first material from the clip
right after the cut. You can, however, apply a transition to an individual clip so that it affects only the beginning or end of the clip. A transition
applied to a single clip is called single-sided. The clip can be immediately adjacent to another clip or sitting by itself on a track. You can apply
double-sided transitions only when the clip before the cut has a handle at its tail, and the clip after the cut has a handle at its head. For more
information, see Applying transitions.
Using single-sided transitions, you have more control over how clips transition. For example, you can create the effect of one clip departing using
the Cube Spin transition, and the next clip fading in using Dither Dissolve.
Single-sided transitions fade to and from a transparent state, not to and from black. Whatever is below the transition in a Timeline panel appears in
the transparent portion of the transition (the portion of the effect that would display frames from the adjacent clip in a two-sided transition). If the
clip is on Video 1 or has no clips beneath it, the transparent portions display black. If the clip is on a track above another clip, the lower clip is
shown through the transition, making it look like a double-sided transition.
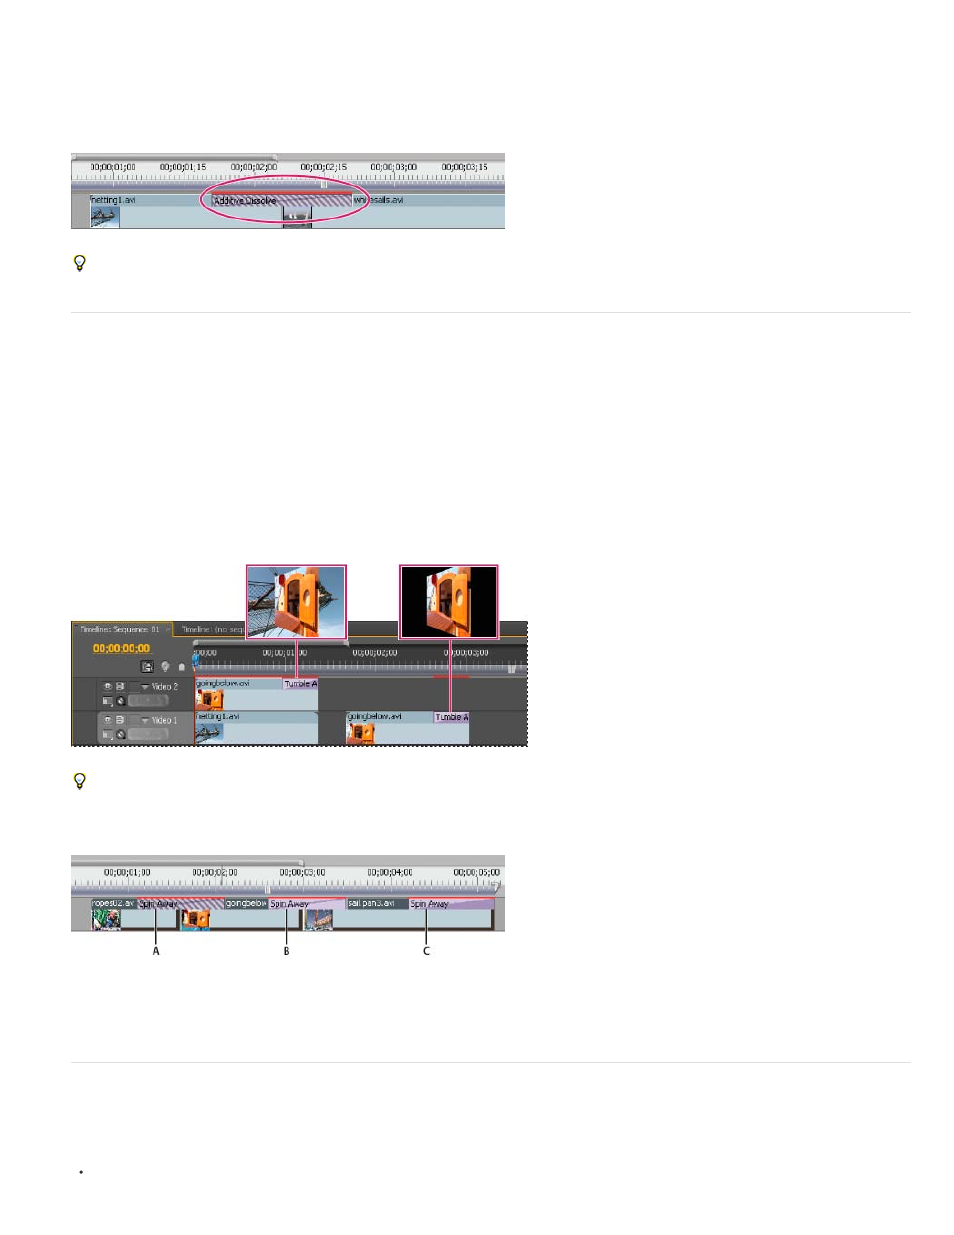
Single-sided transition with clip beneath it (left) compared to single-sided transition with nothing beneath it (right)
If you want to fade to black between clips, use the Dip To Black dissolve. Dip To Black doesn’t reveal any underlying clips; it always fades to
black.
In a Timeline panel or the Effect Controls panel, a double-sided transition has a dark diagonal line through it, while a single-sided transition is split
diagonally with one half dark and one half light.
Types of transitions
A. Double-sided transition using duplicate frames B. Double-sided transition C. Single-sided transition
Note: If a double-sided transition must repeat frames (rather than use trimmed frames), the transition icon contains additional diagonal lines. The
lines span the area where it has used the repeated frames. (See Clip handles and transitions.)
Applying transitions
To place a transition between two clips (centered on the cut line), the clips must be on the same track, with no space between them. As you drag
the transition to a Timeline panel, you can adjust the alignment interactively. Whether or not the clips have trimmed frames determines how you
can align the transition as you place it between the clips. The pointer changes to indicate the alignment options as you move it over the cut:
If both clips contain trimmed frames at the cut, you can center the transition over the cut or you can align it on either side of the cut so that it
439